
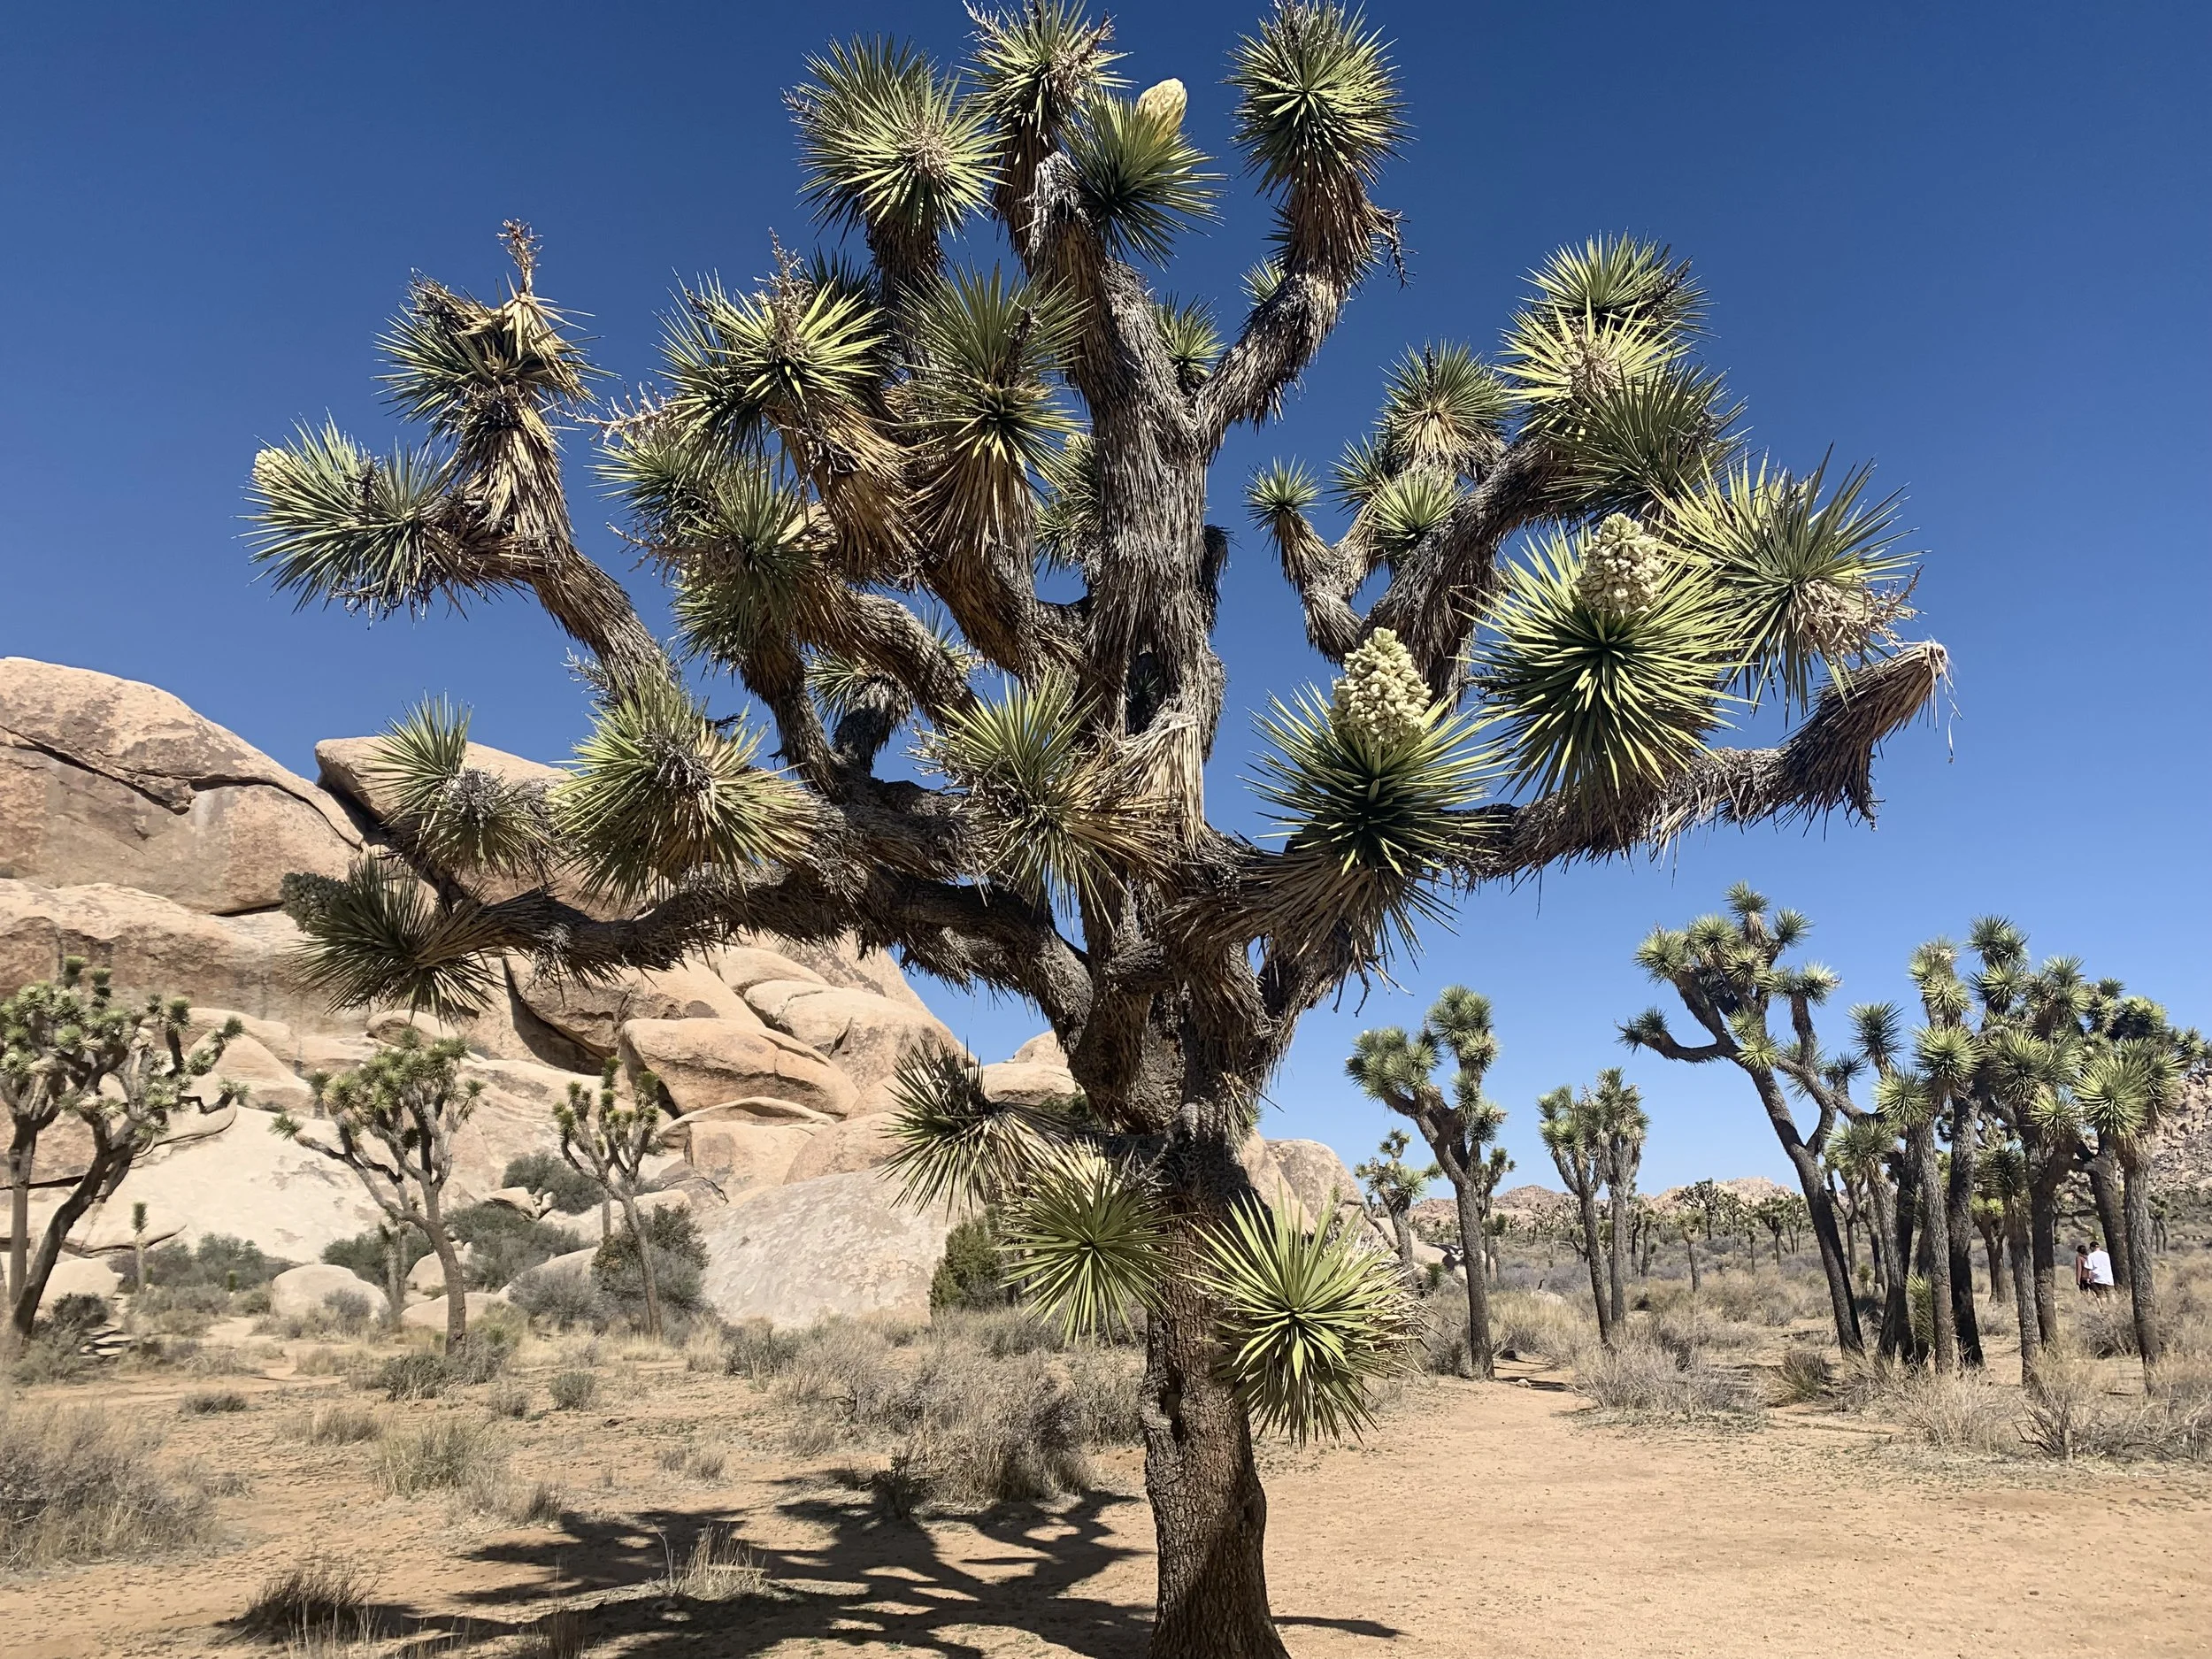
Joshua Trees along the Barker Dam Trail
If you enjoy my posts, please consider signing up below to get email notifications of my latest posts. I will not share your email.

What is a Joshua Tree?
The park is named after the Joshua Tree, but finding information about Joshua Trees is harder than you’d think. Neither the park brochures or the Cottonwood Visitor Center had any information specific to Joshua Trees. Eventually, along the Cap Rock interpretive hike, I found signs providing some information about Joshua Trees.
Joshua Trees are also known as Yucca Palms, which I think describes it better. This tree belongs in the Yucca genus and looks like multiple yucca plants connected by a trunk and branches. The name Joshua Tree comes from the Mormons who traveled across the Mojave Desert and imagined these trees looked like Joshua holding out his hands while guiding the Israelites through Canaan.
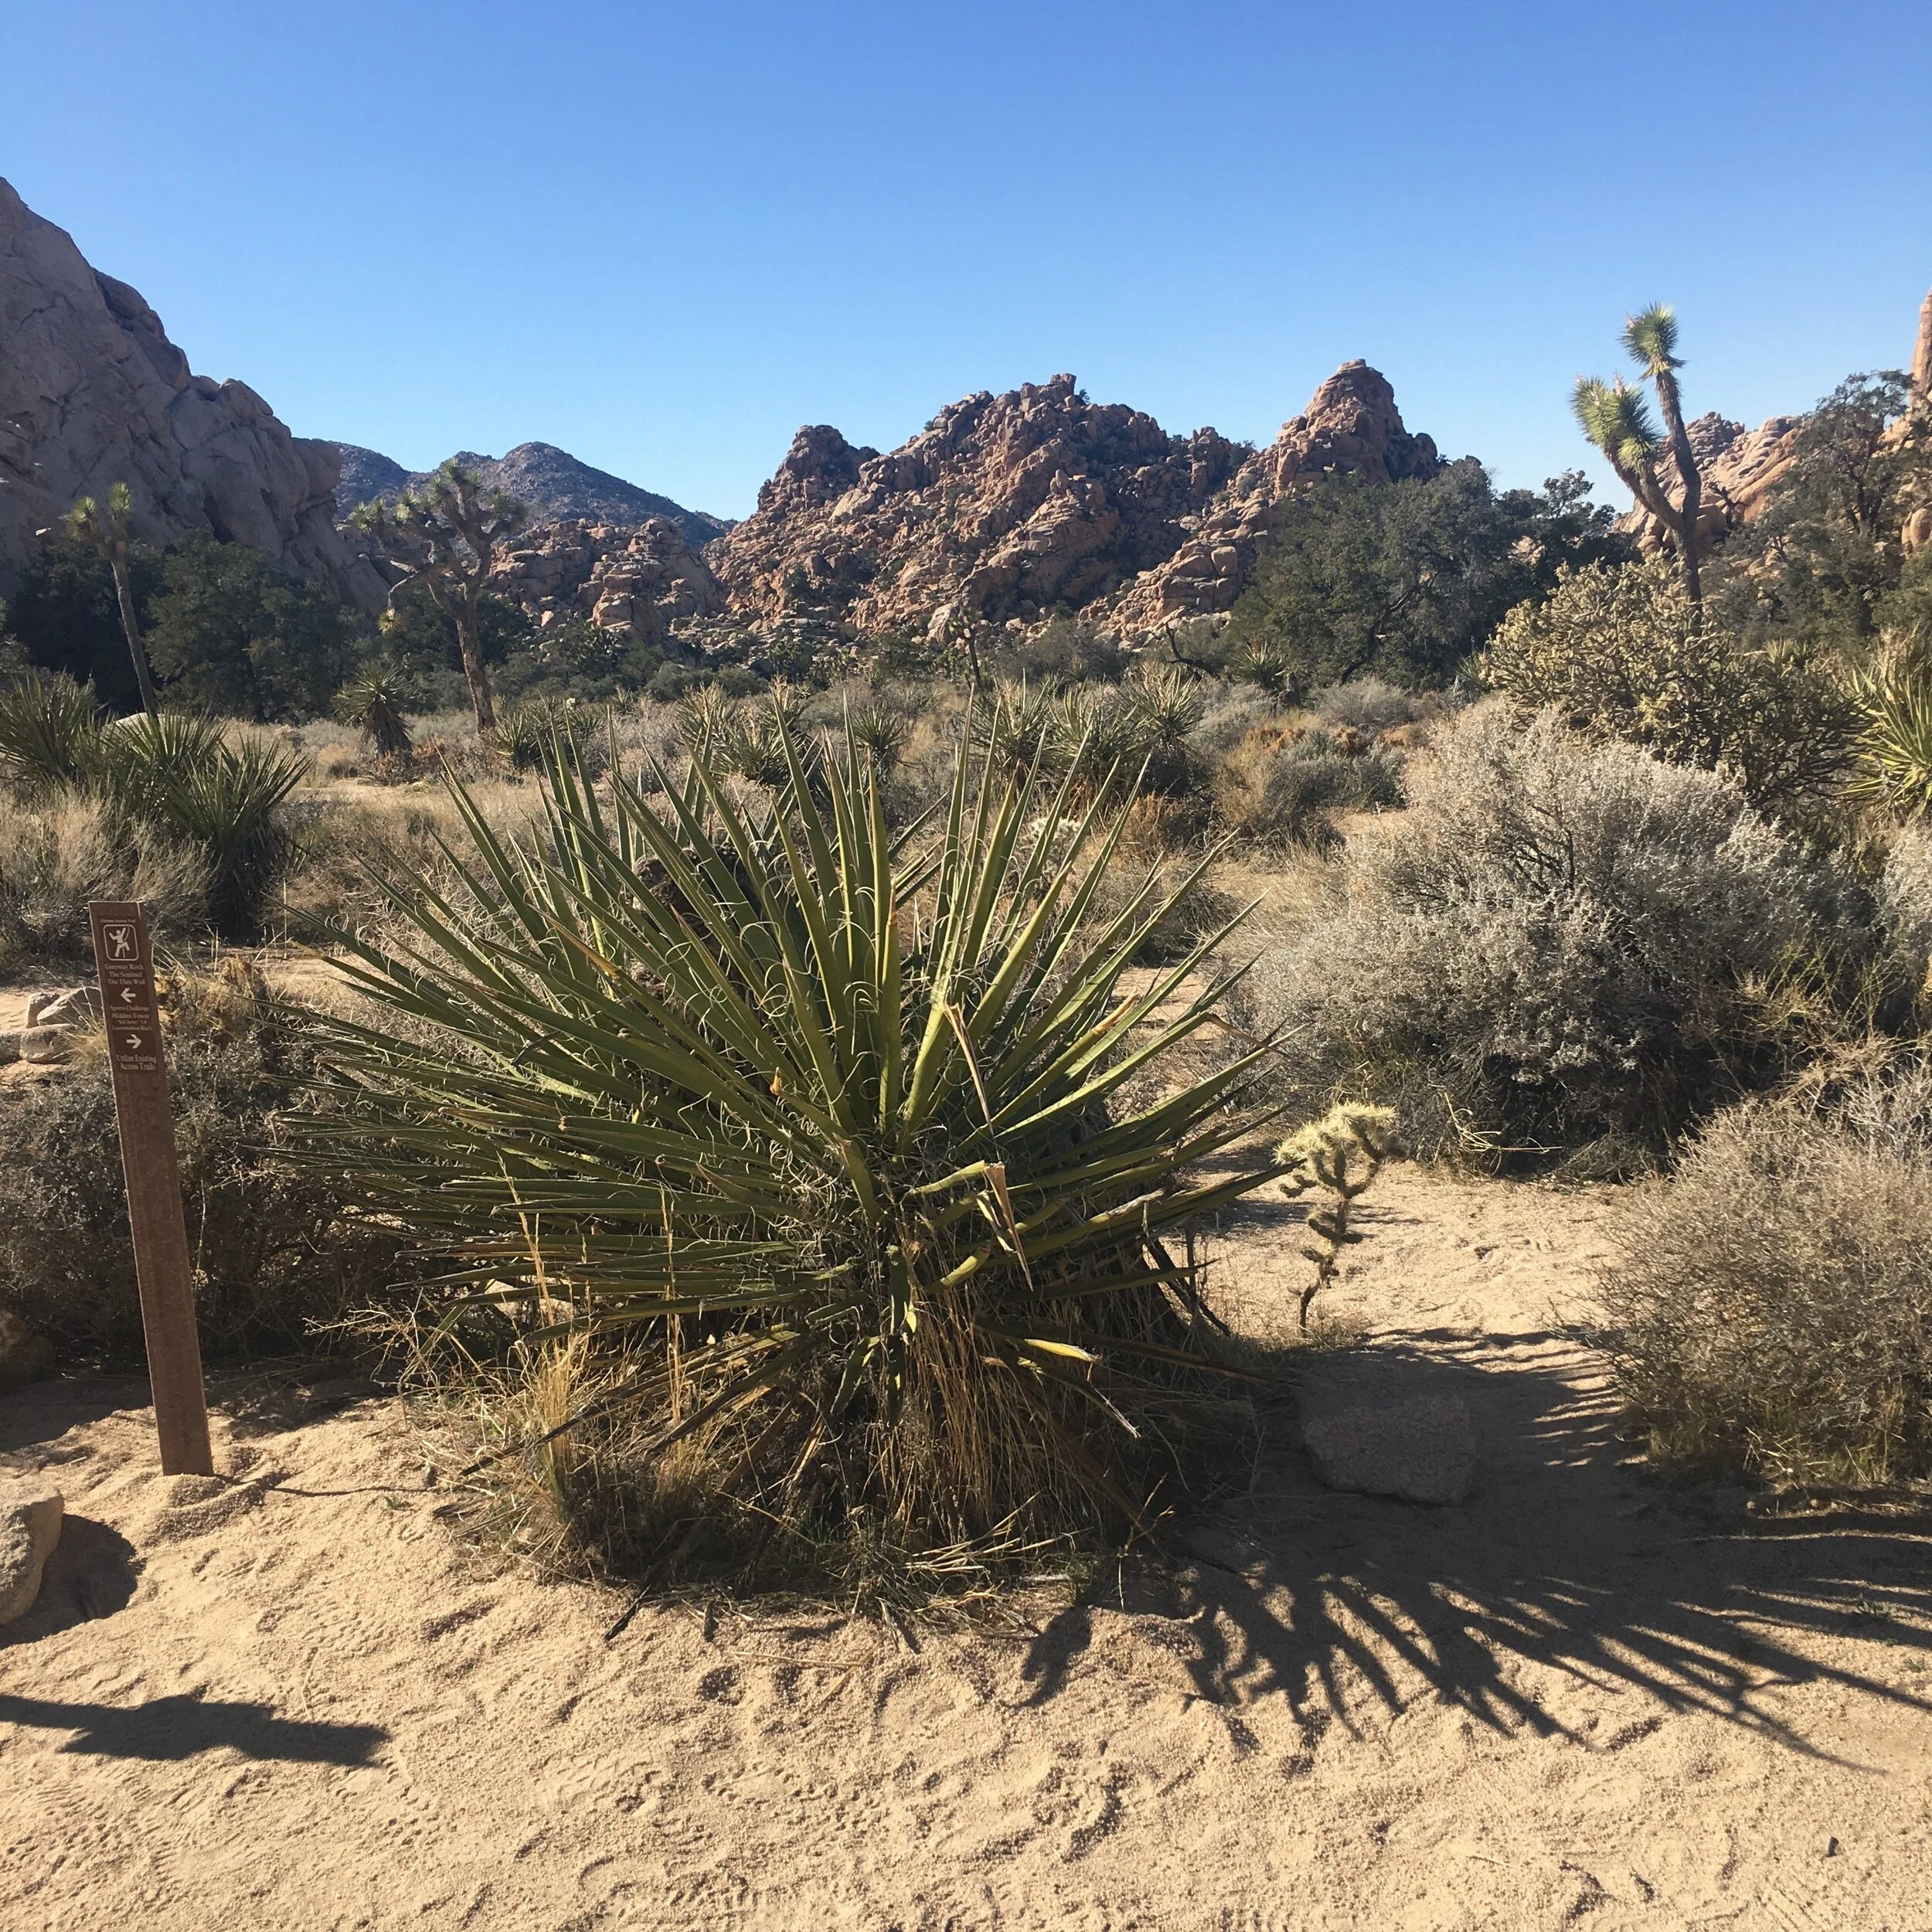
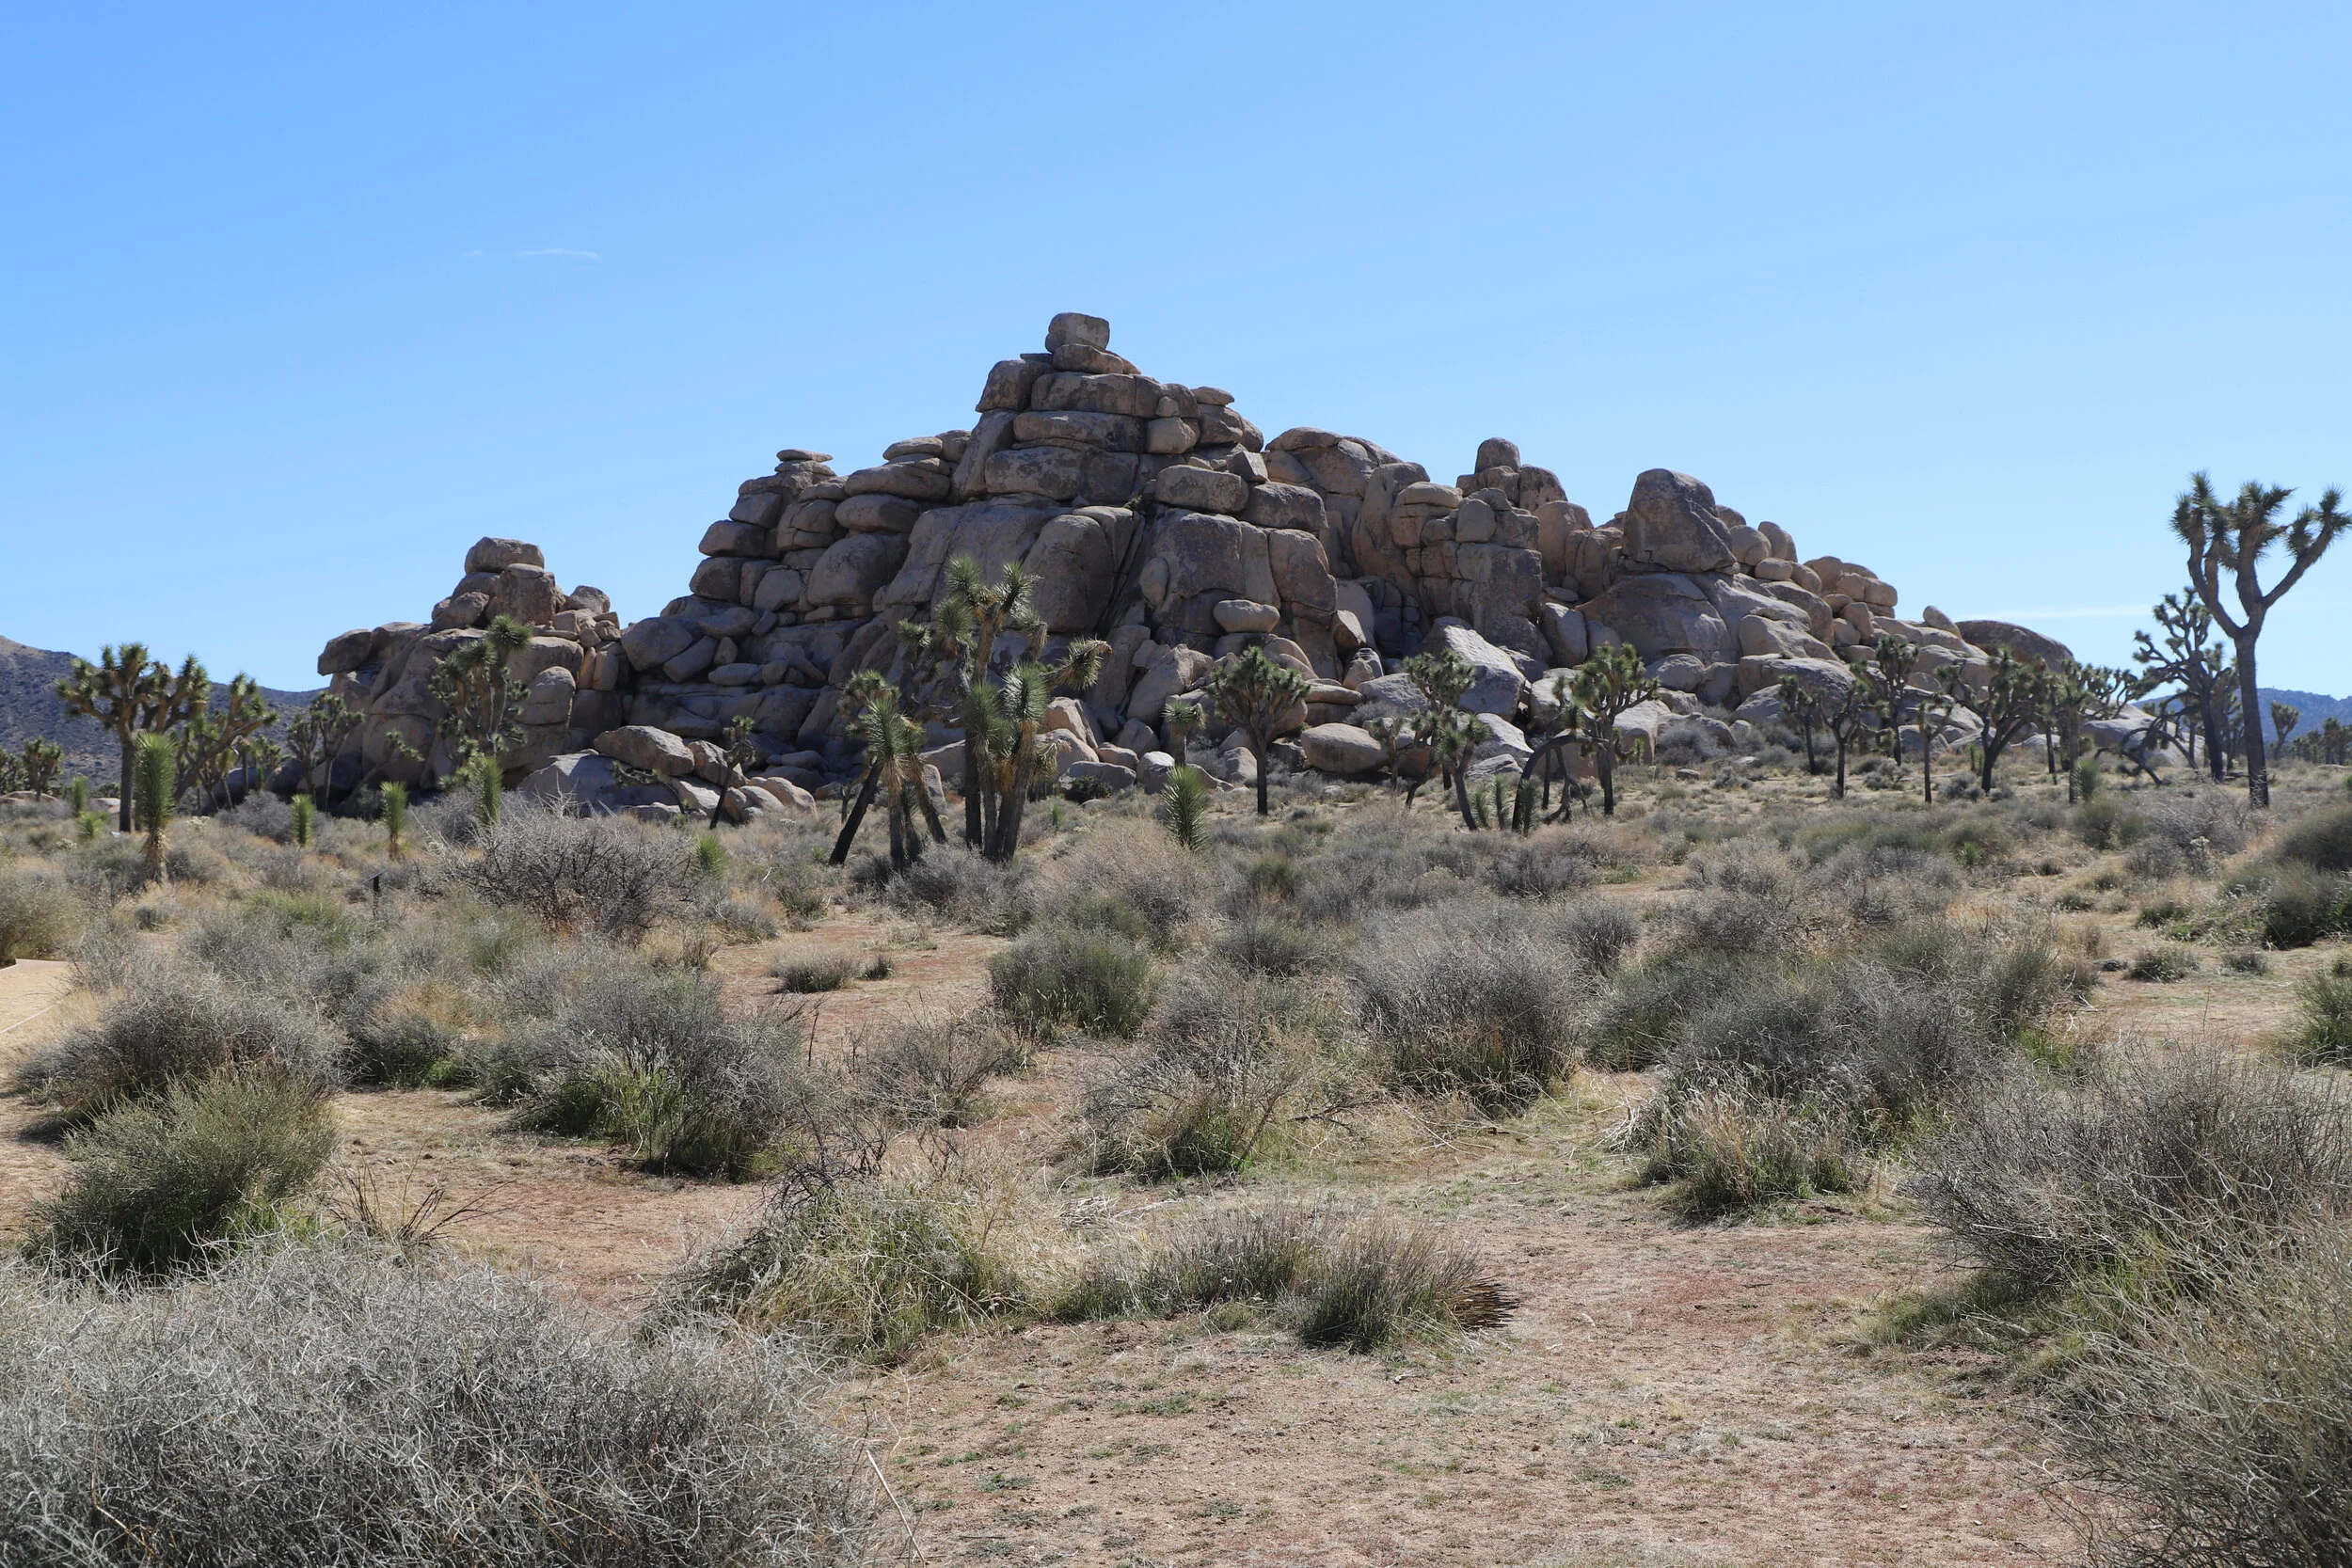
Yucca Plant along Hidden Valley Trail (in the front). Joshua Trees can be seen in the back of the picture.
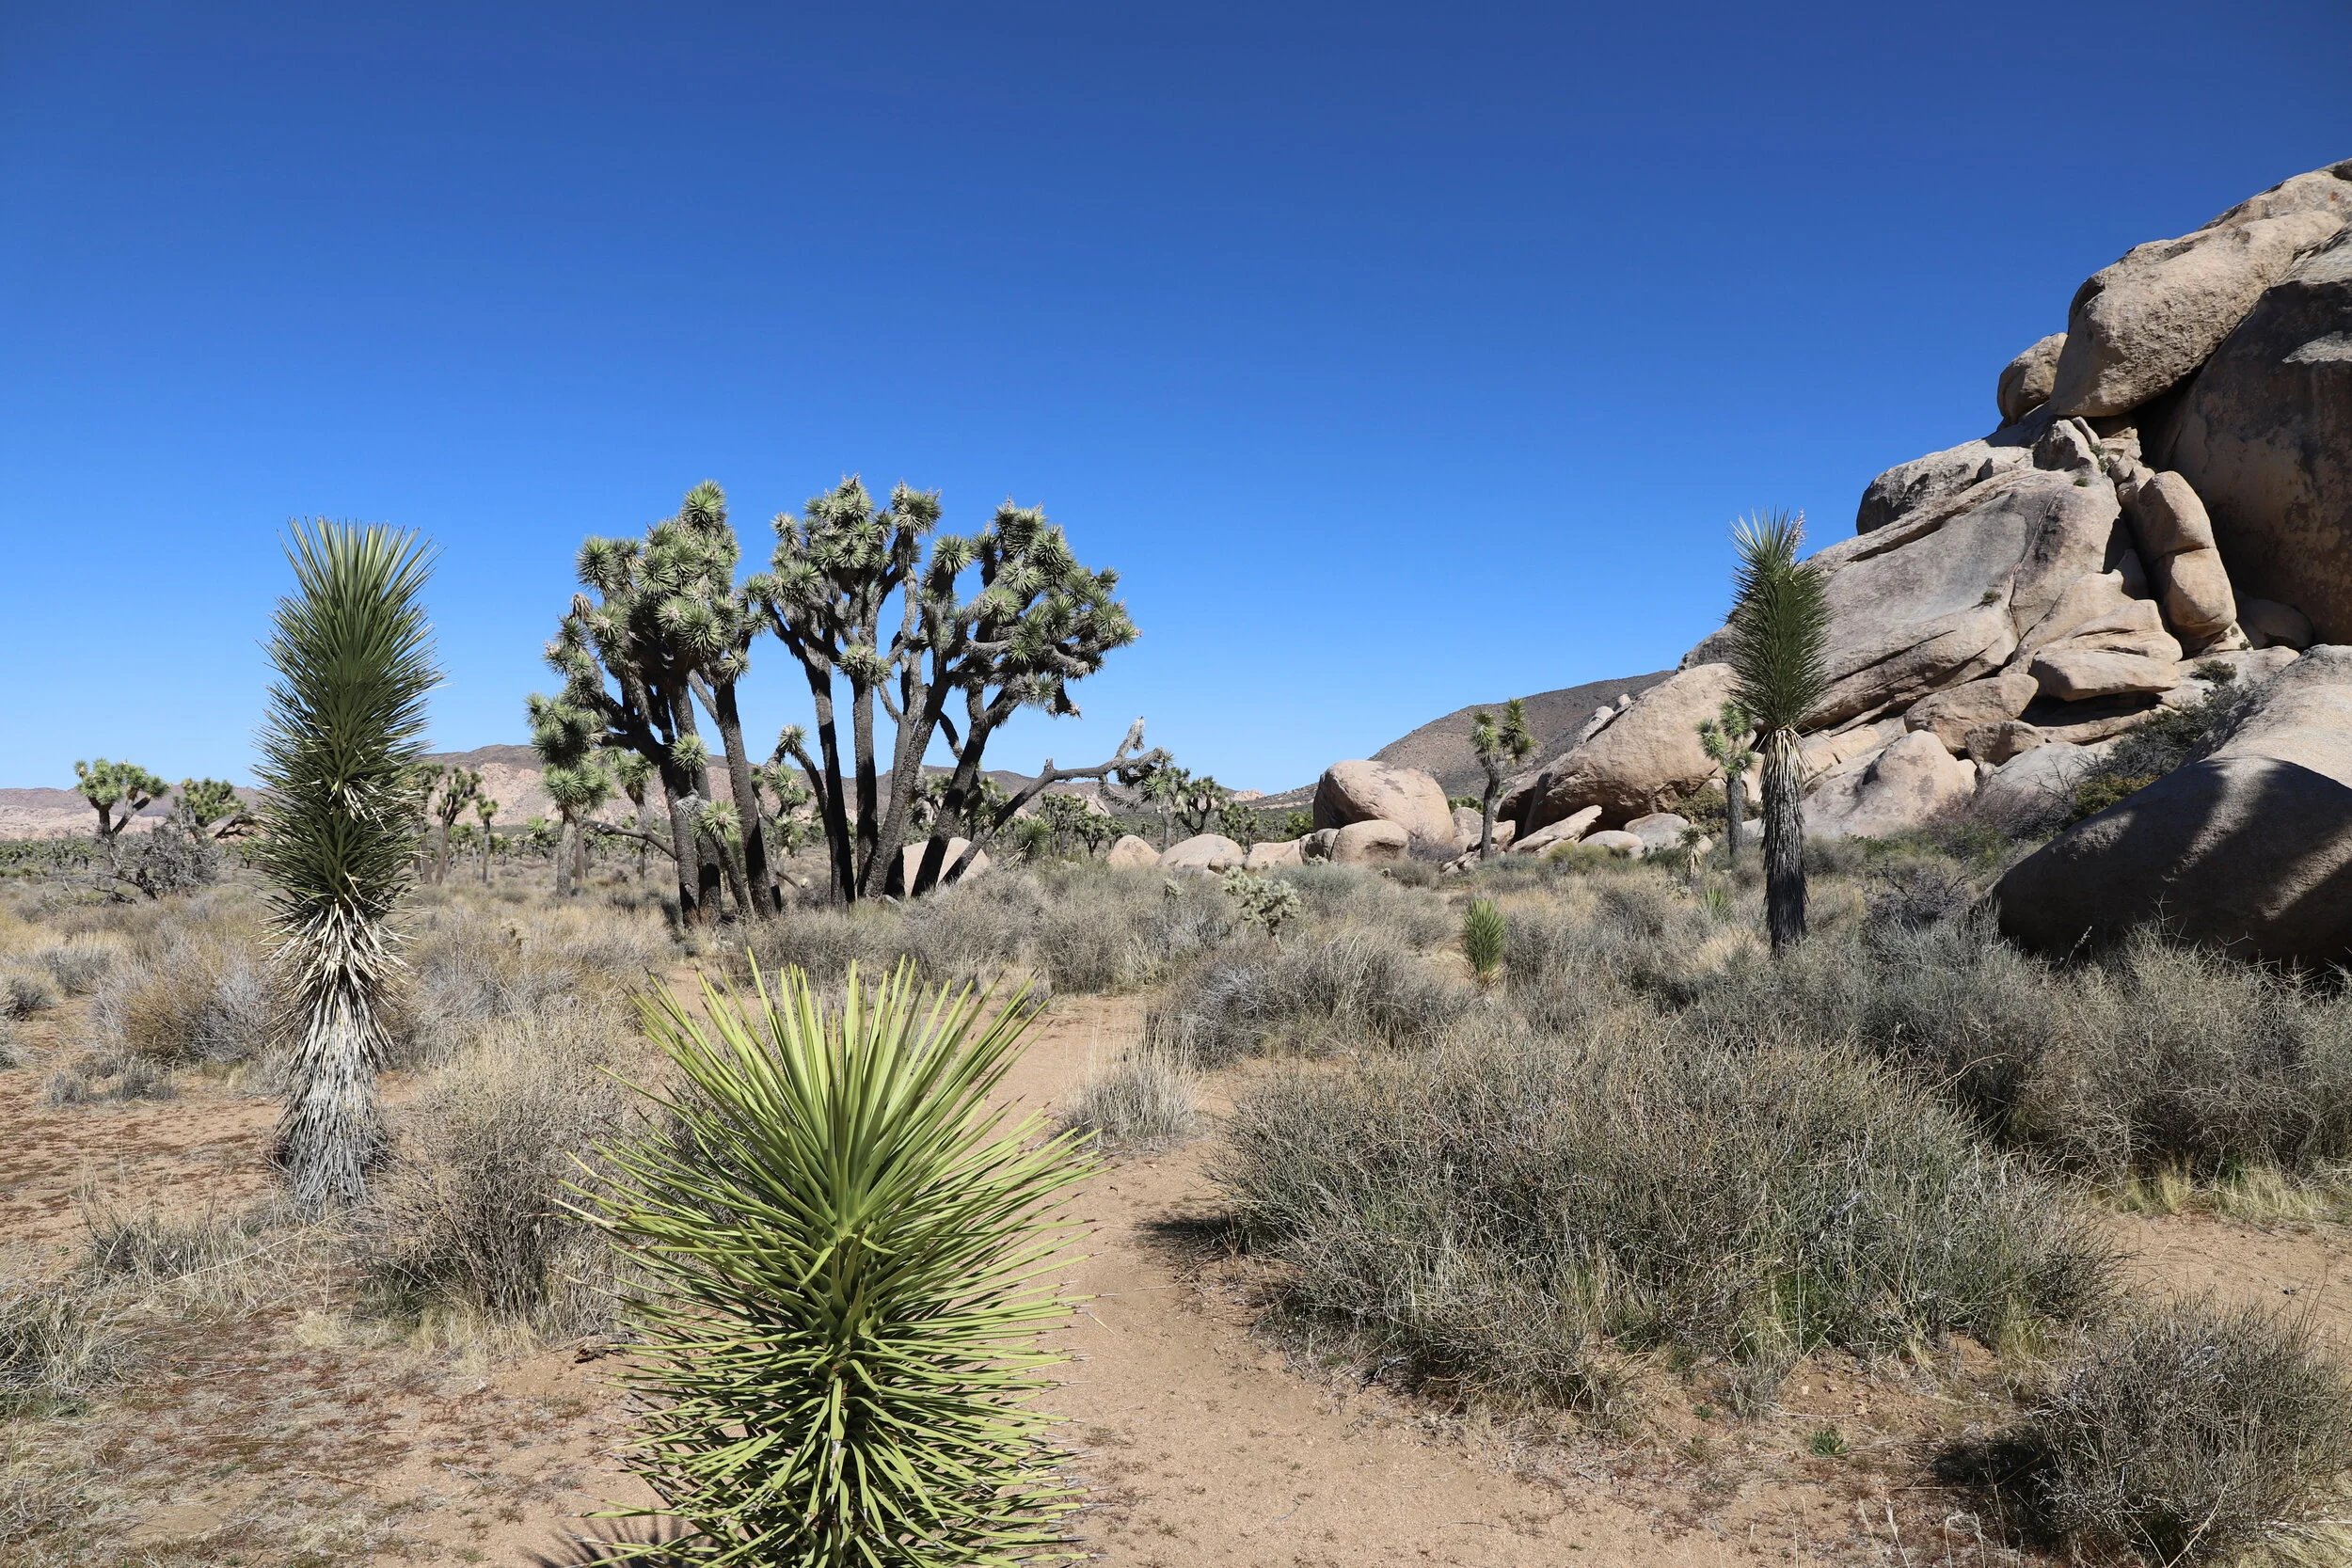
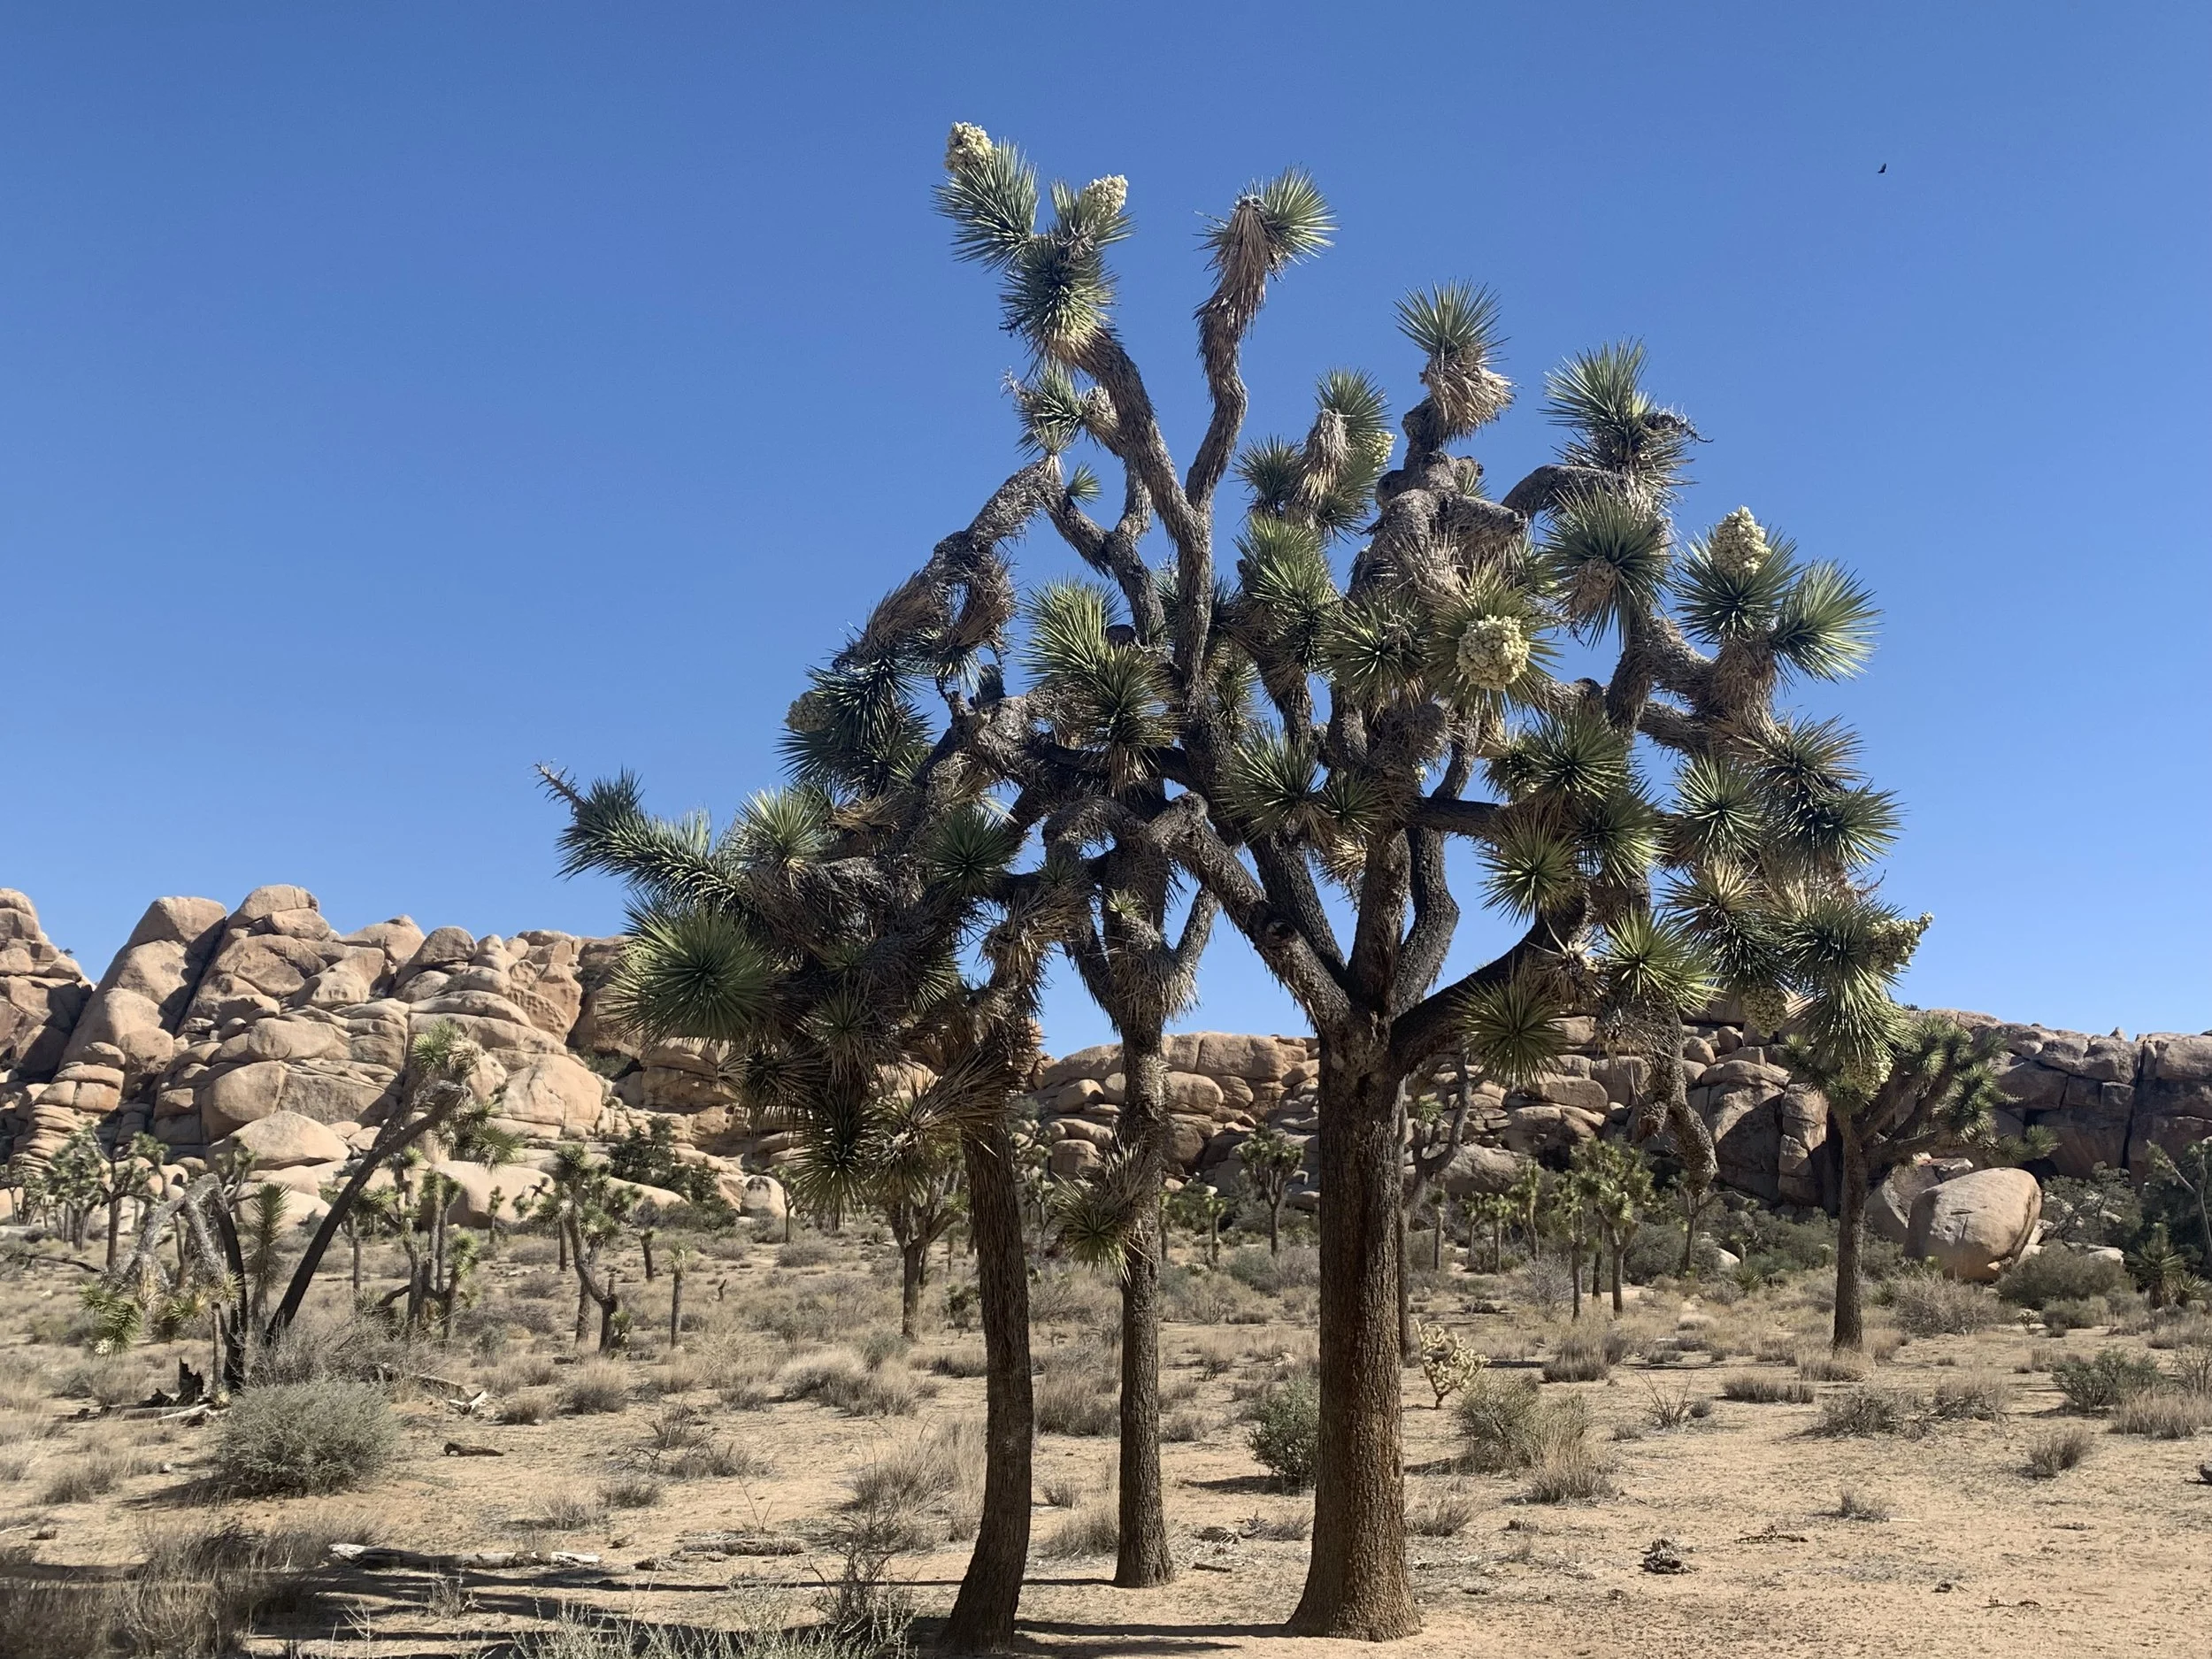
This picture shows both young Joshua Trees (in the front, trees that do not yet have branches) and more mature Joshua Trees (in the back, taller with multiple branches). This picture is from Cap Rock Trail.
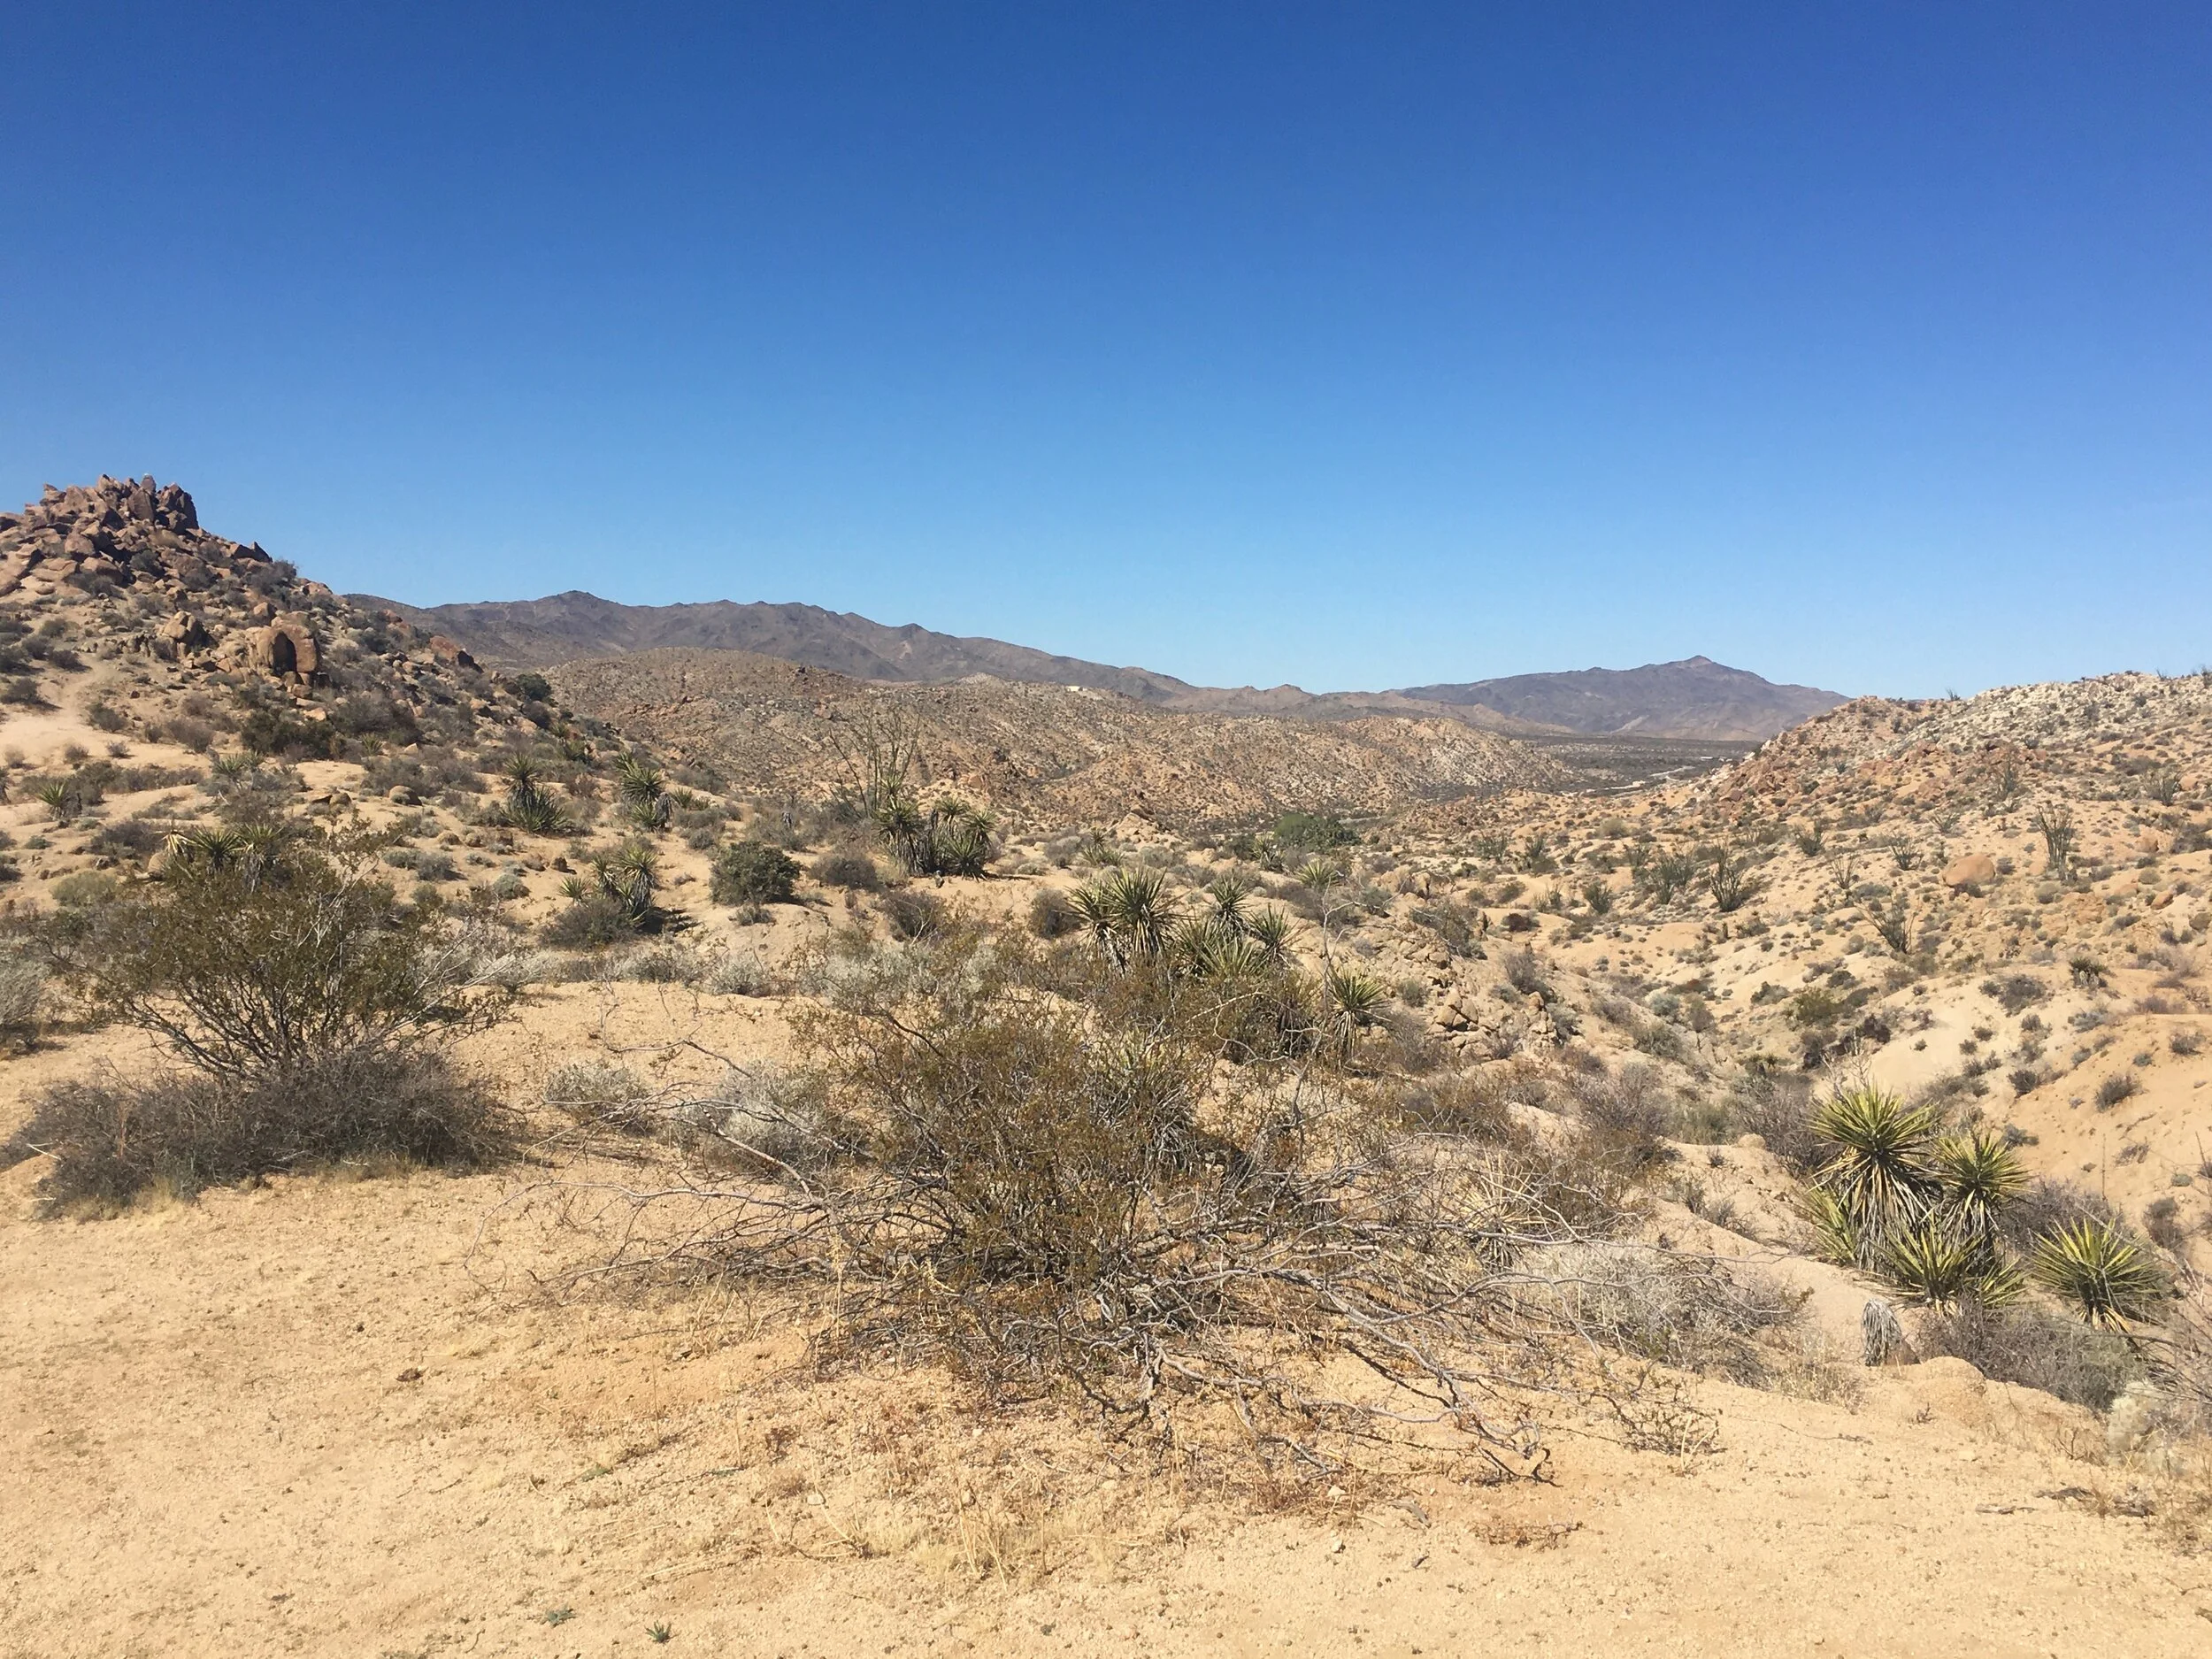
Funny enough, if you enter the park from the southern entrance, you will see plenty of Yucca plants, but the Joshua Tree won’t show up in abundance until after the Cholla Gardens. This is because the southern part of the park is in the Colorado Desert (below 3,000 ft in elevation). As you drive northward, you will rise in elevation as you enter the Mojave Desert (above 3,000 ft) and you will see Joshua Trees everywhere. As we drove in from the south, we were confused about the namesake of the park during the first part of our journey.
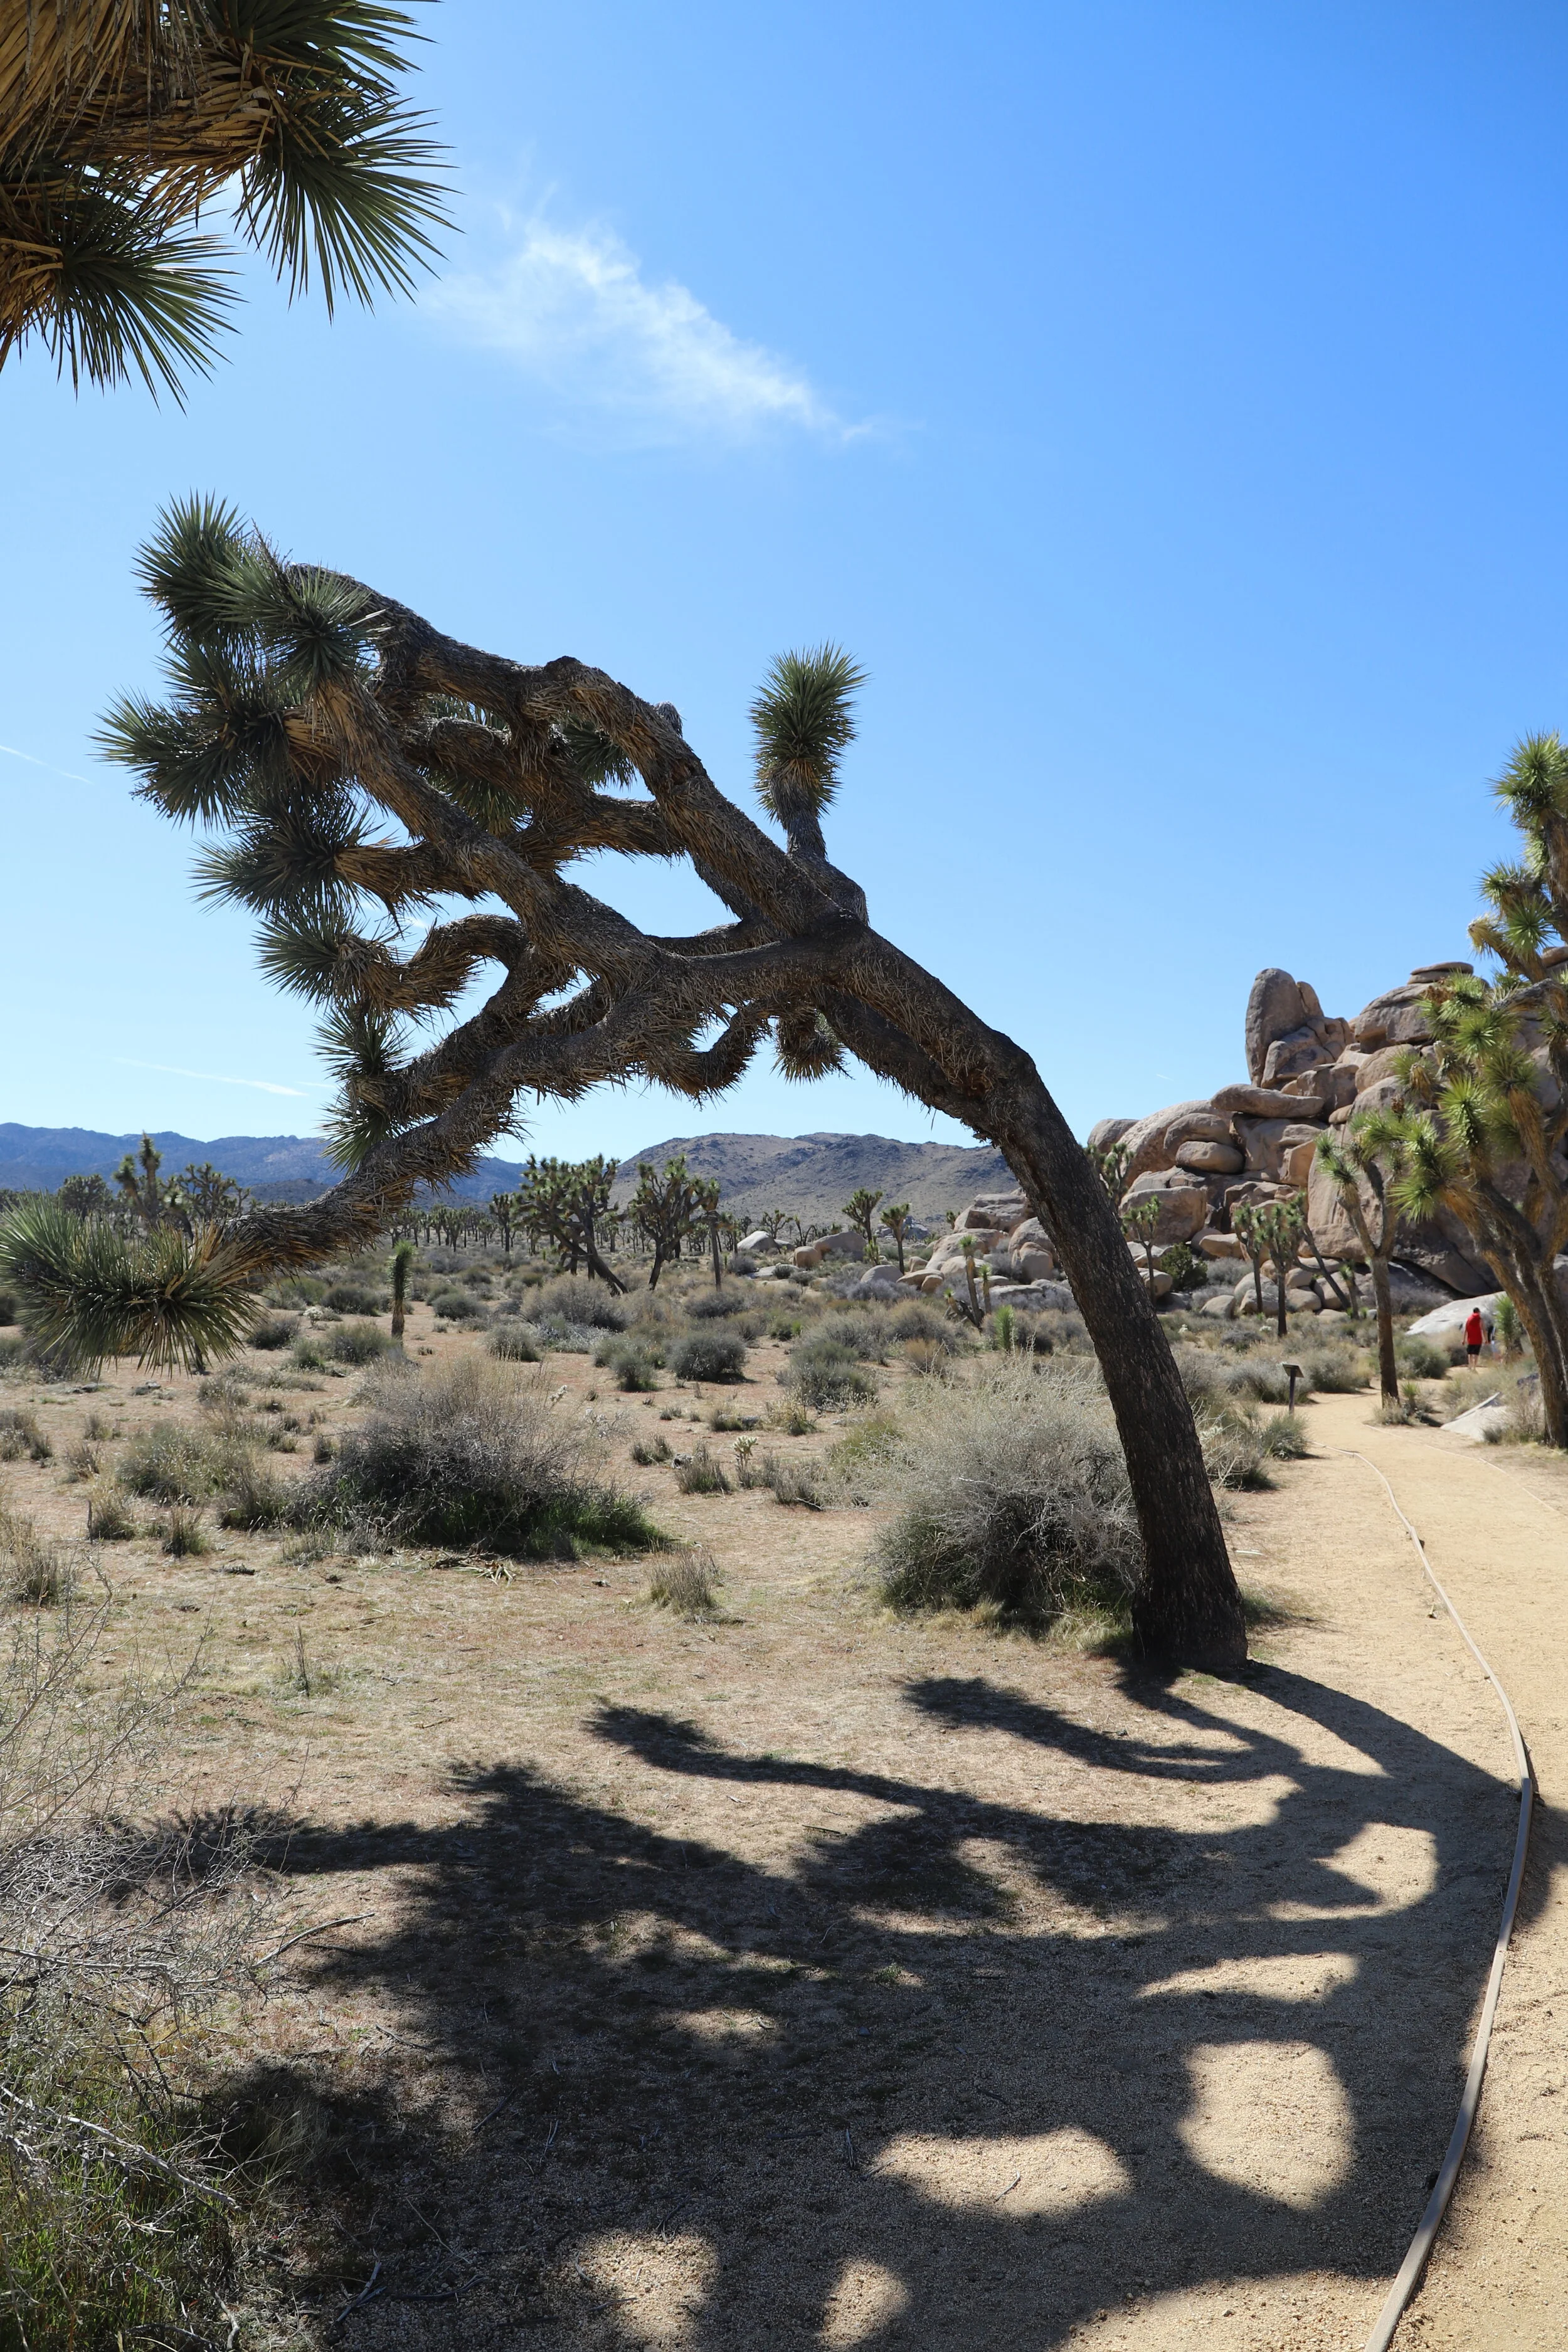
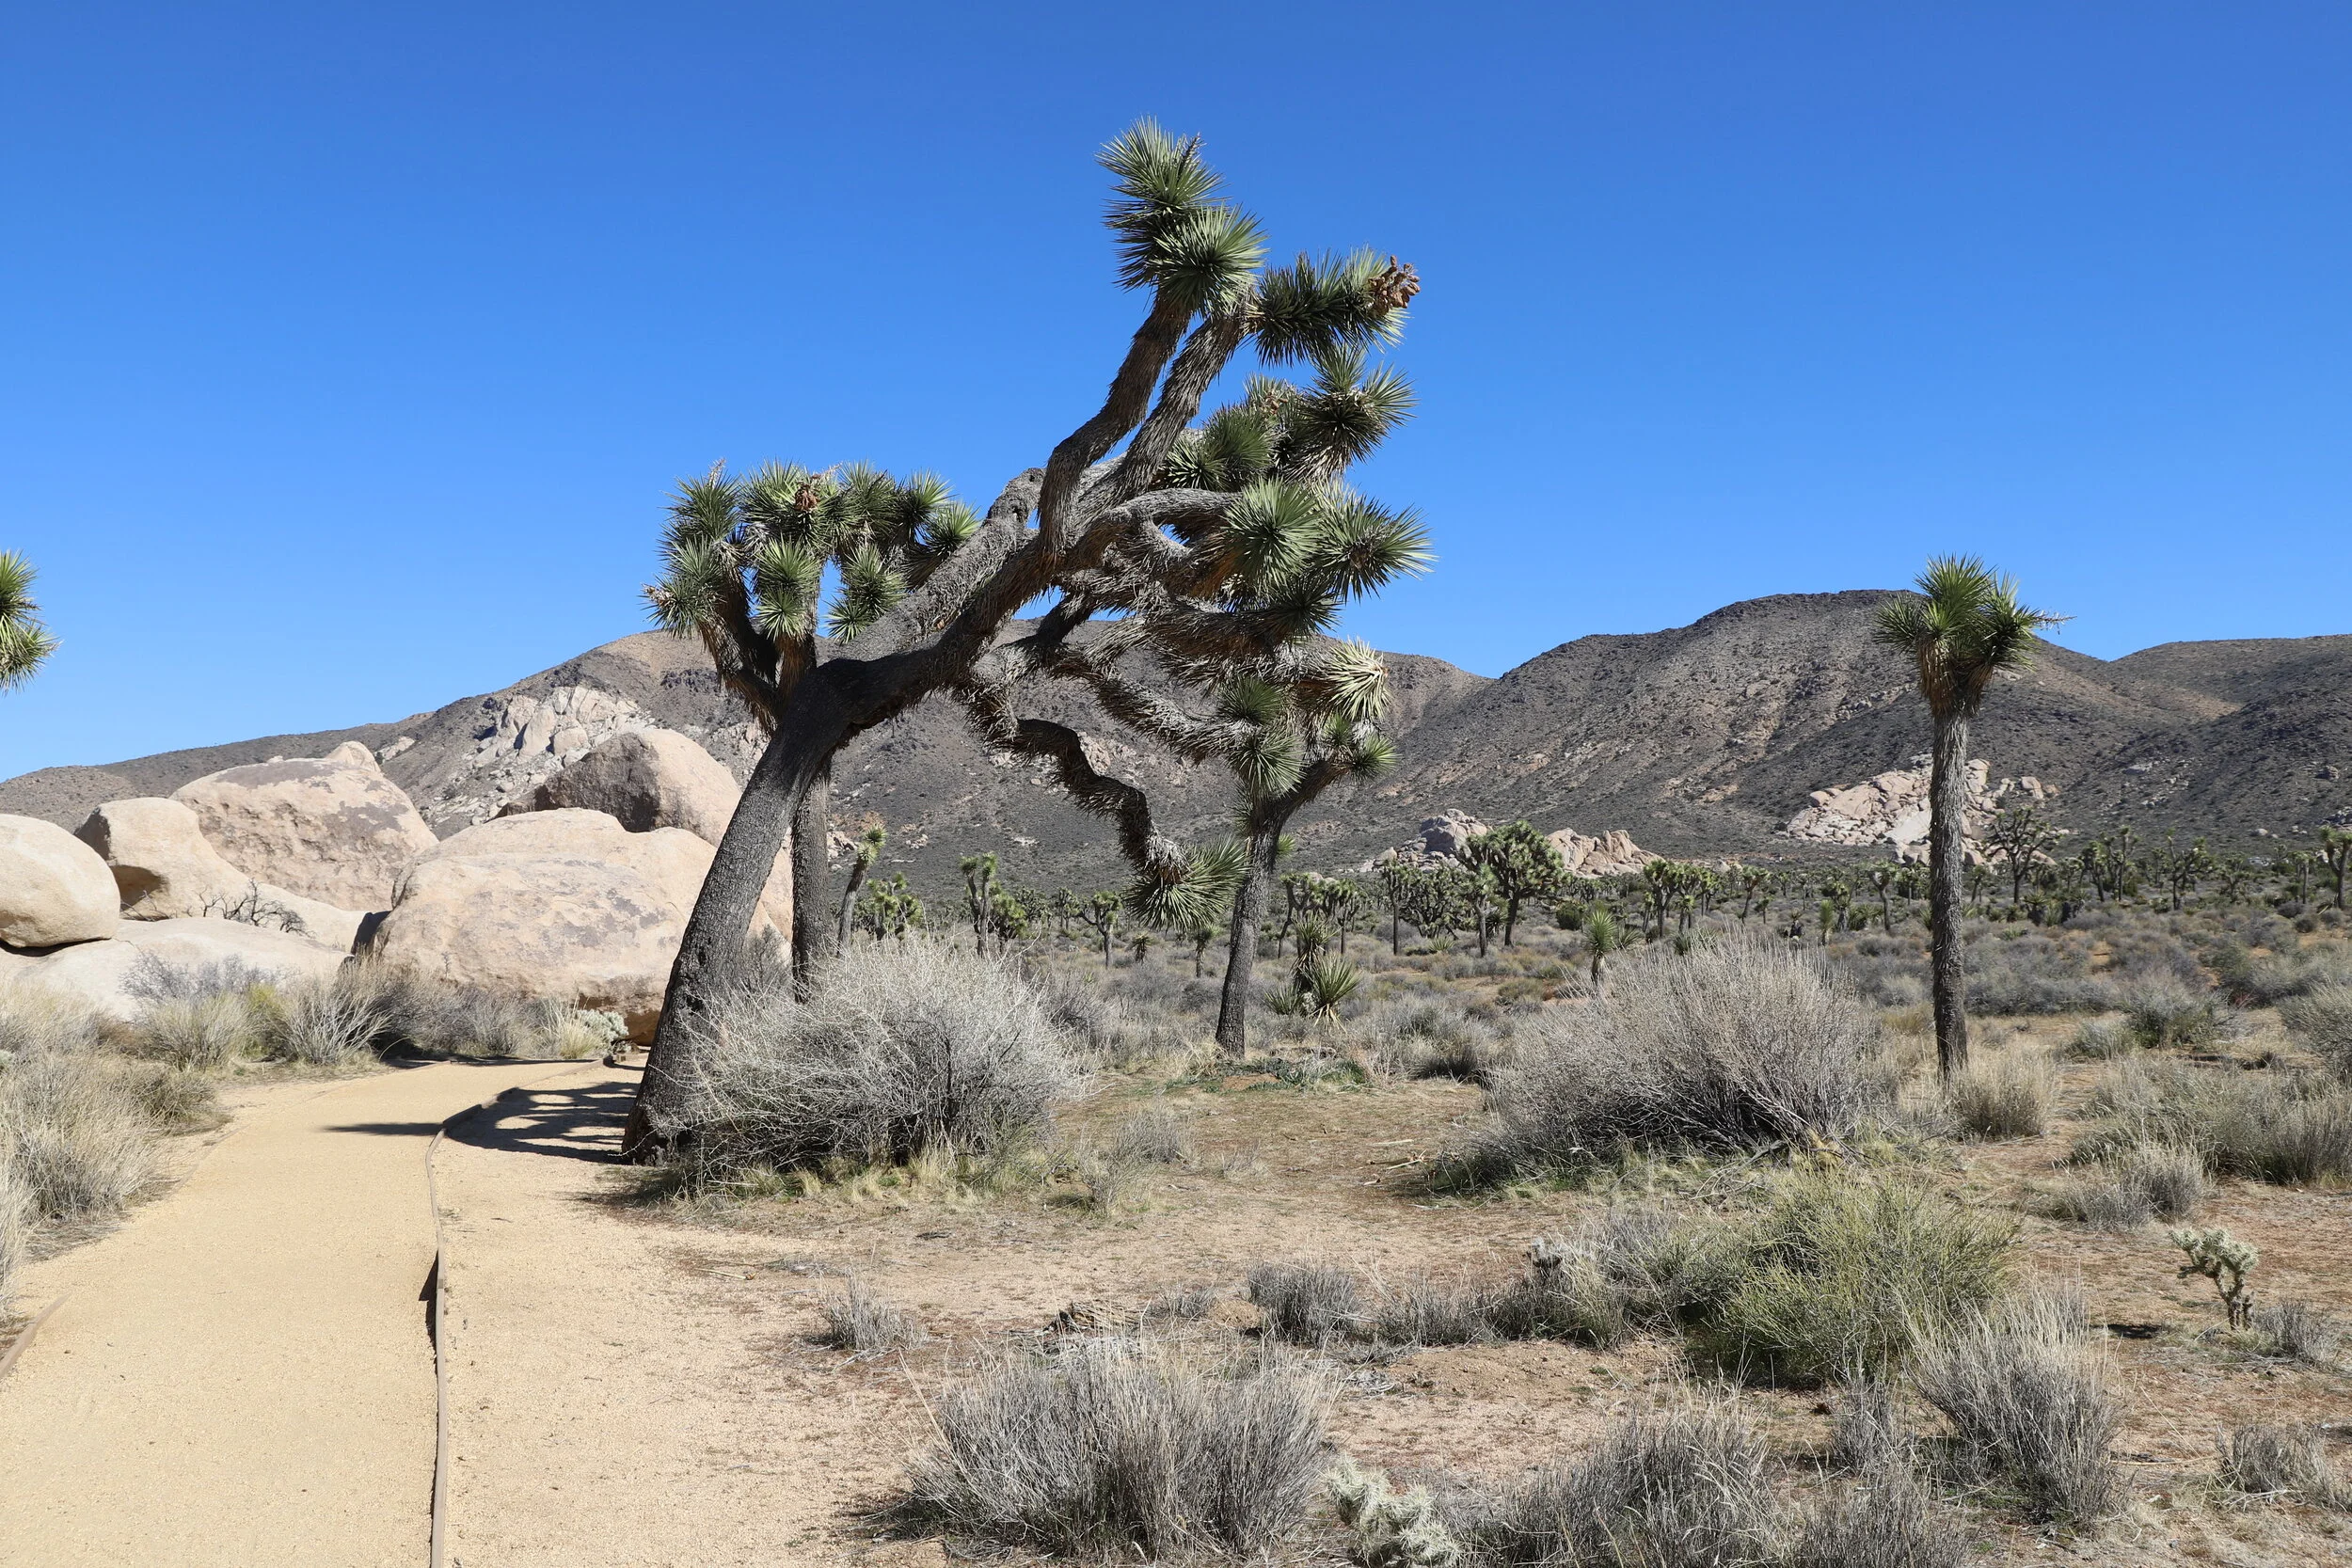
Joshua Tree along Cap Rock Trail
The more that I looked at the Joshua Trees, the more convinced I became that they looked like alien plants (from another world). To survive in the Mojave Desert, though, requires some incredible adaptations. The Mojave Desert is the “high desert” meaning higher in elevation. In addition to minimal annual rainfall (about 5 inches), the desert plants need to withstand freezing temperatures in addition to warm summer days at 100 deg F. The resilience of these trees is beautiful; a miracle of how life persists. Joshua Trees have a waxy outside to prevent the loss of water. The shape of their leaves funnel the few raindrops which fall to their shallow roots. Joshua Trees also hold onto their dead leaves to protect the plant from the relentless sun.
Planning Your Trip
Reference the below interactive map for Joshua Tree National Park entrances, visitor centers, trailhead locations, nearby lodging, closest international airports, and other nearby (within 2 hours) outdoor activities. Use two fingers on the map to zoom in and look around.
Location and Entrances
Joshua Tree National Park is in the southern section of California and includes three different park entrances. The southern entrance is next to the Cottonwood Visitor Center and is just off I10. My first time to Joshua Tree, we drove in from Phoenix, so the hikes I have listed below start at this southern entrance. The northeastern entrance is near the Oasis Visitor Center, just outside of Twentynine Palms. And the northwestern entrance is near the Joshua Tree Visitor Center.
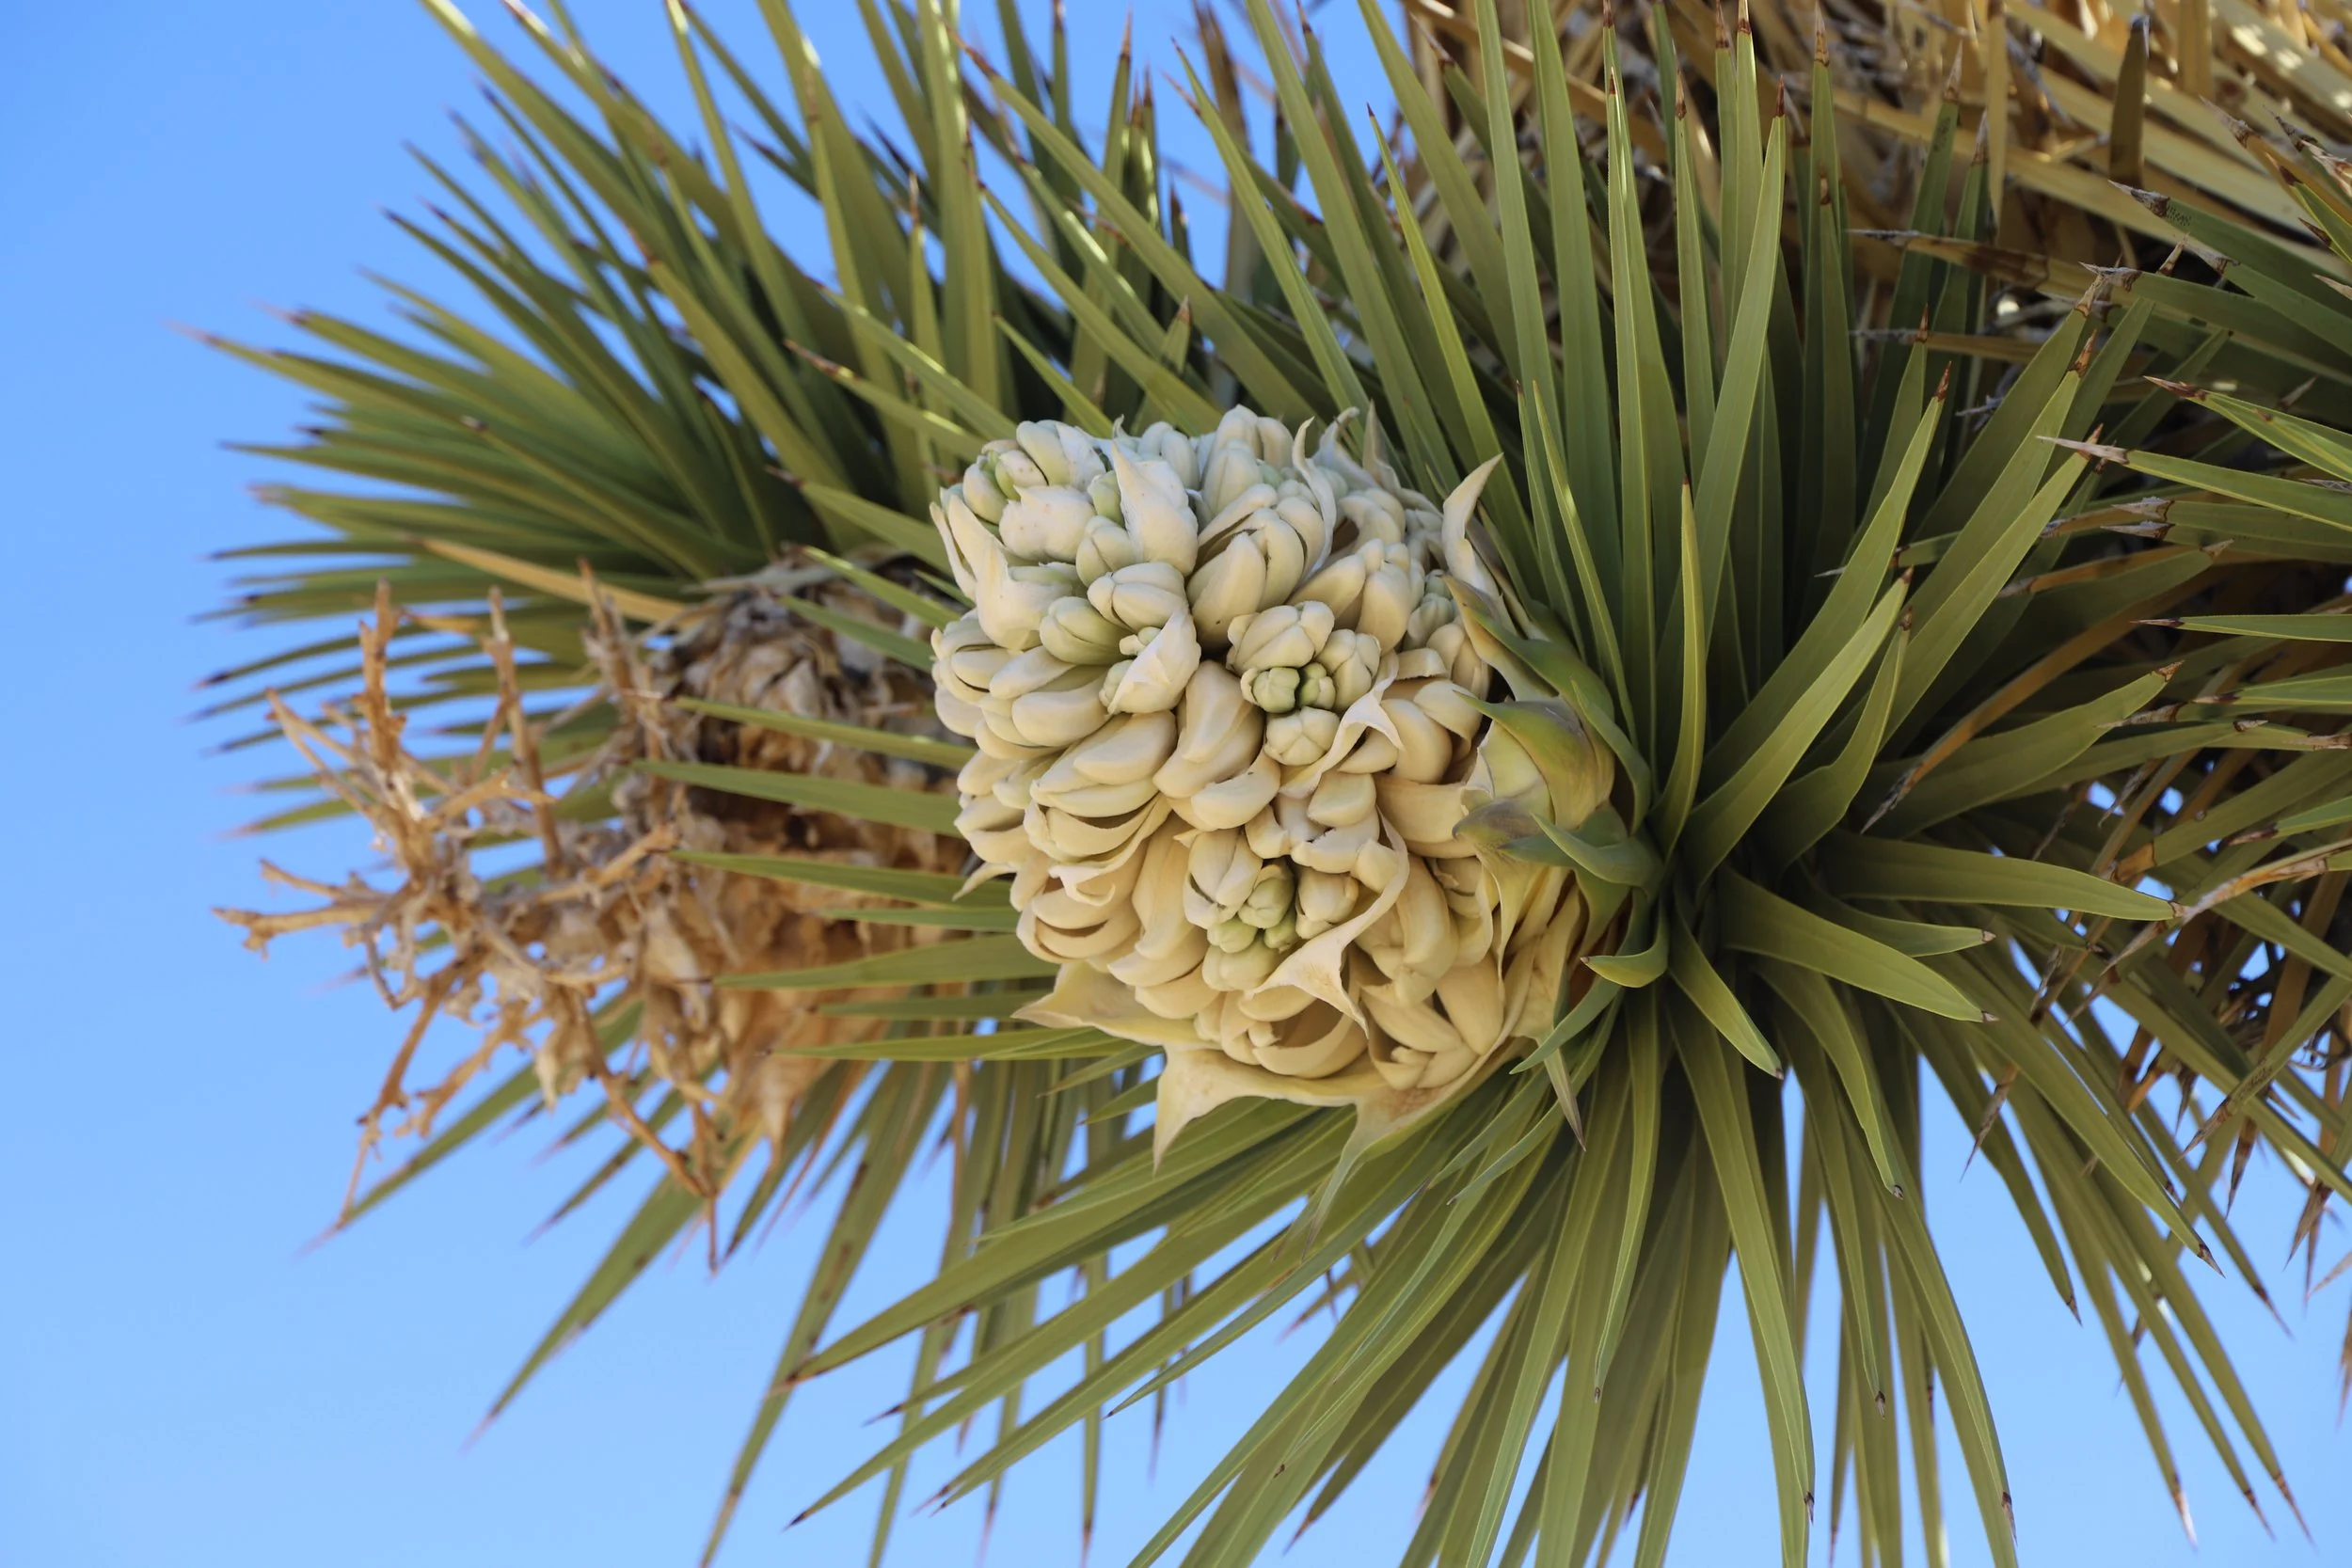
Joshua Tree blooming in March
Nearest Cities with Lodging
Twenynine Palms, CA, is within minutes from the northeastern entrance of Joshua Tree National Park. Yucca Valley, CA, is the closest city to the northwestern entrance. Both cities have hotels and plenty of restaurants. There isn’t much near the southern entrance.
Nearest Large Cities with Airports
Los Angeles is about 2 hours from Joshua Tree National Park, and San Diego is closer to 2.5 hours. The northwestern entrances is closest for both of these cities. Las Vegas is 3 hours away, and the closest entrance is northeastern. Phoenix is 3.5 hours away, and the southern entrance is the closet. Keep in mind that the roads outside the park have faster speed limits so if you drive through the park you will likely leave from a different entrance, which will add extra time to your adventure.
Joshua Trees on the Barker Dam hike
Other Nearby Attractions
If you want to combine this trip with other nearby (within 2 hours) outdoor attractions, here are some ideas. Note that I haven’t been to any of these parks, but they all look fun. I’ve included links to external sites so you can learn more. In my first visit to Joshua Tree, my parents and I drove out and back from Phoenix in the same, but very long day. I came back again a couple of years later with my boys, and we stayed in Yucca Valley. We combined this tip with Death Valley, Cabrillo, and some fun in LA and San Diego.
San Bernardino National Forest
Salton Sea State Recreation Area
Providence Mountains State Recreation Area
Time Needed
Joshua Tree is a smaller National Park that you can do reasonably do in one to two days. Sample some shorter hikes, throw in one or two longer hikes, and plan to spend the night in Twentynine Palms or Yucca Valley.

Cottonwood Springs
Other Things to Know
The visitor centers at Joshua Tree National Park are very small and do not have food. Pack your lunch, bring extra snacks, and have more water than you can imagine drinking. Do some research before you enter the park. There are several more hikes than what is listed on the park map, and the road signs do not consistently highlight that there is a trailhead versus just a viewpoint so you need to have an idea beforehand where you plan to go. Also, I thought the maps at the trailheads were poor at best. If you have a GPS app, such as Gaia GPS, it’s worth your time to download maps of the park before you arrive. You won’t have Internet access once you are in this park.
Hikes
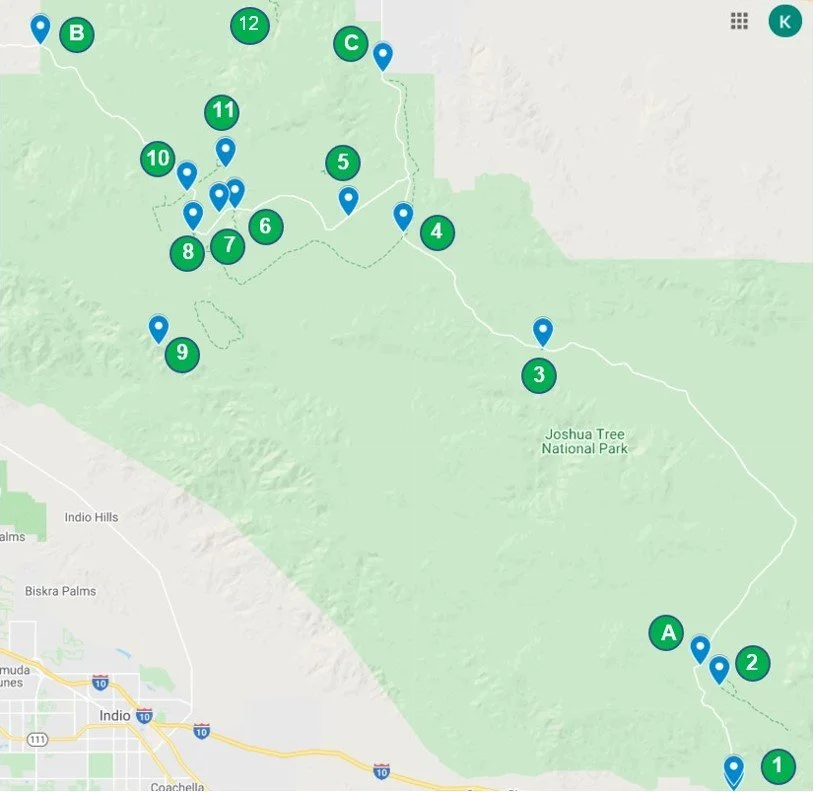
A - Cottonwood Visitor Center, B - Northwestern Entrance, C - Northeastern Entrance
1 - Bajada Nature Trail, 2 - Cottonwood Springs / Mastodon Peak, 3 - Cholla Cactus Garden, 4 - Arch Rock, 5 - Skull Rock / Discovery Trail, 6 - Ryan Mountain, 7 - Hall of Horrors Slot Canyon, 8 - Cap Rock, 9 - Keys Viewpoint, 10 - Hidden Valley, 11 - Barker Dam, 12 - Rattlesnake Canyon
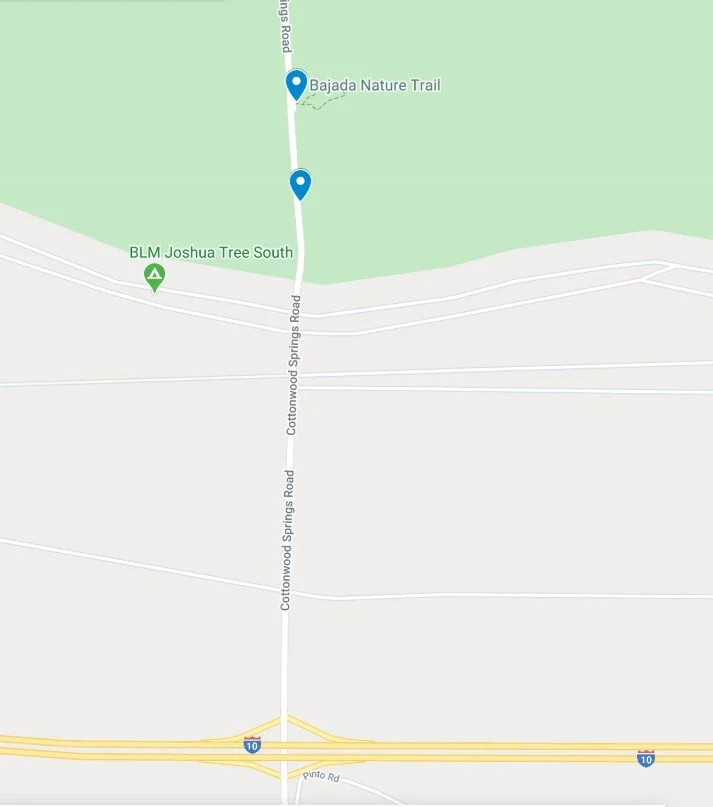
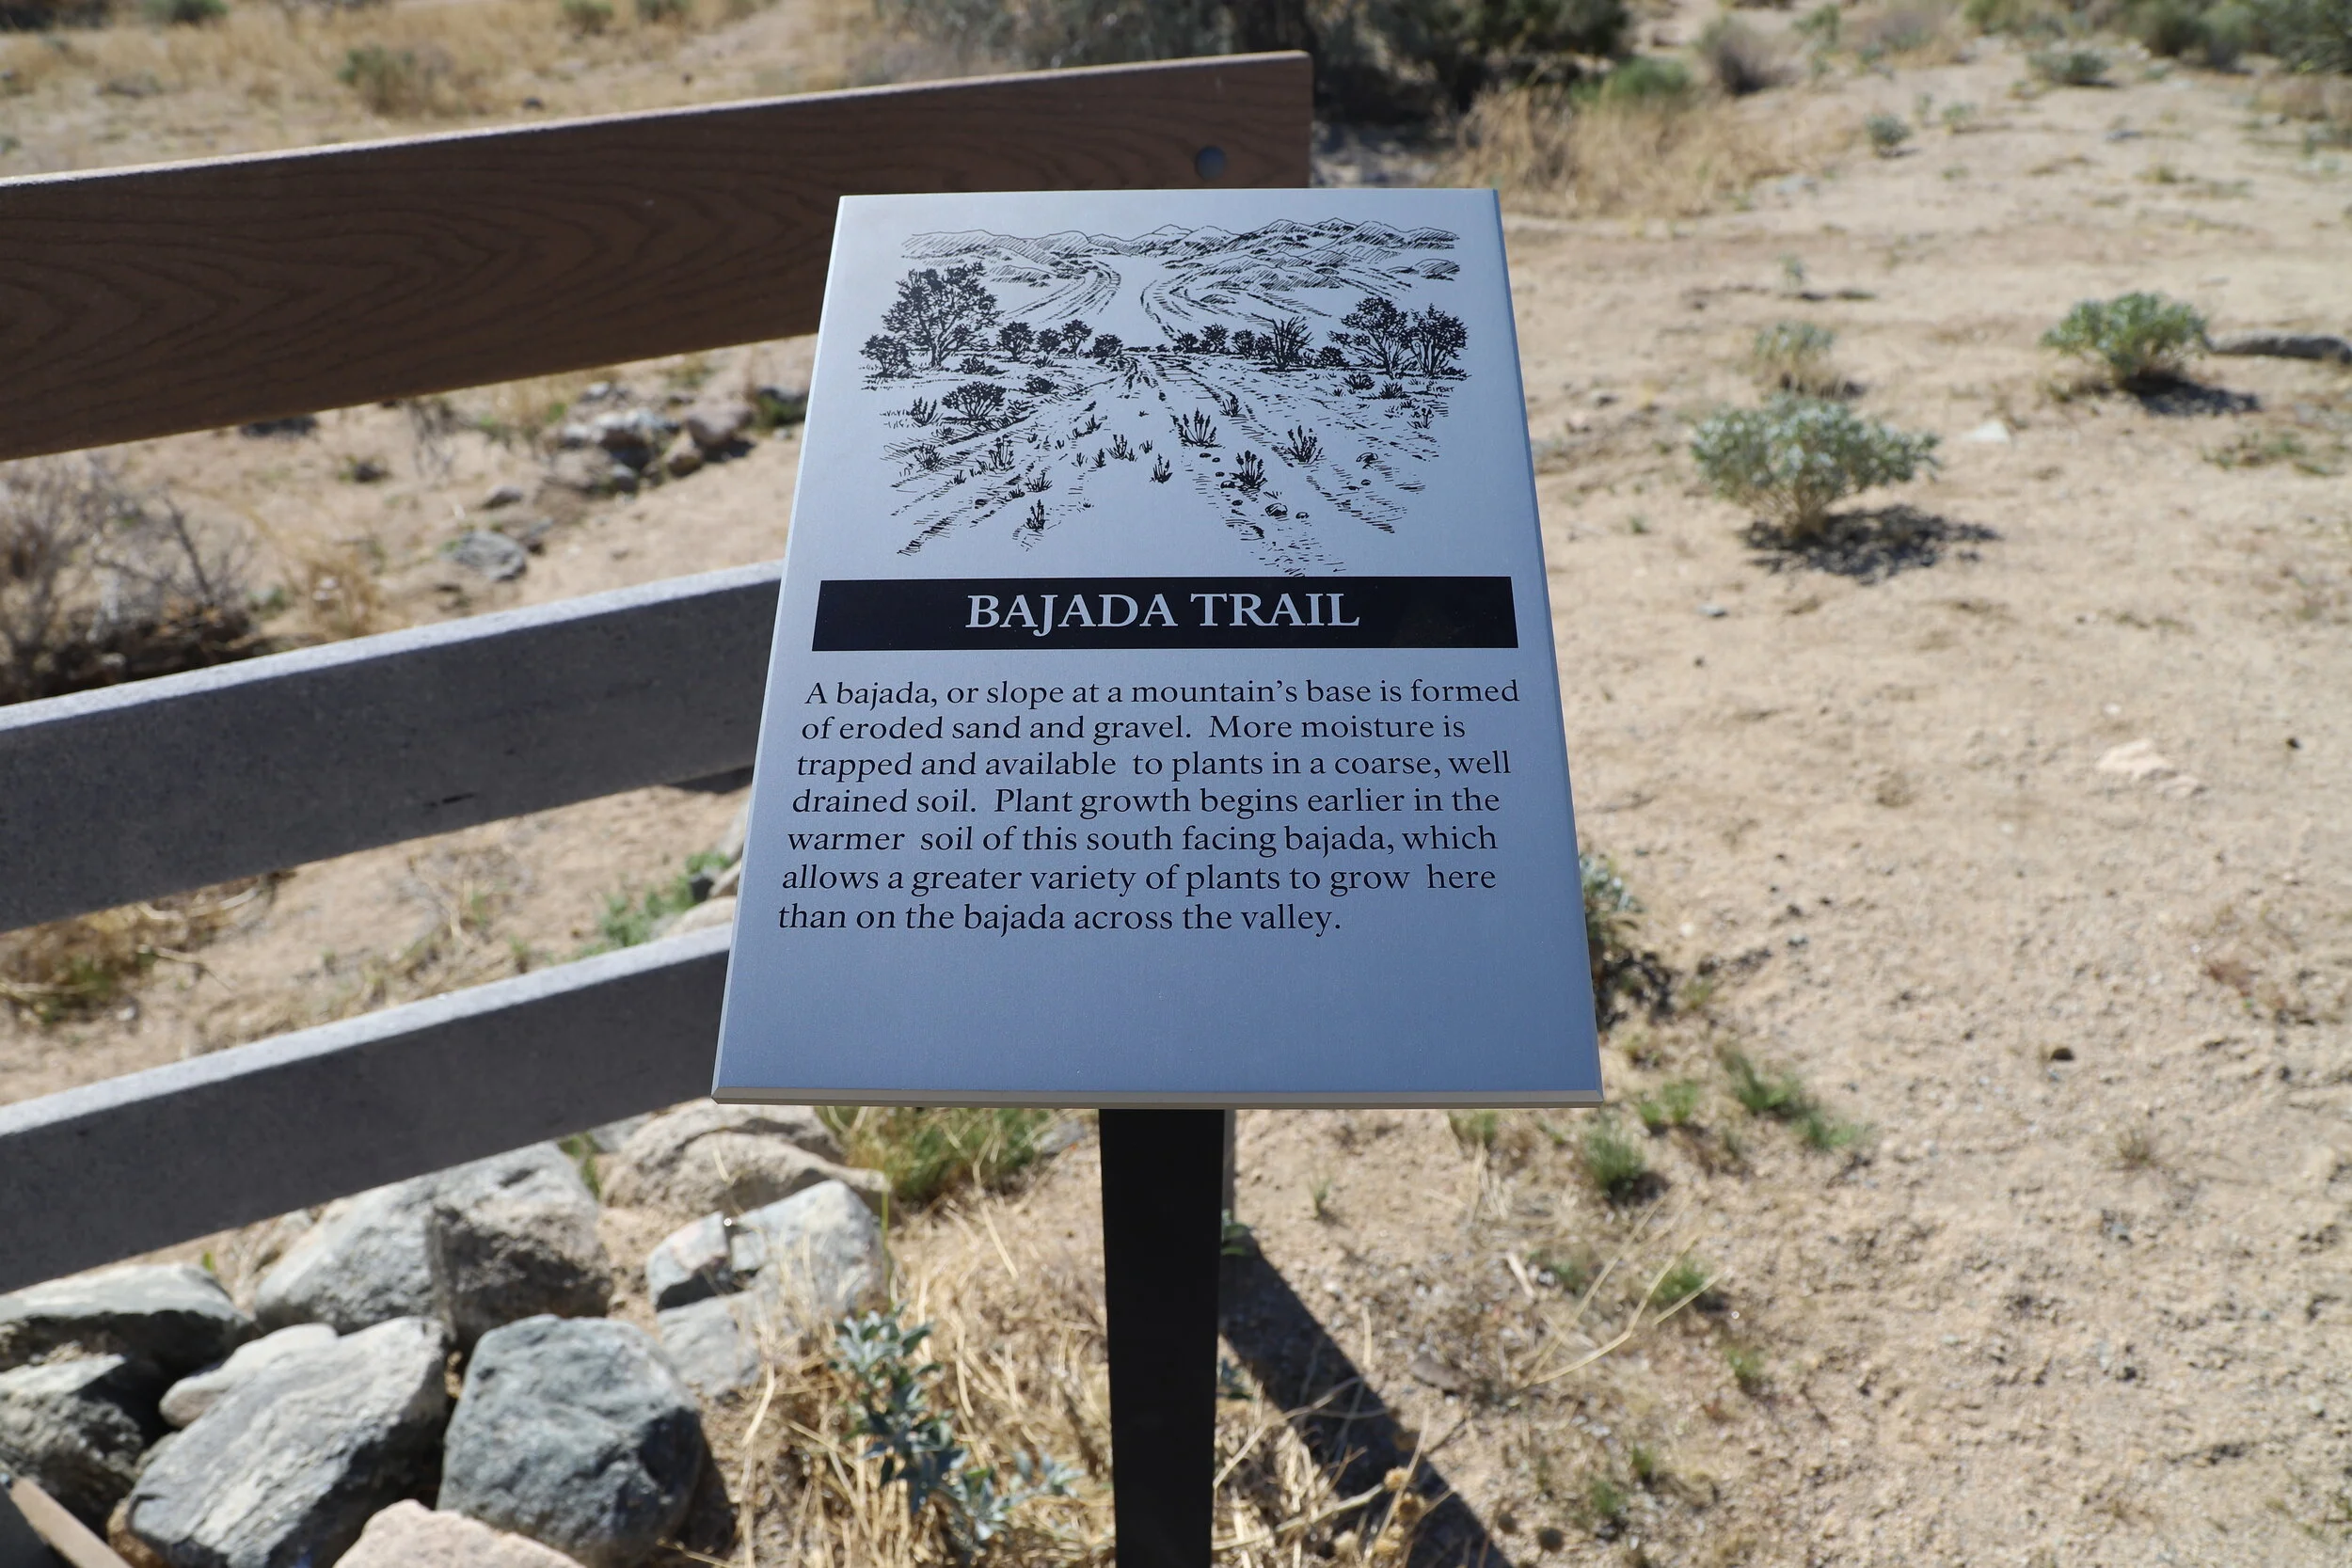
1 - Bajada Nature Trail
Distance - 0.25 miles
Elevation Gain - N/A
Trailhead Location - This trail is off of Cottonwood Springs Road, just after you’ve exited I10
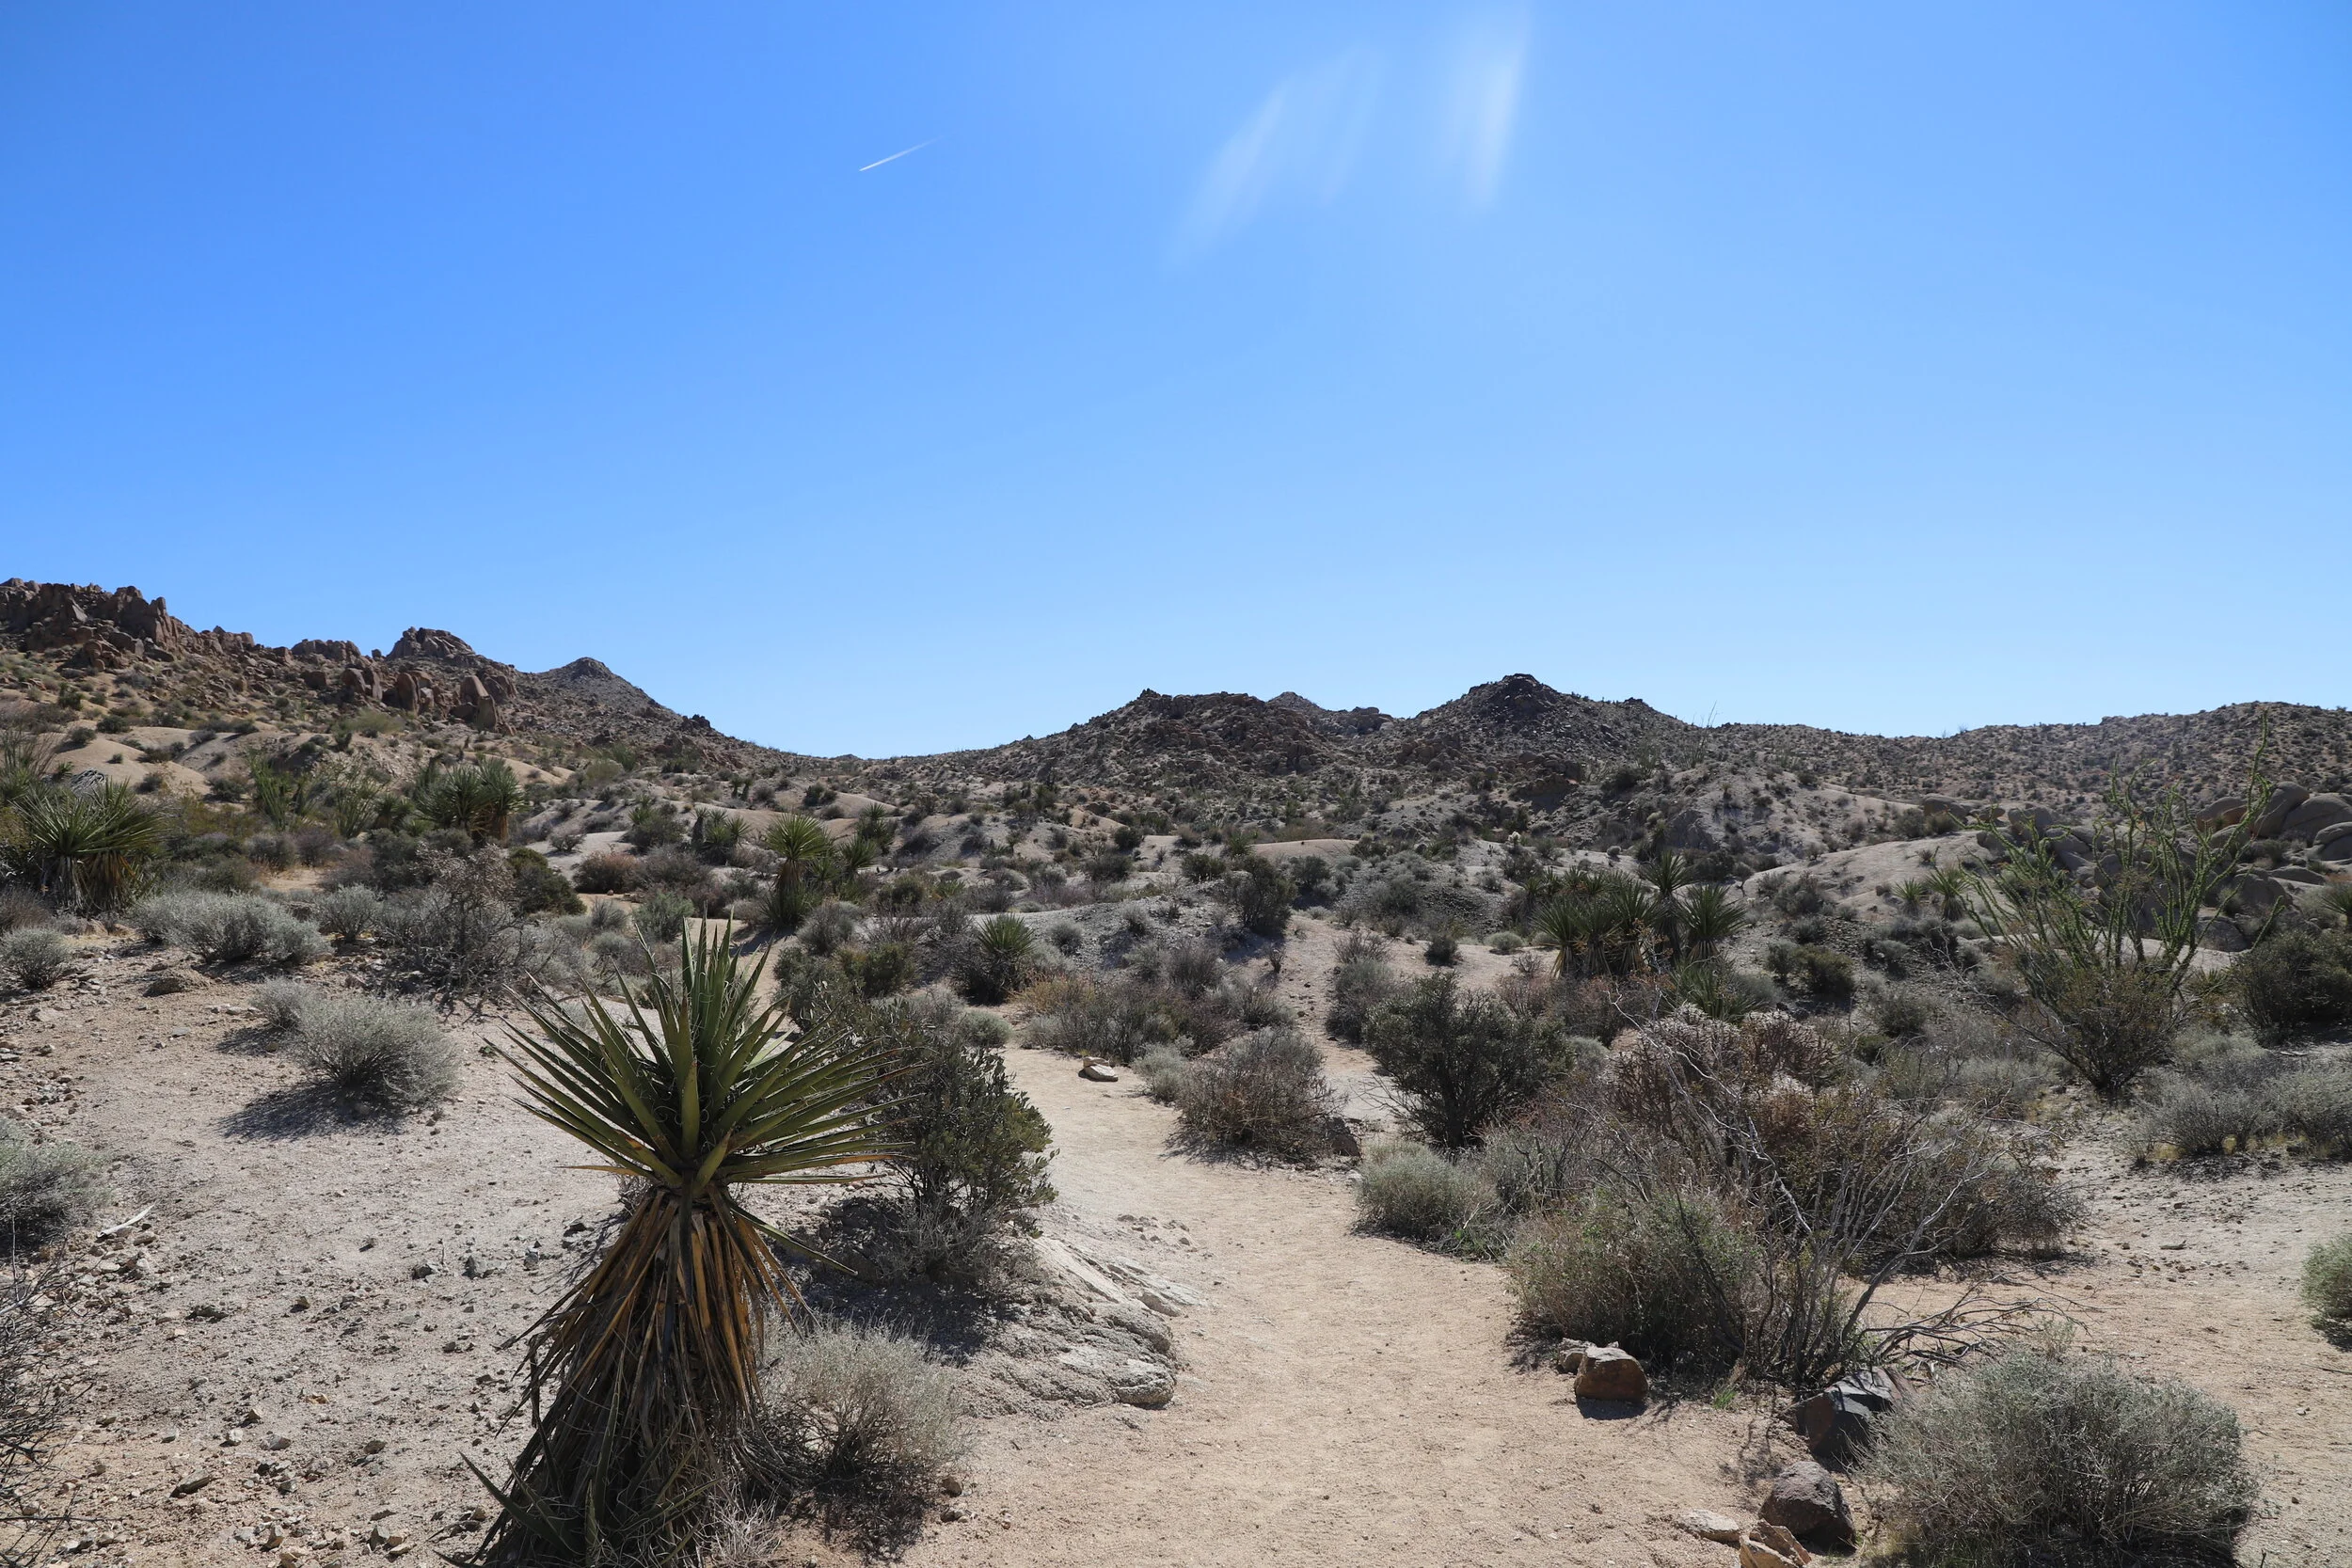
There are trails with better views listed below, but I love learning about the desert plant adaptations and how the plants and animals work together to survive in the desert. This trail had several informational signs along the short hike. If you’re interested in things like that, it’s a great quick stop. Note, there are no Joshua Trees here, the elevation is too low.
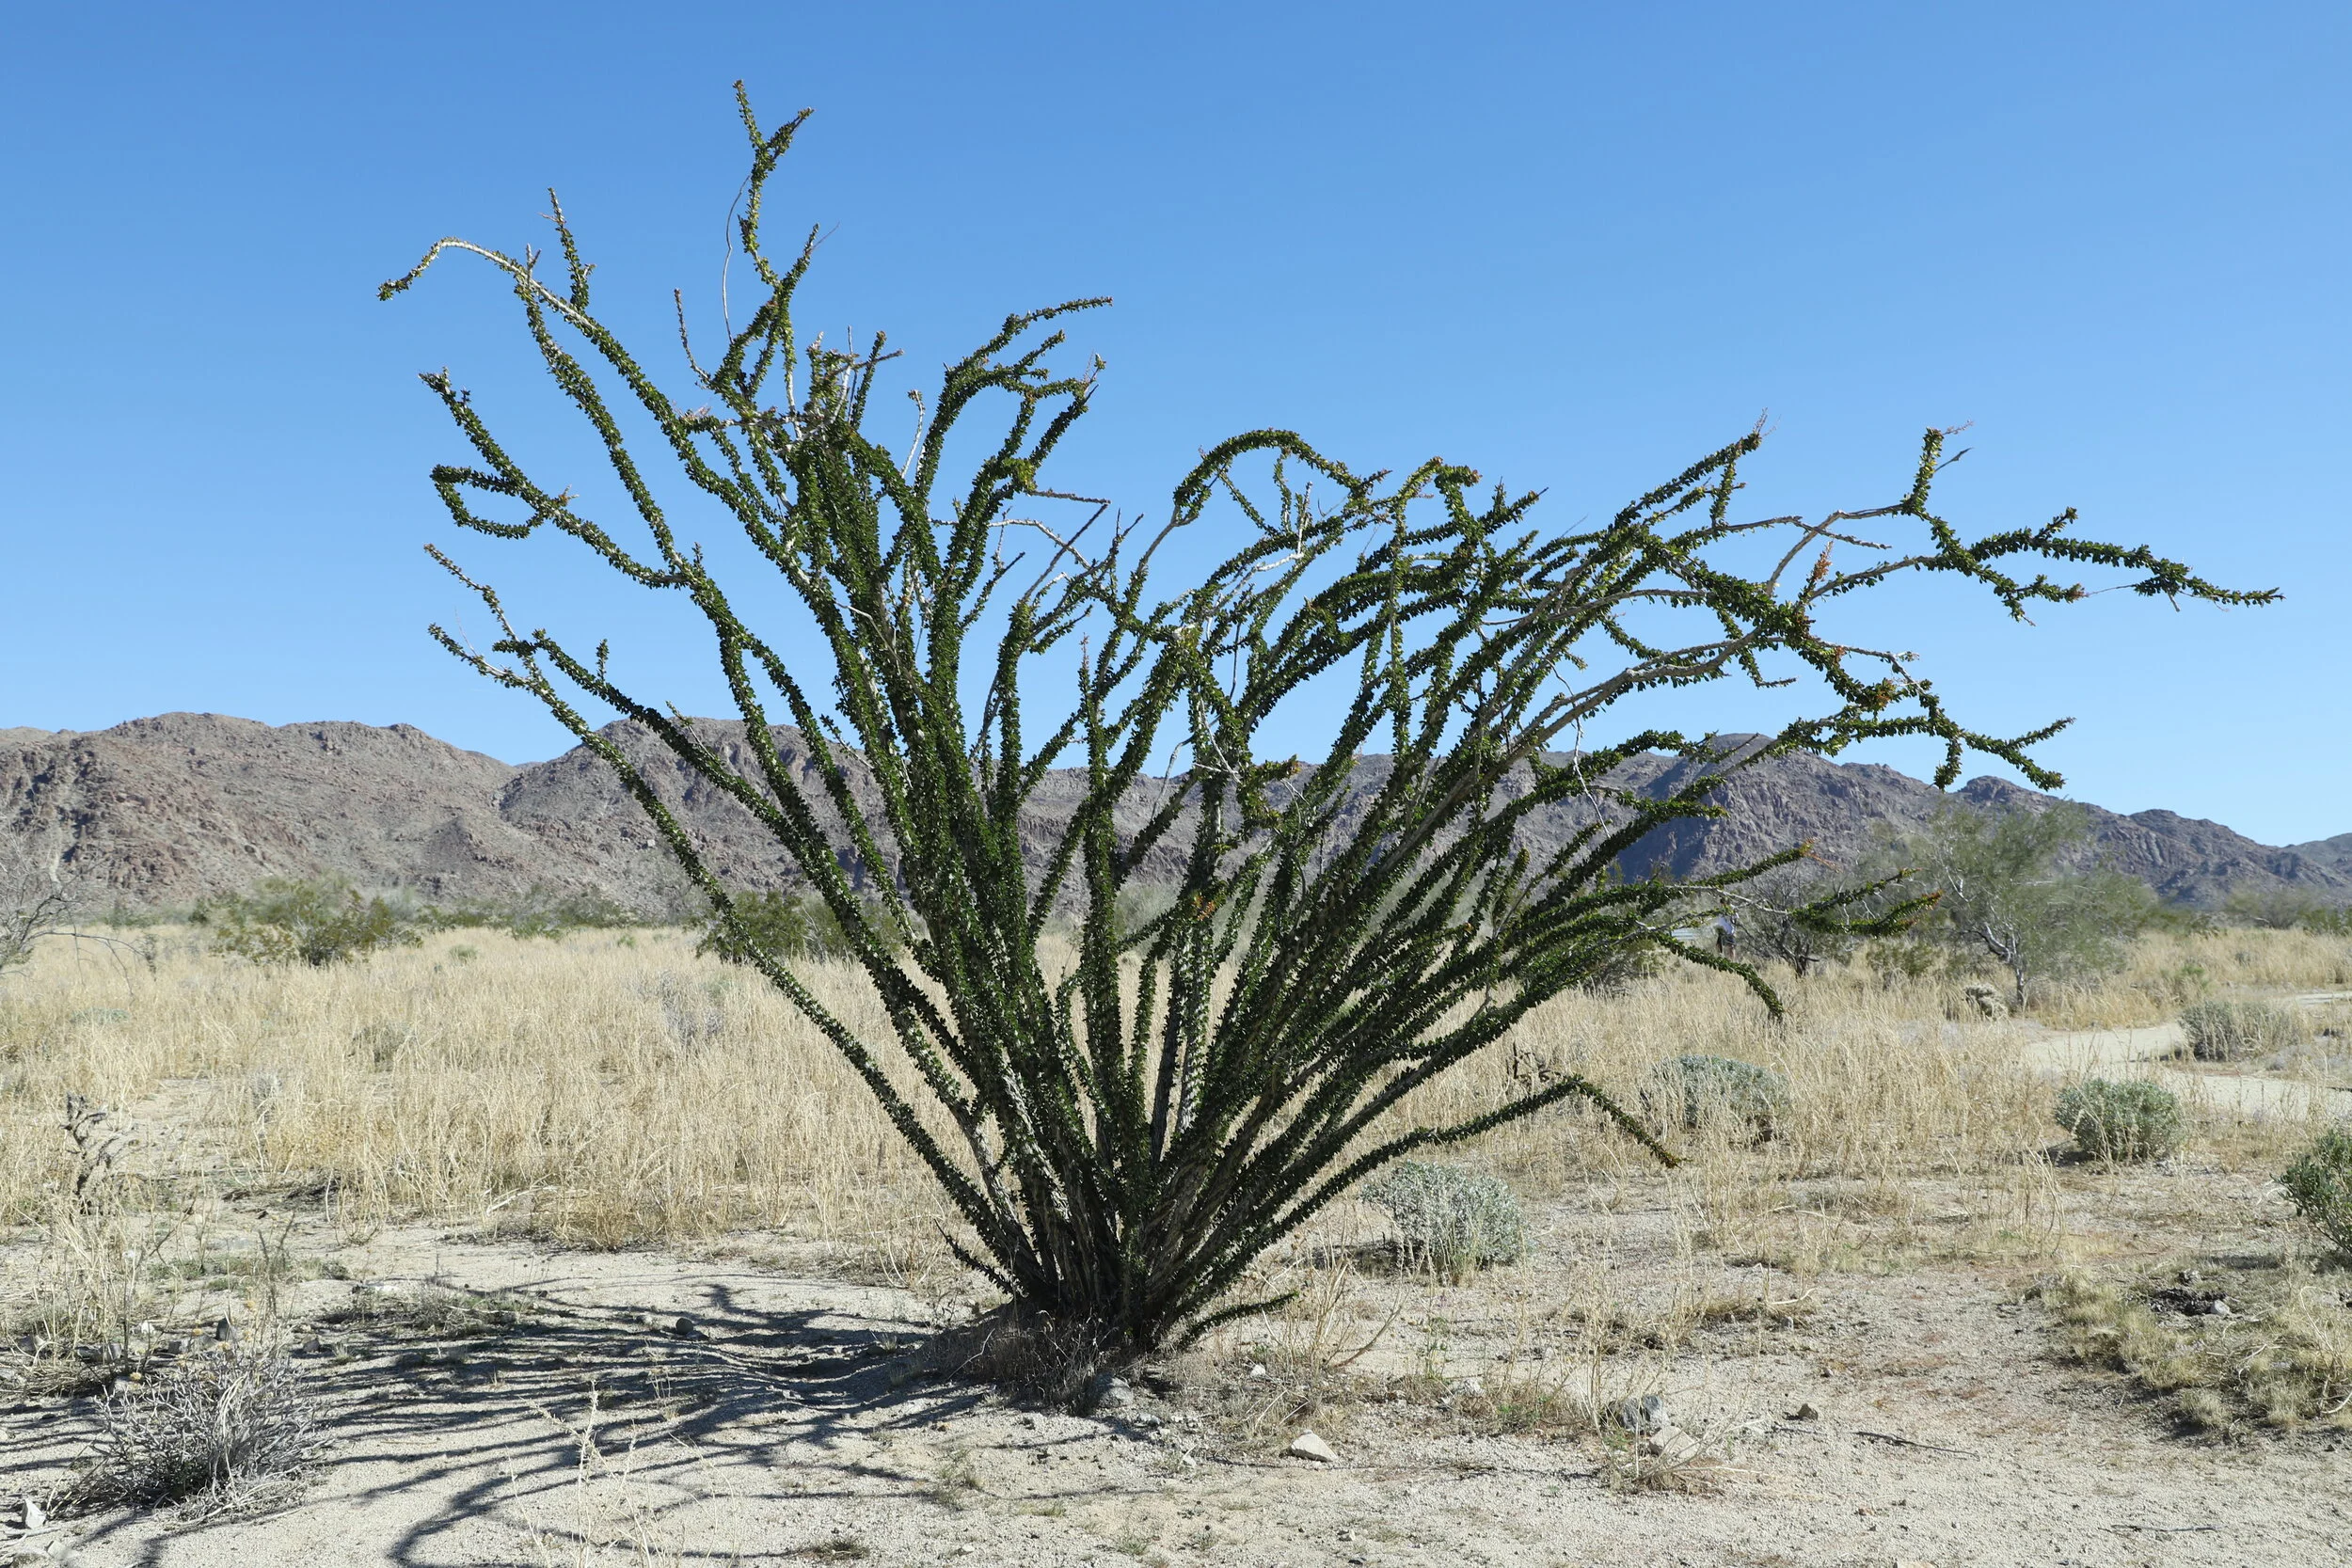
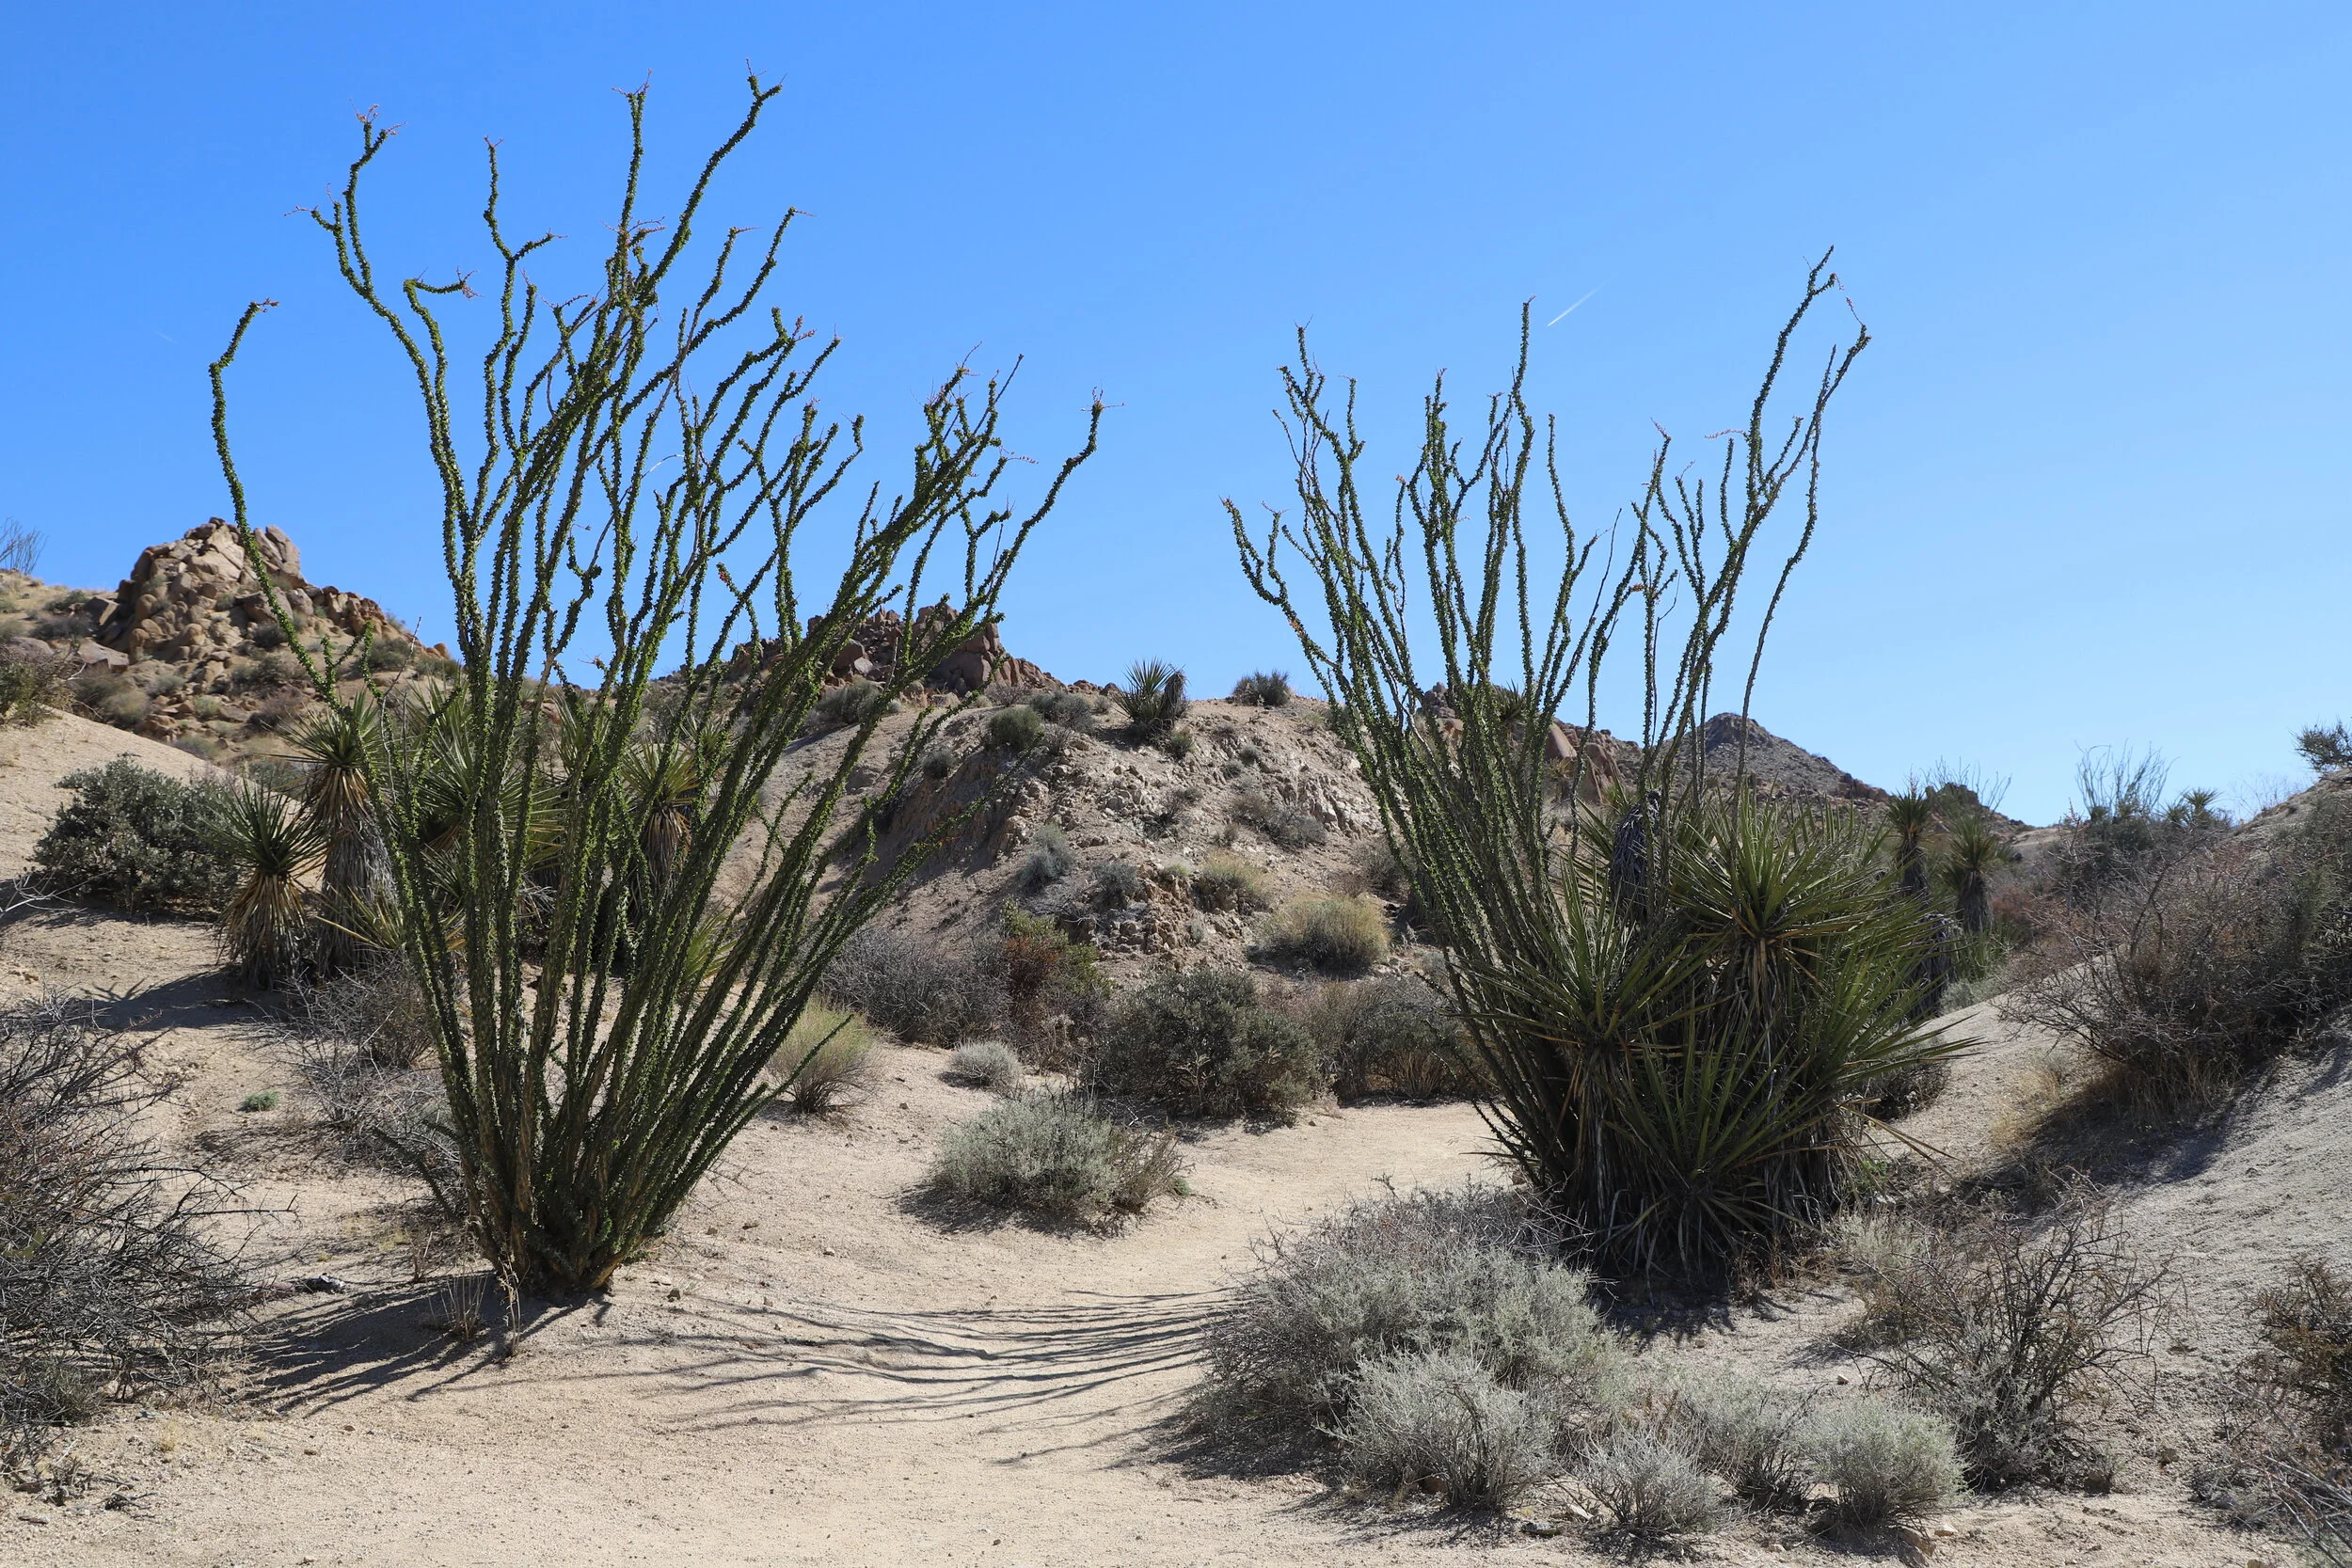
This Ocotillo Cactus has leaves meaning that it currently has enough water from a recent rain. To save water during drought periods, this cactus drops its leaves and uses the chlorophyll in its green stems to create energy.
Bajada Trail
2 - Cottonwood Springs / Mastodon Peak
Distance - Cottonwood Springs is a quick out and back 0.1 mile hike to see the fan palm oasis. Continue on the Mastodon Peak Loop hike for a longer 2.4 mile hike
Elevation Gain - 375 ft.
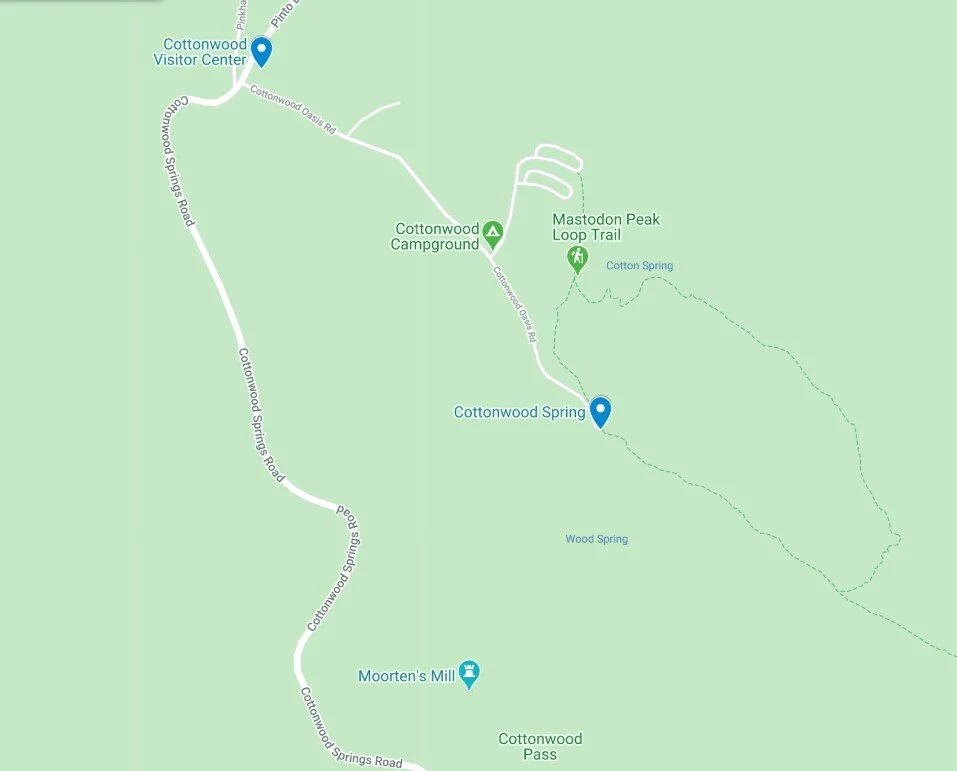
Trailhead Location - From the southern entrance, turn right on Cottonwood Oasis Road, just before the Visitor Center parking lot. To find the fan palms with minimal hiking needed, head all the way to the end of the road (pin labeled Cottonwood Spring). There is just a short descent down to the palm trees. Turn back when you are ready. If you want to go further, continue on the Mastodon Peak Loop Trail.
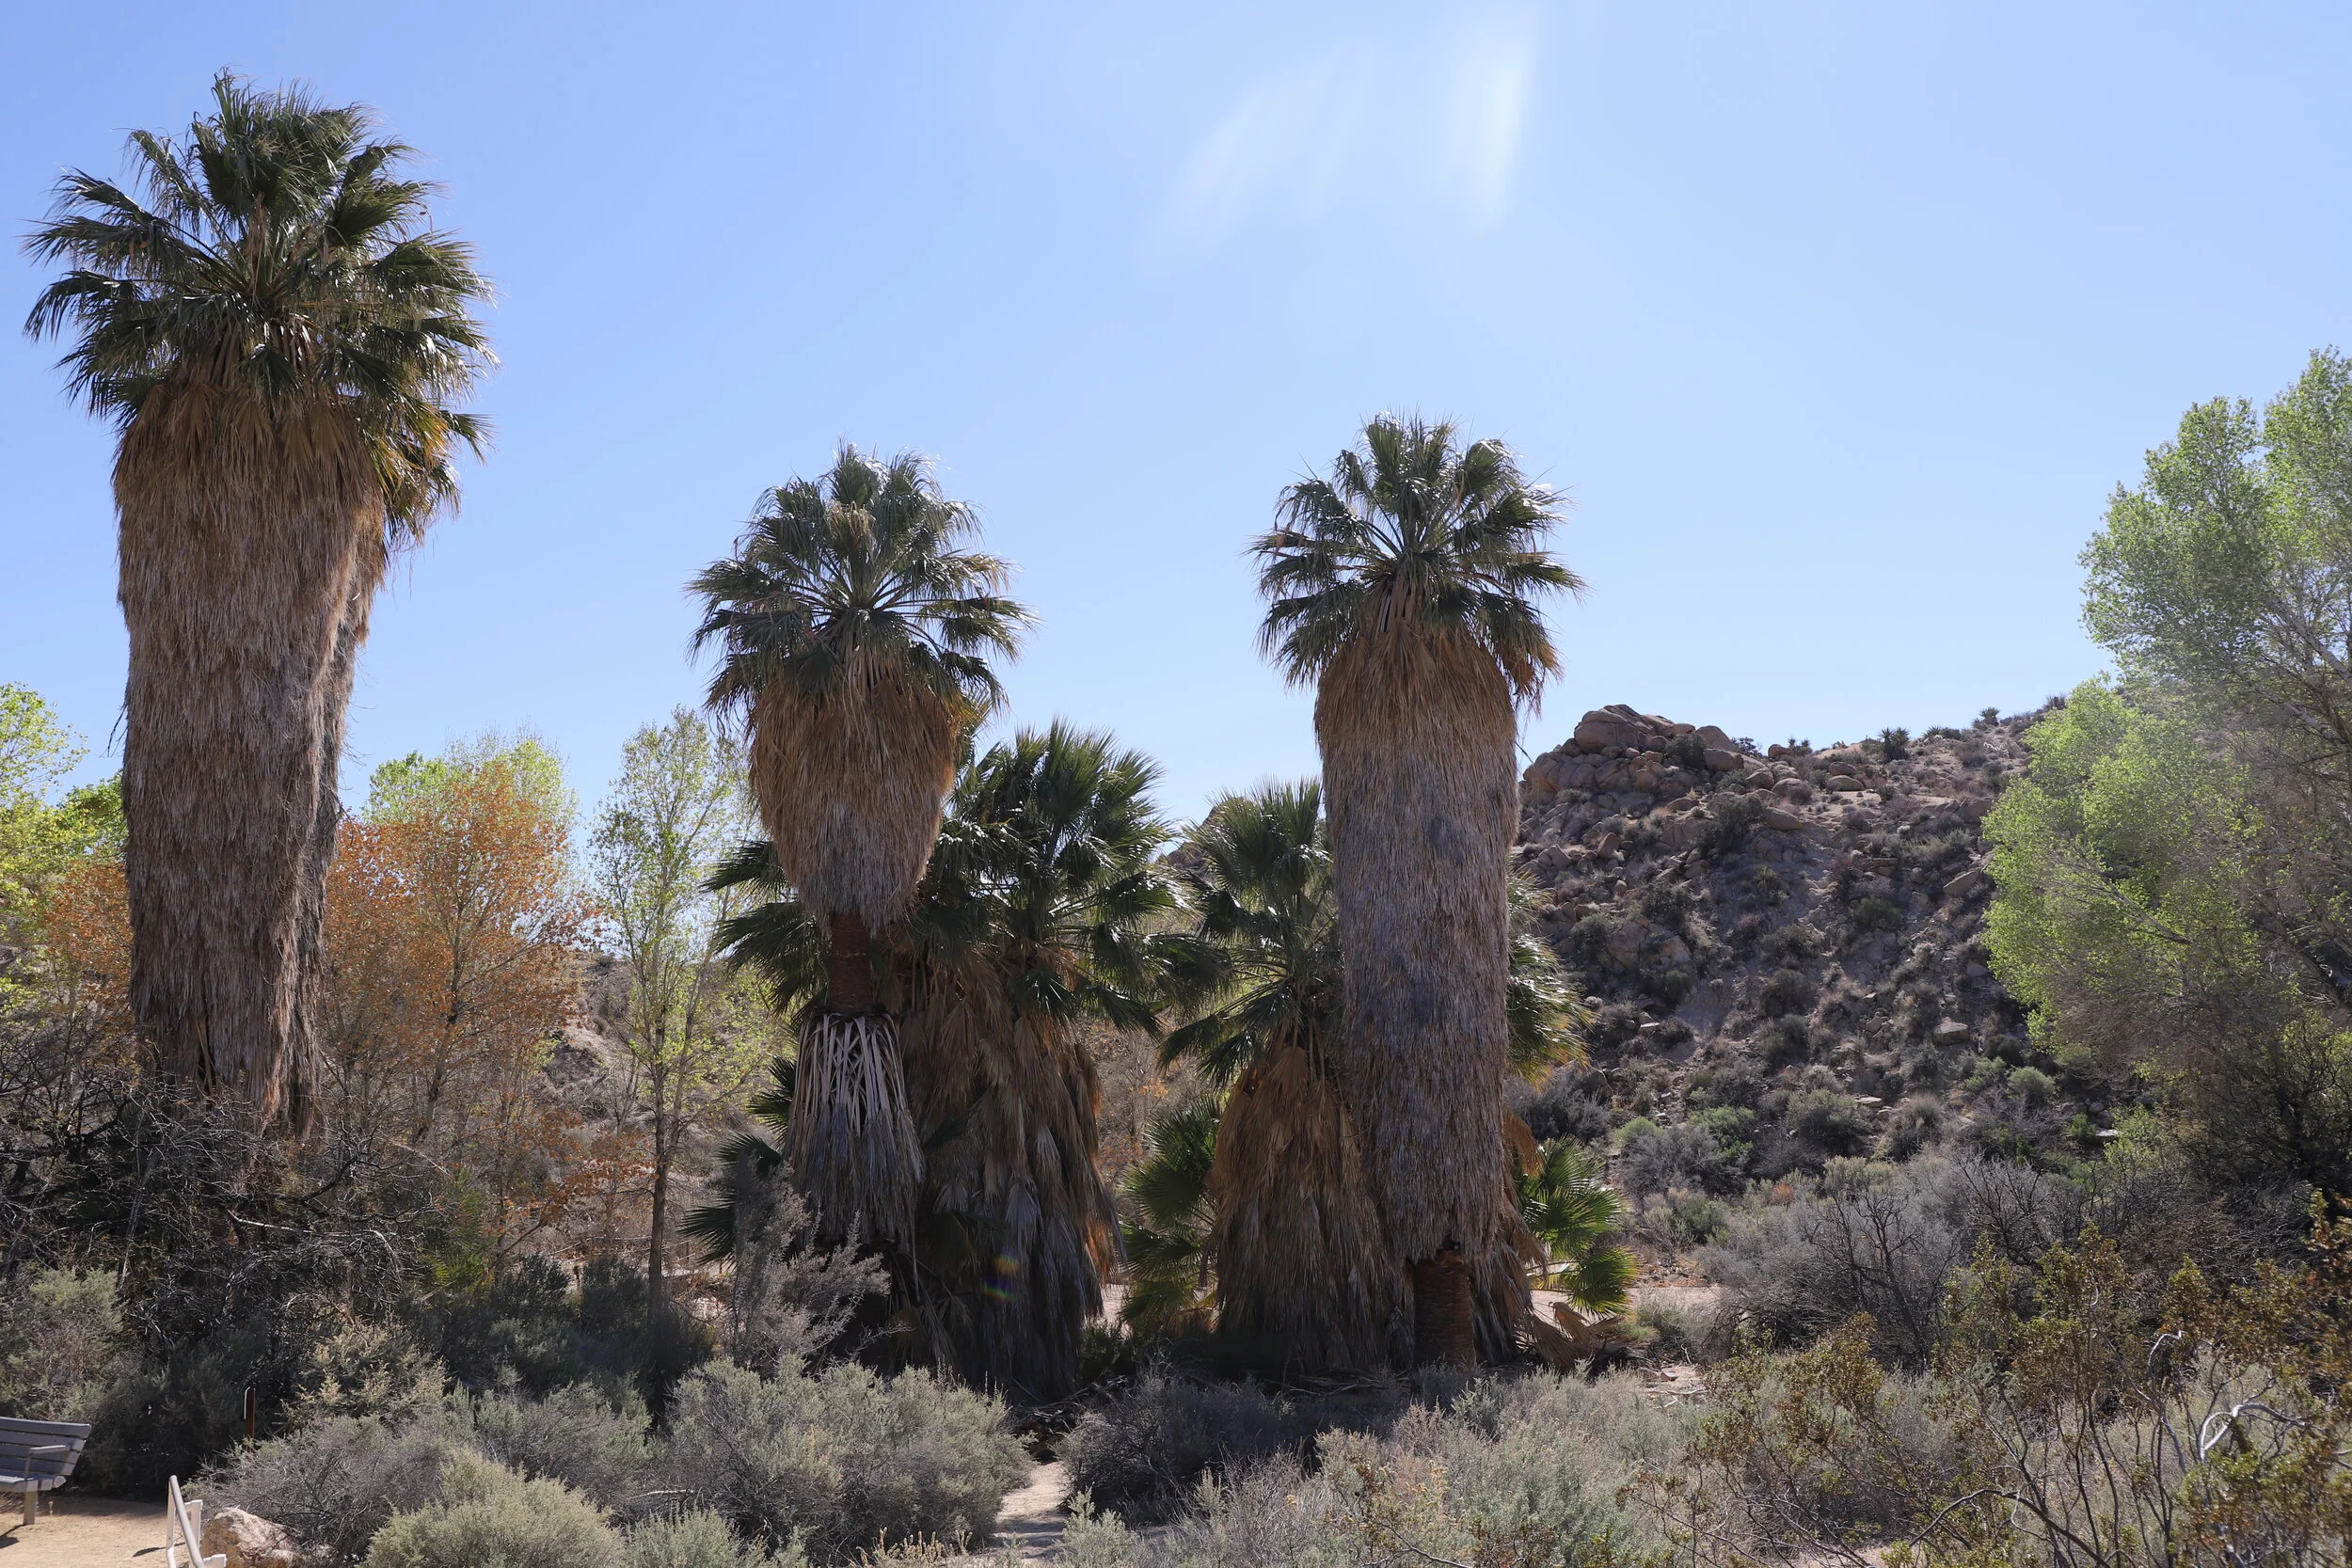
Cottonwood Springs - Very strange to see palm trees, which require a lot of water, out in the desert. There is a spring, which was created during an earthquake, which gives water to these palm trees and creates an oasis.
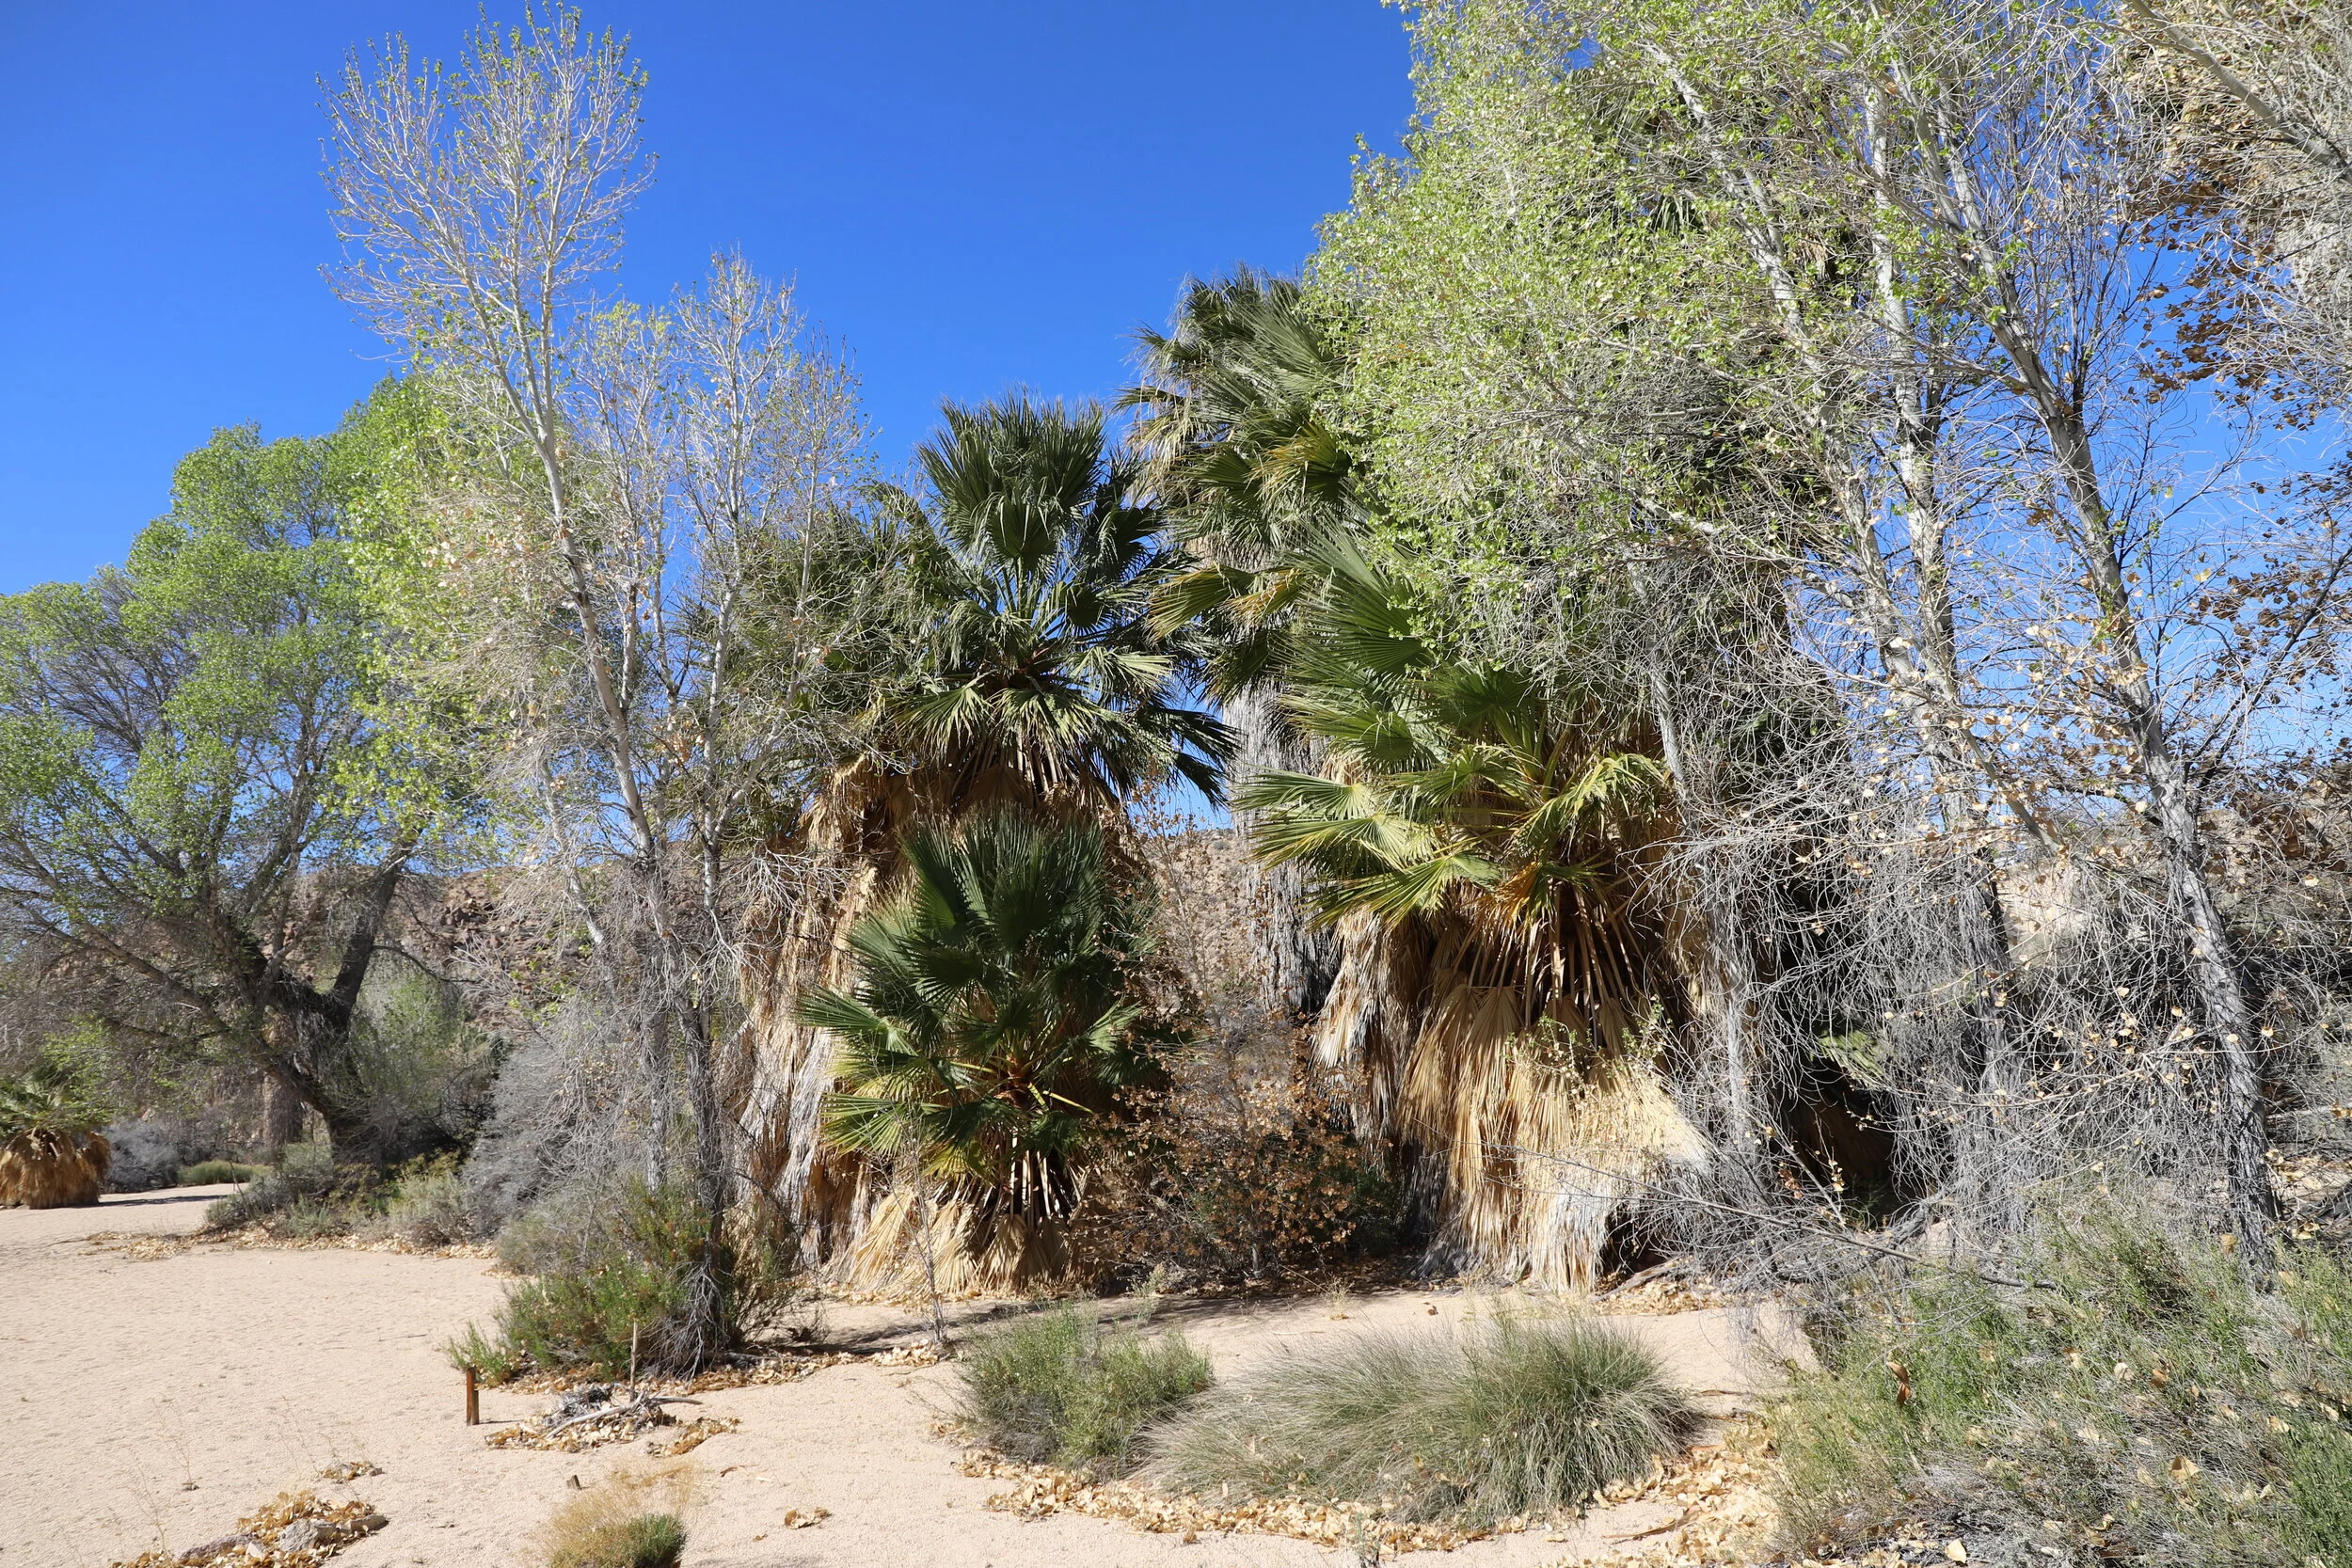
Cottonwood Springs
Continuing along the Mastodon Trail
Continuing along Mastodon Trail
There are some steps along the trail, and at the top, the views are beautiful. This is where I turned around due to having only one day and wanting to see other parts of the park.
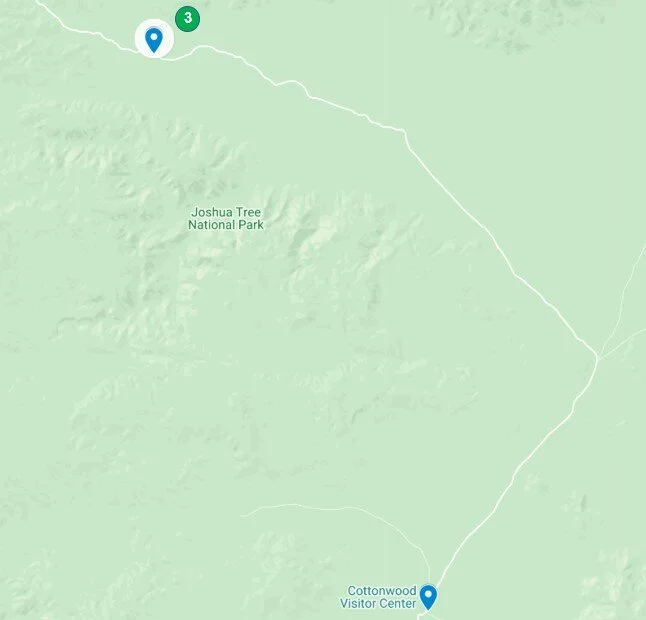
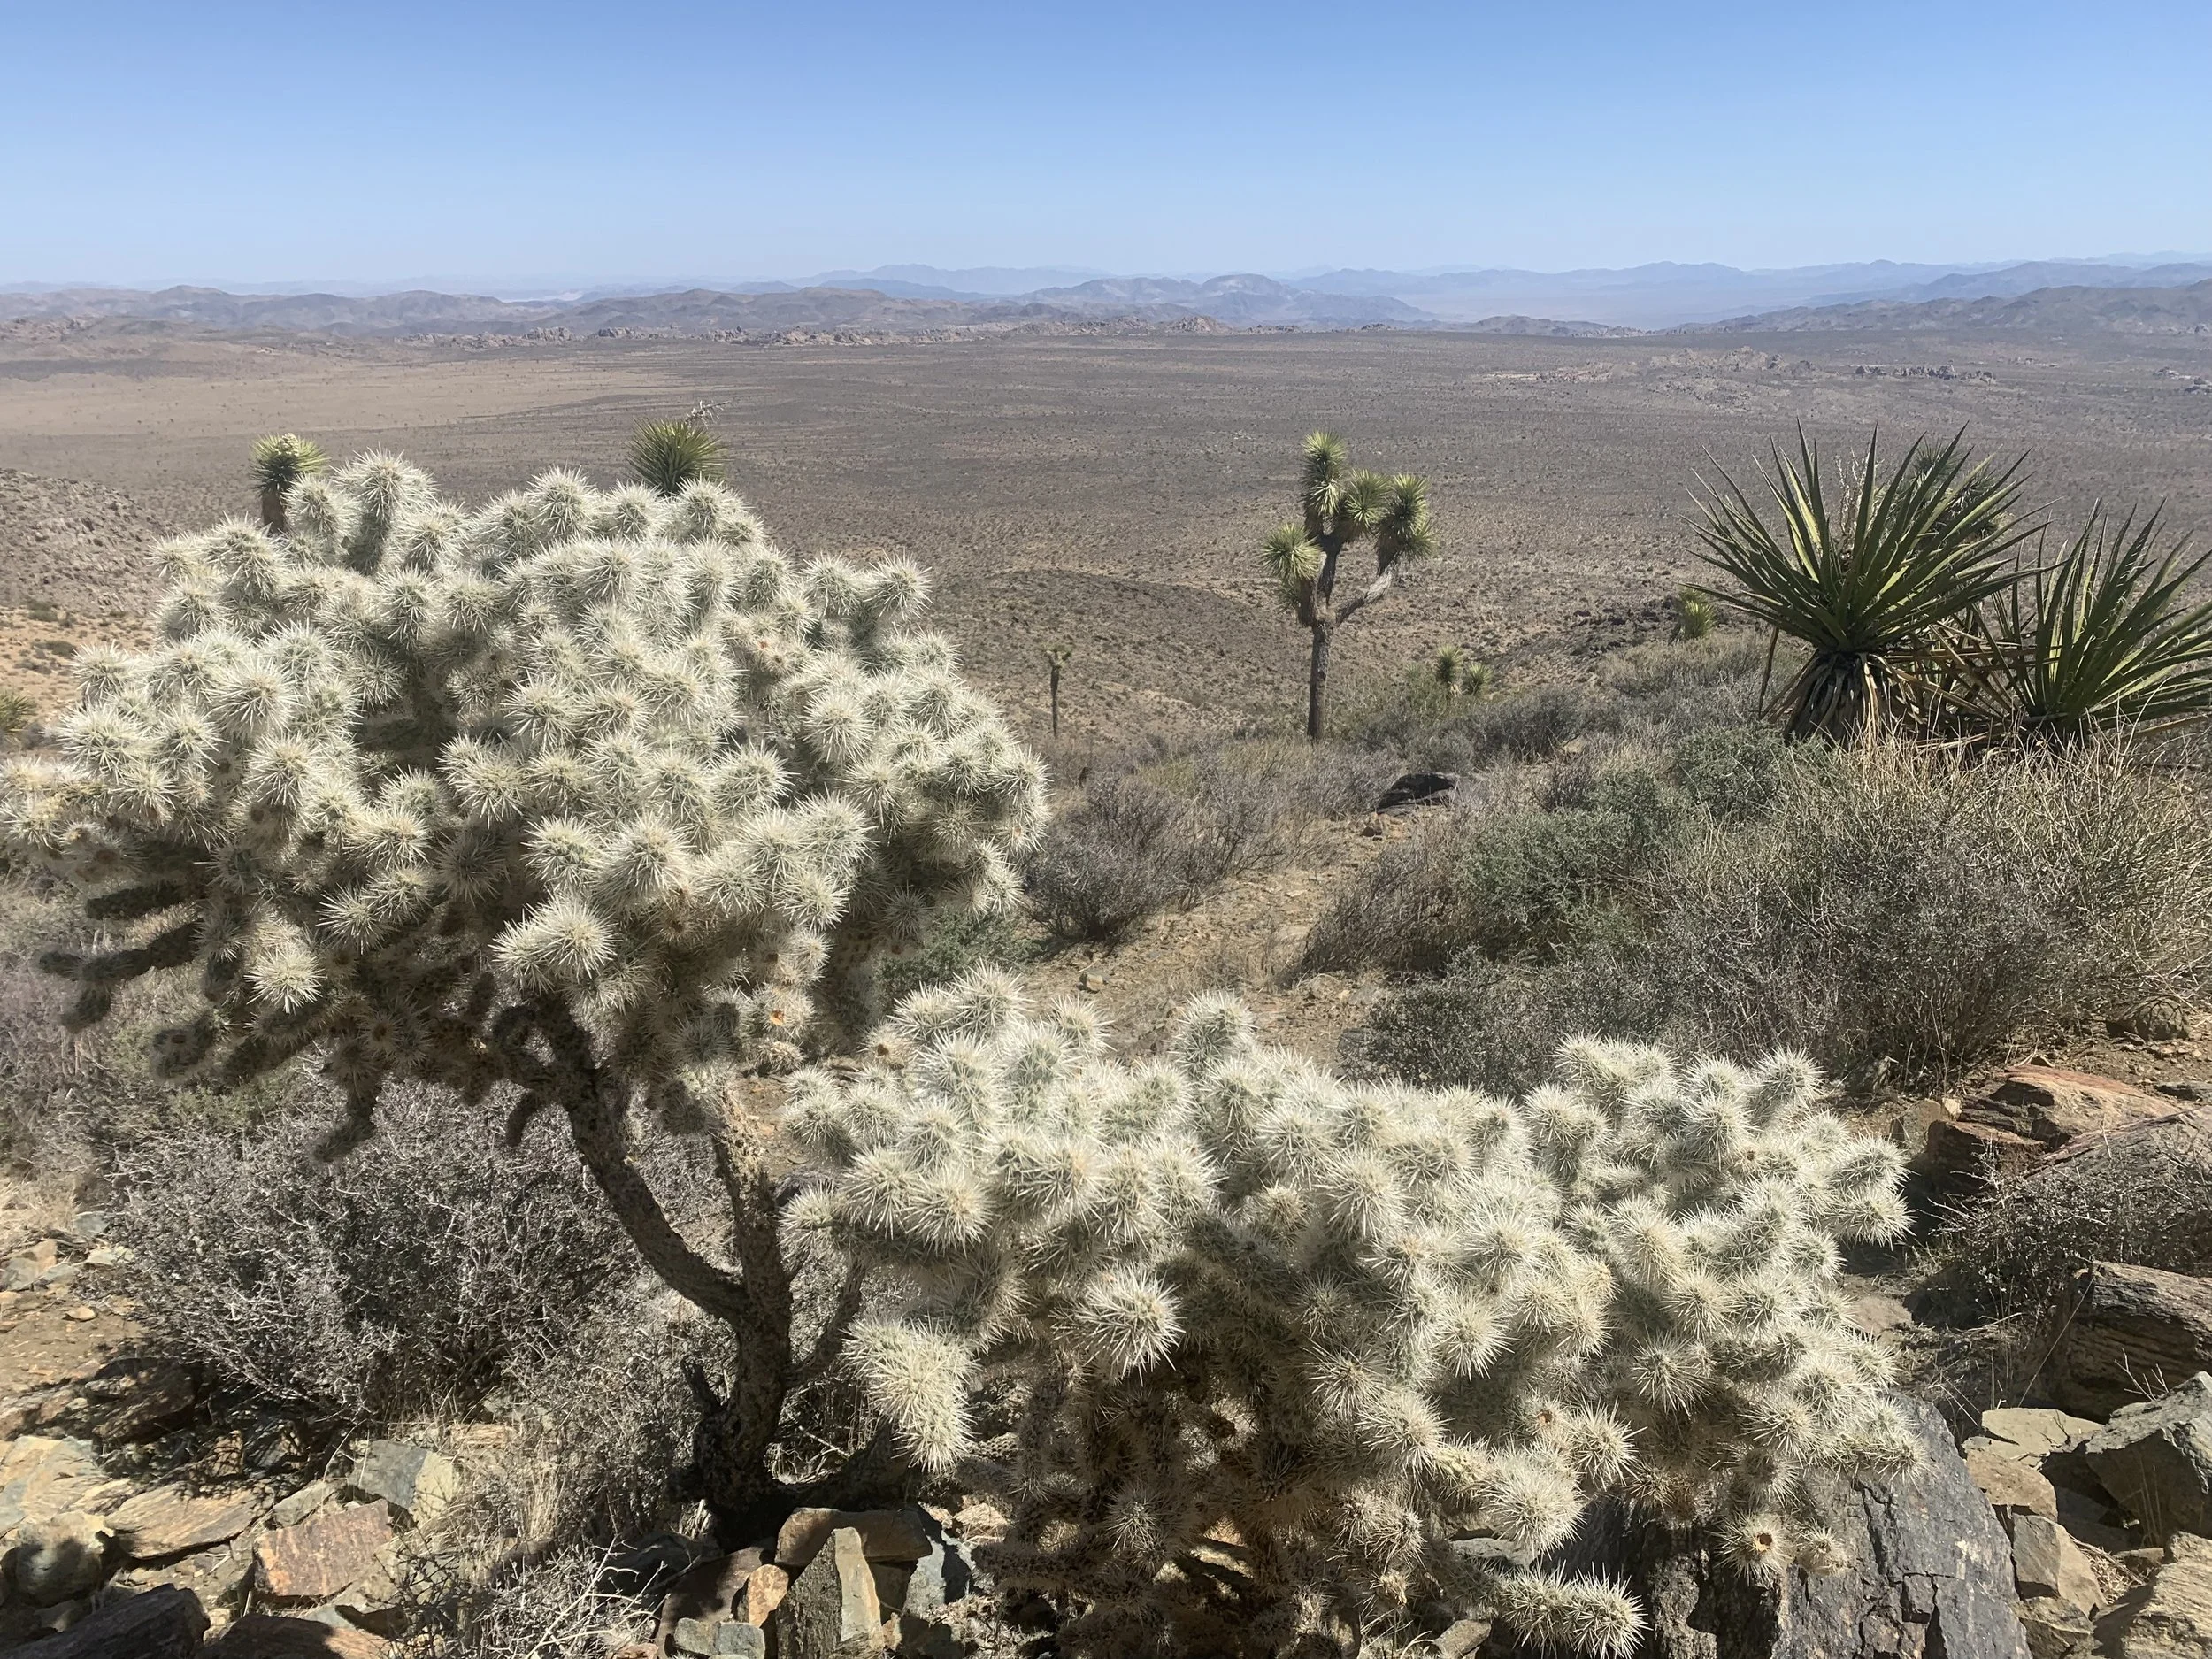
3 - Cholla Cactus Garden
Distance - 0.25 miles
Elevation Gain - N/A
Trailhead Location - The Cholla Cactus Garden trailhead is 20 miles from the Cottonwood Visitor Center along the Pinto Basin Road
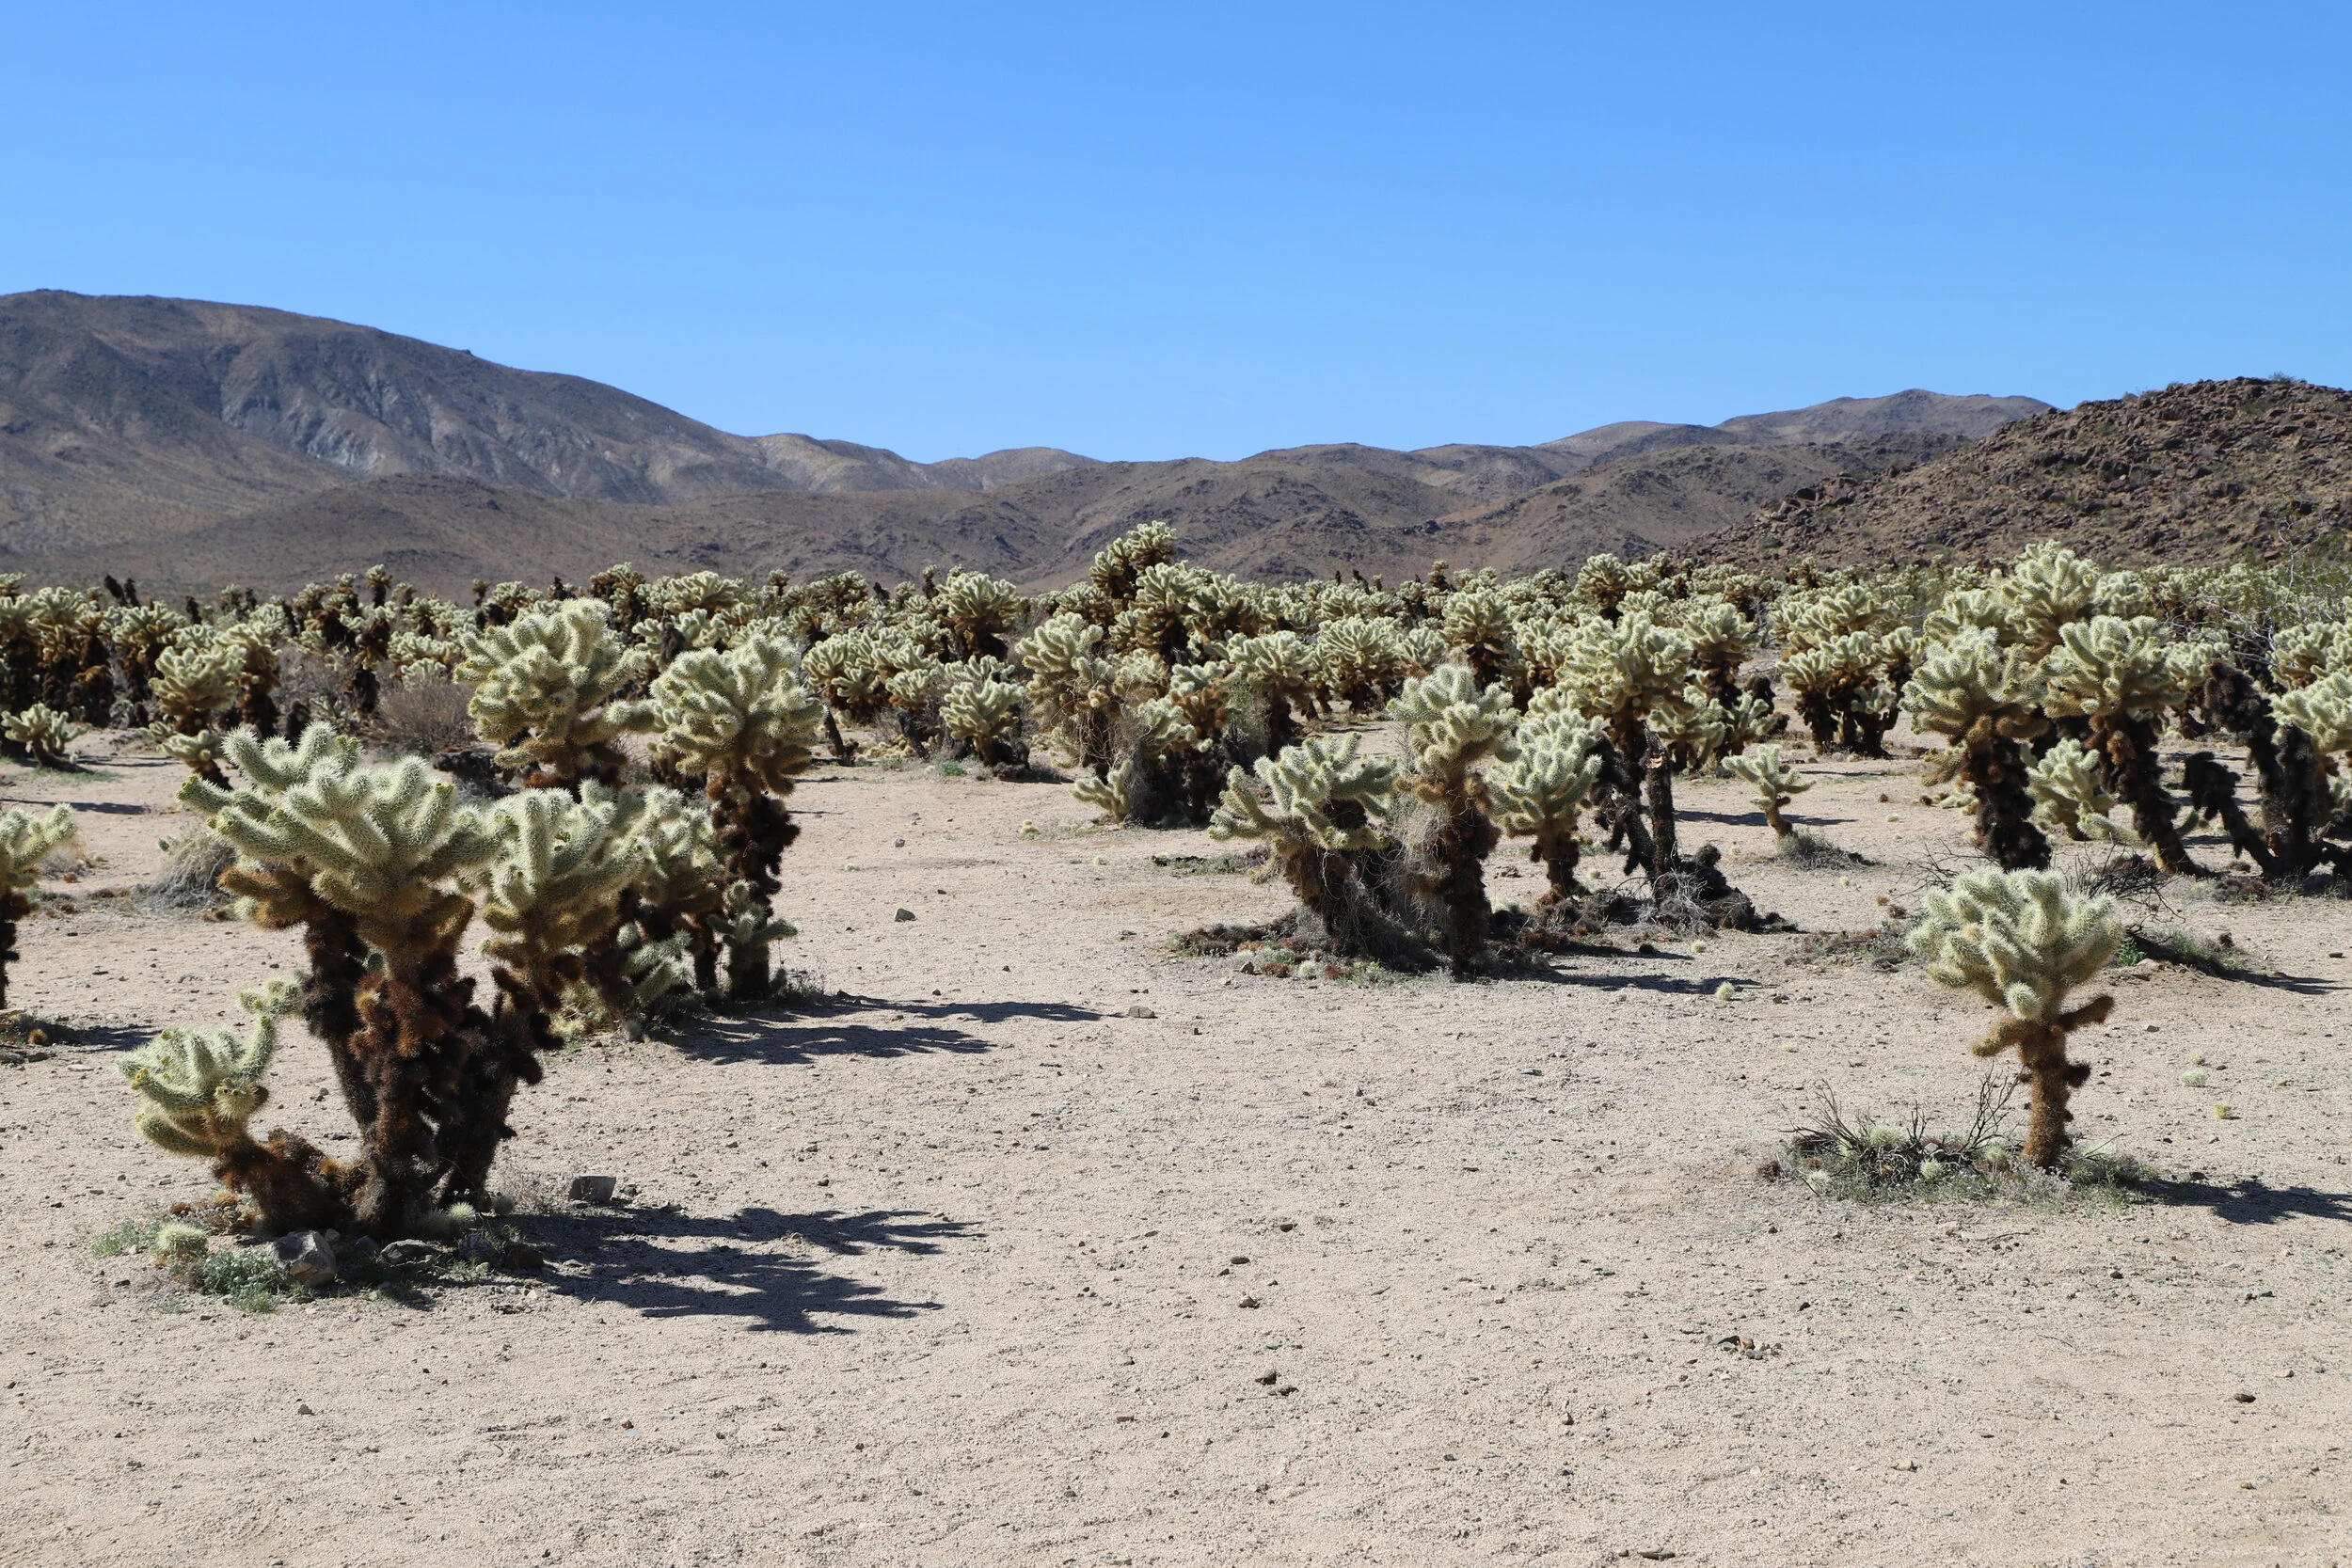
3 - Cholla Cactus Garden
This trail was one of my favorites in the park. The pictures don’t show this well; there are tens of thousands of cholla cactus, everywhere. I am a sucker for chollas - I love taking pictures of these fuzzy looking plants. If you have little children, I wouldn’t recommend this trail though. The cactus are everywhere, and it would be very easy to run into one accidentally.
Cholla Cactus Garden
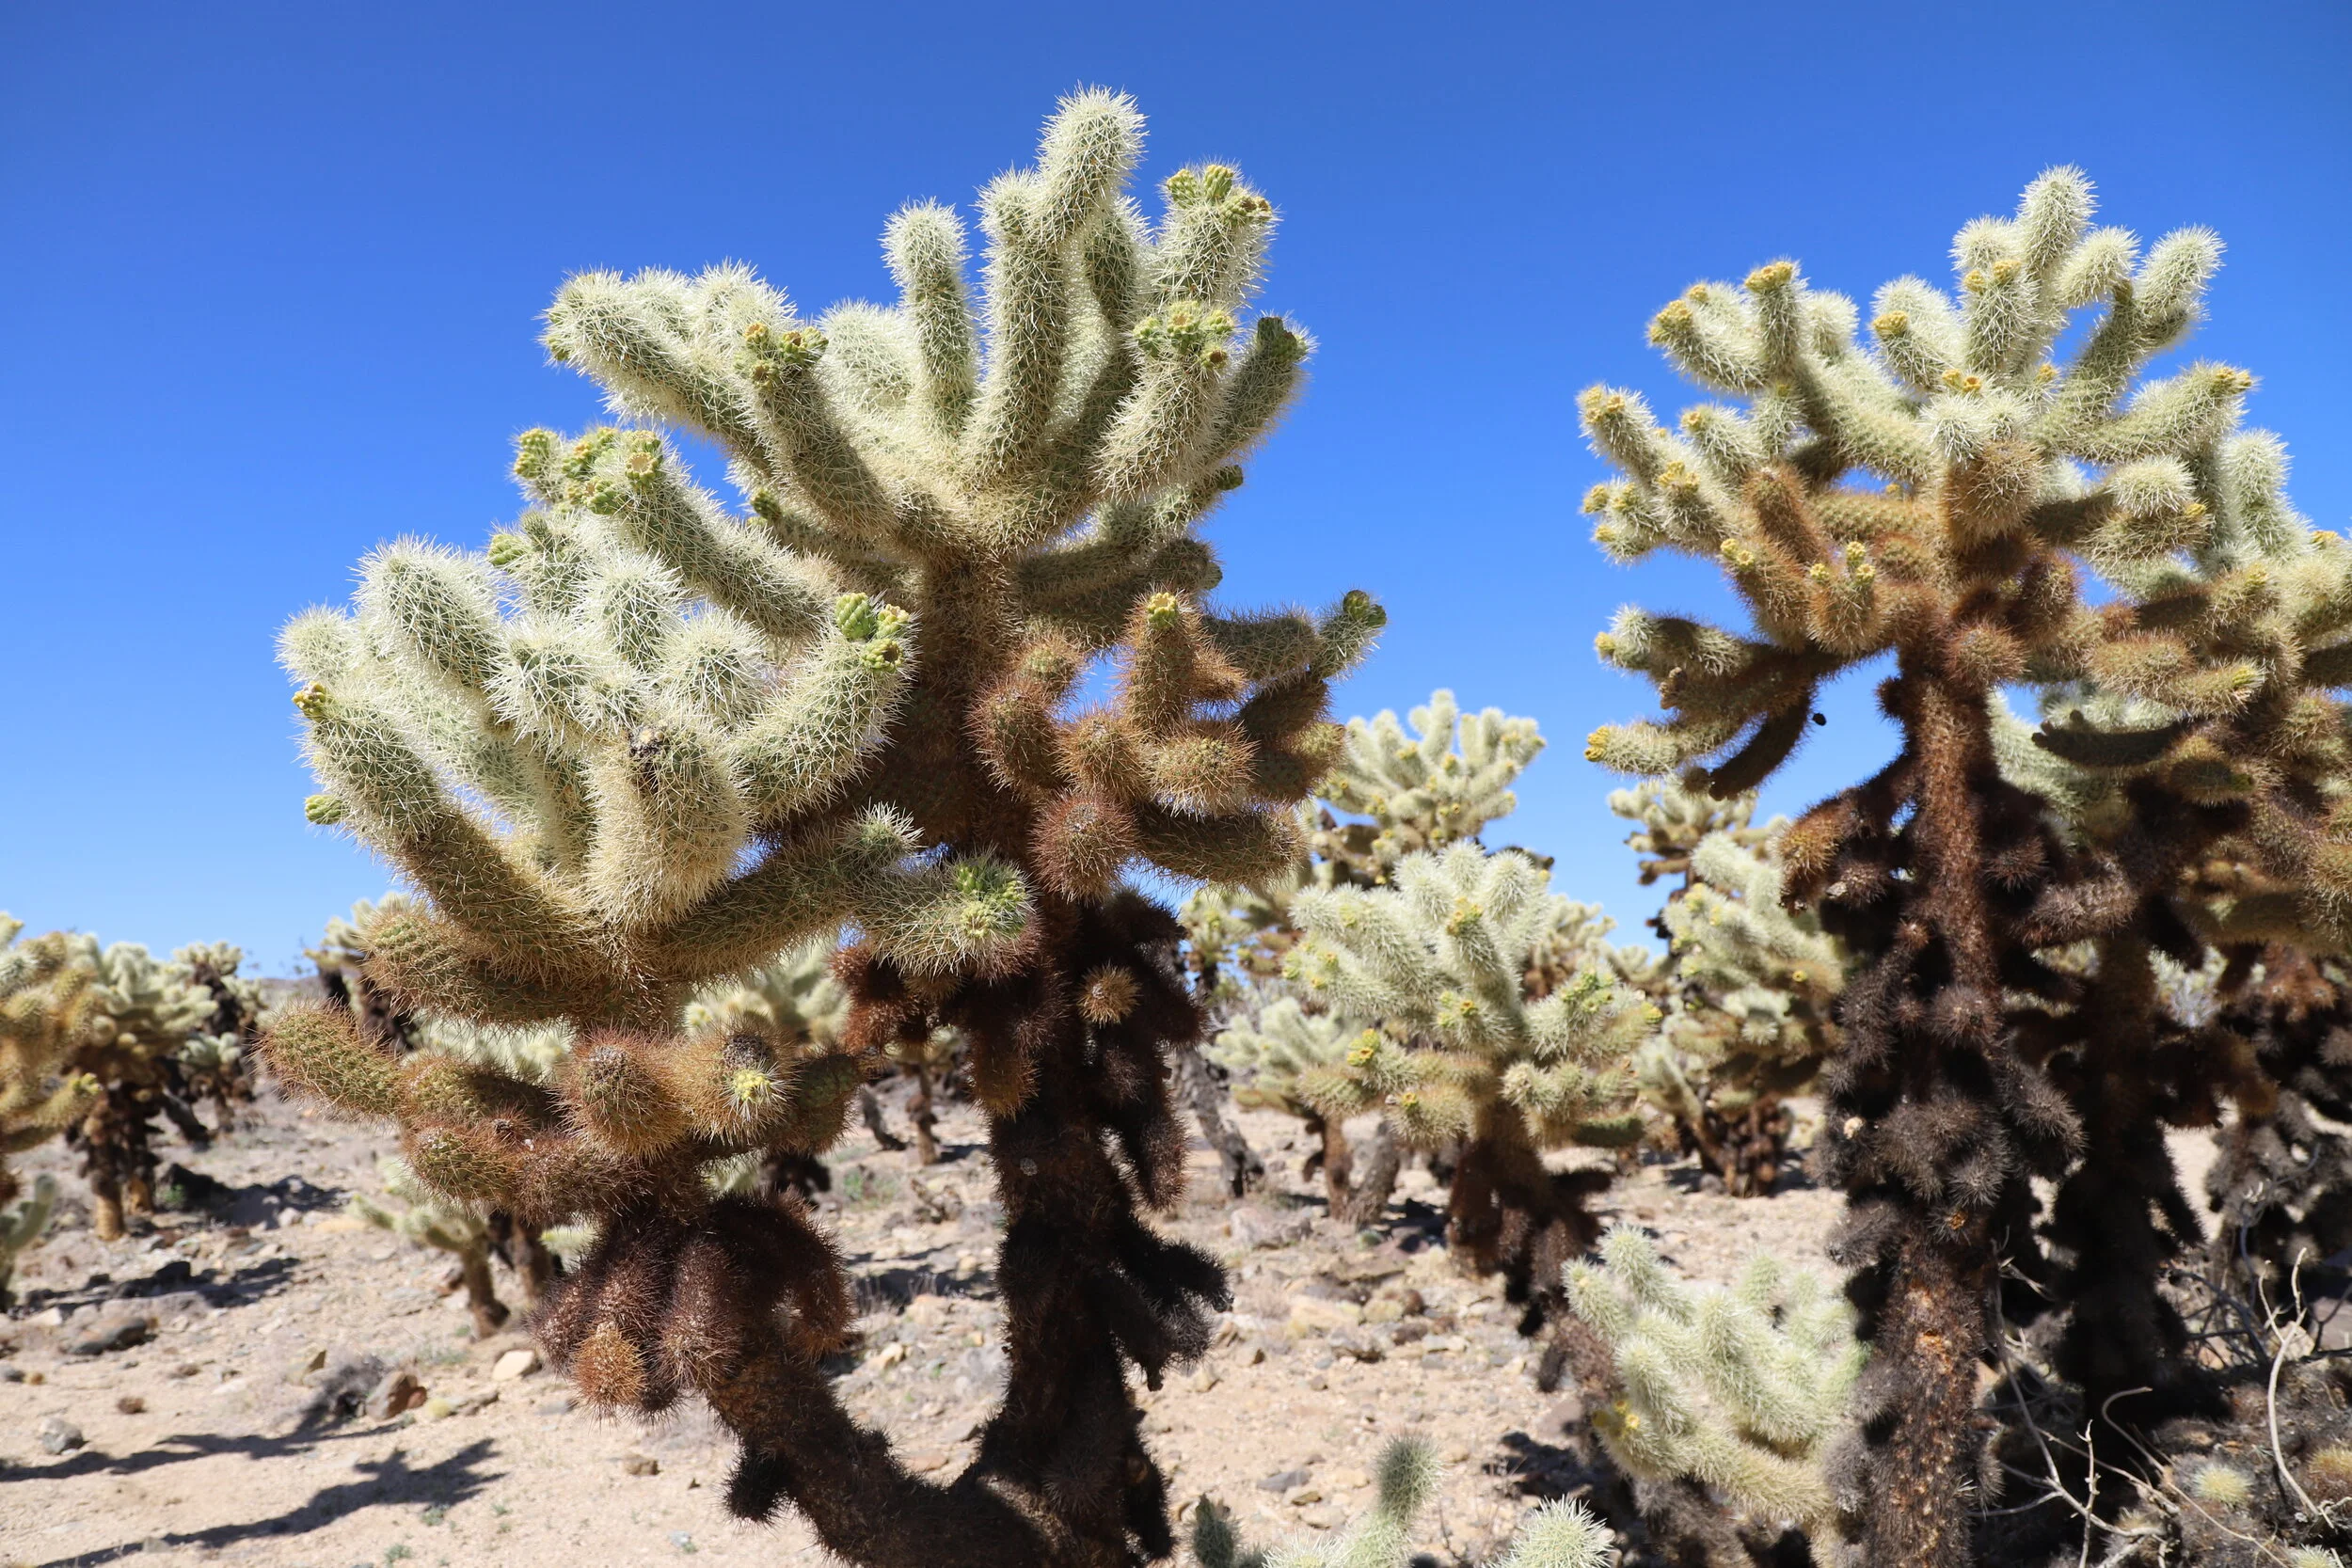
More Cholla
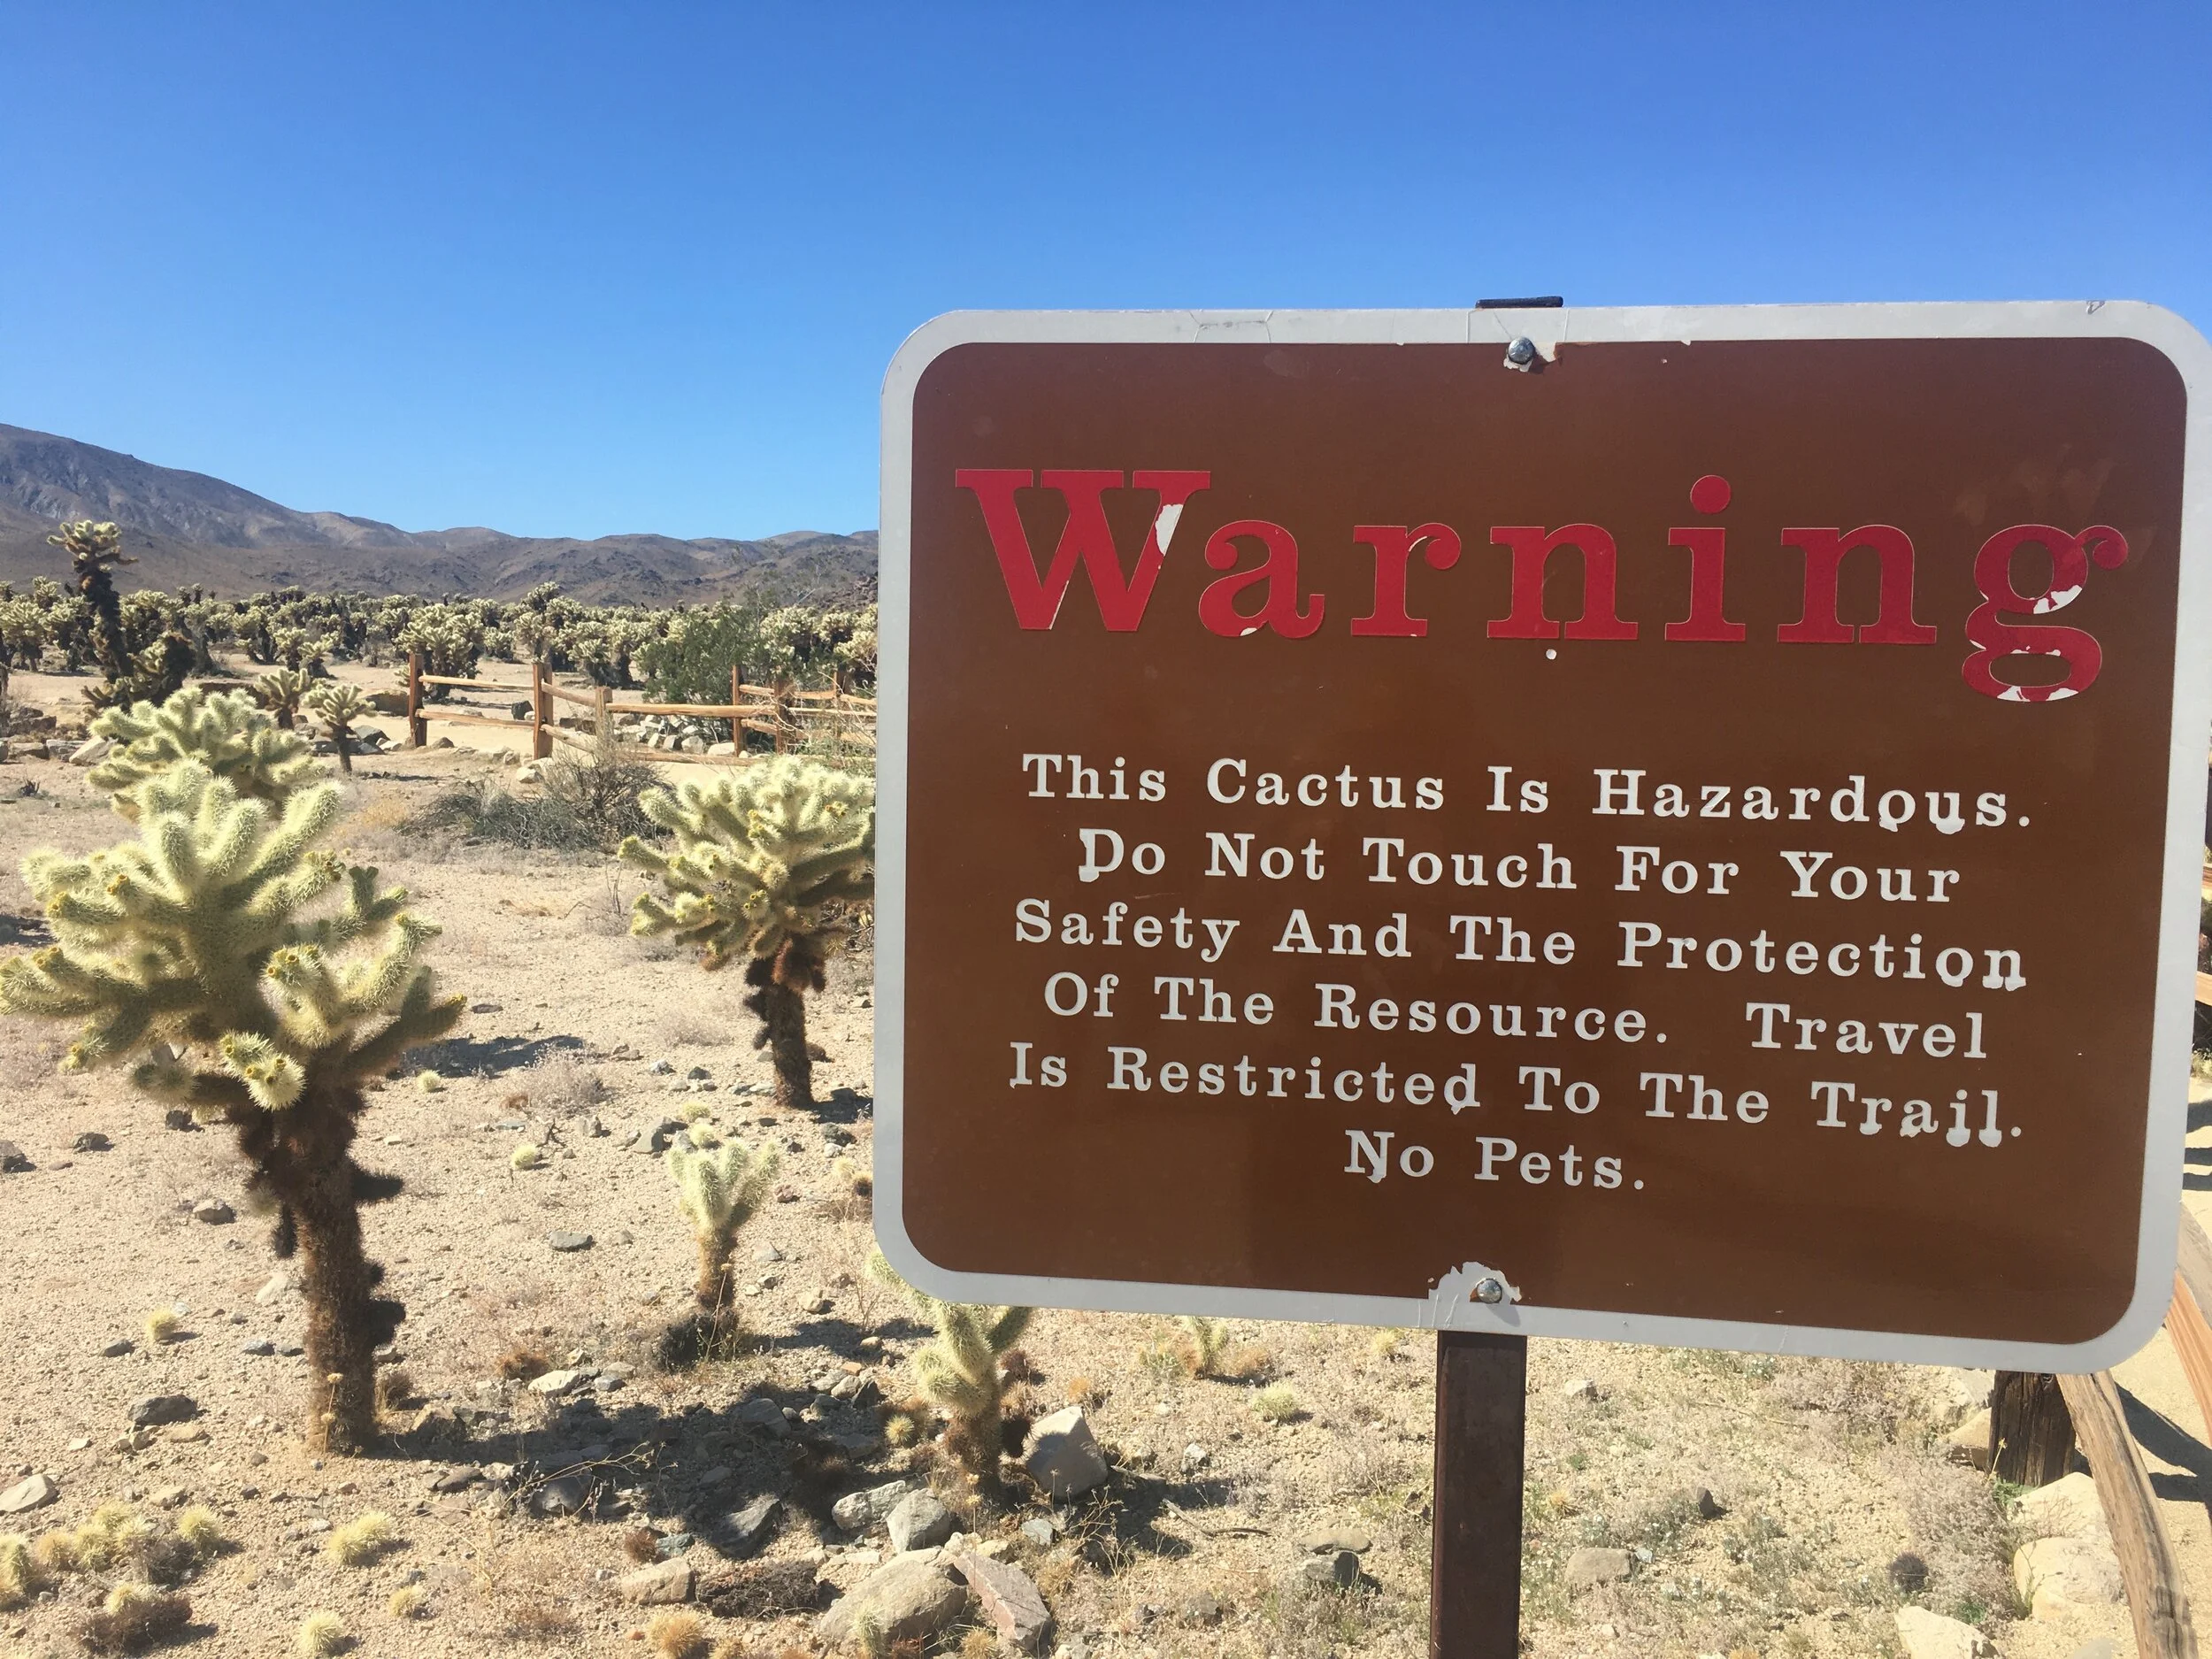
I love this sign. As someone who has slipped and fallen in the desert and slid right into a cactus, this is a valid warning. This sign is not to protect the cactus - they will protect themselves :)
4 - Arch Rock
Distance - 0.5 mile loop
Elevation Gain - N/A
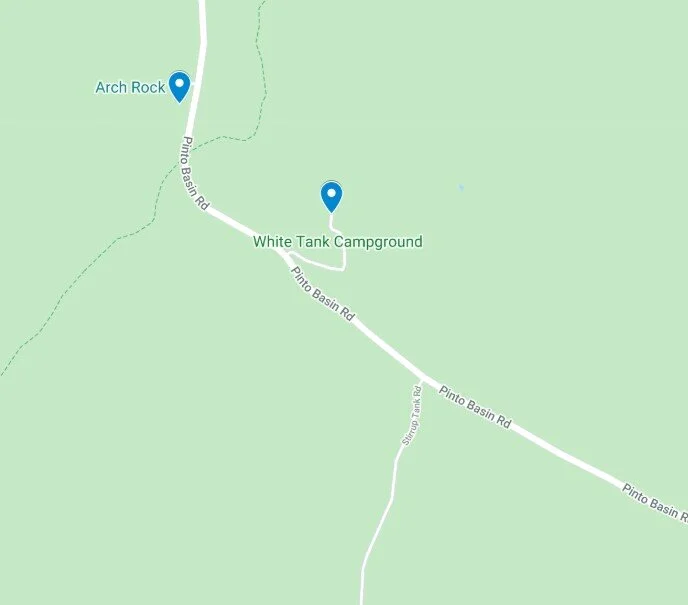
Trailhead Location - If parking is available, the shortest trail is in the White Tank Campground. If you park at the main trailhead, there is an out and back part of the trail, which increases it to 1.2 miles. This trail is not marked on the park brochures, which I didn’t realize as I planned my trip. I was looking Arch Rock while in Joshua Tree, but never found it. I had an approximate location of the trailhead, but it was incorrect and I hadn’t verified the trailhead on a map while I had access to the Internet. The below map is from googlemaps, and I assume that it’s accurate. The White Tank Campground is clearly marked on the road and should be a good marker as reference.
5 - Skull Rock / Discovery Trail
Distance - N/A - Skull Rock is visible from the road. If you want to do some hiking around the rocks, there is a 1.7 mile loop hike. Note that Skull Rock, Face Rock, Discovery Trail, and Split Rock Loop are all in the same area and you will be on different portions of each trail. See the map below. This is not marked well in the park maps.
Elevation Gain - 150 ft
Trailhead Location - There is a small parking area marked Skull Rock. If that is full, street parking is an option, or go to the Jumbo Rocks Campground.
The parking lot for Skull Rock is marked. Jumbo Rocks Campground is another option if you want to hike the full loop.
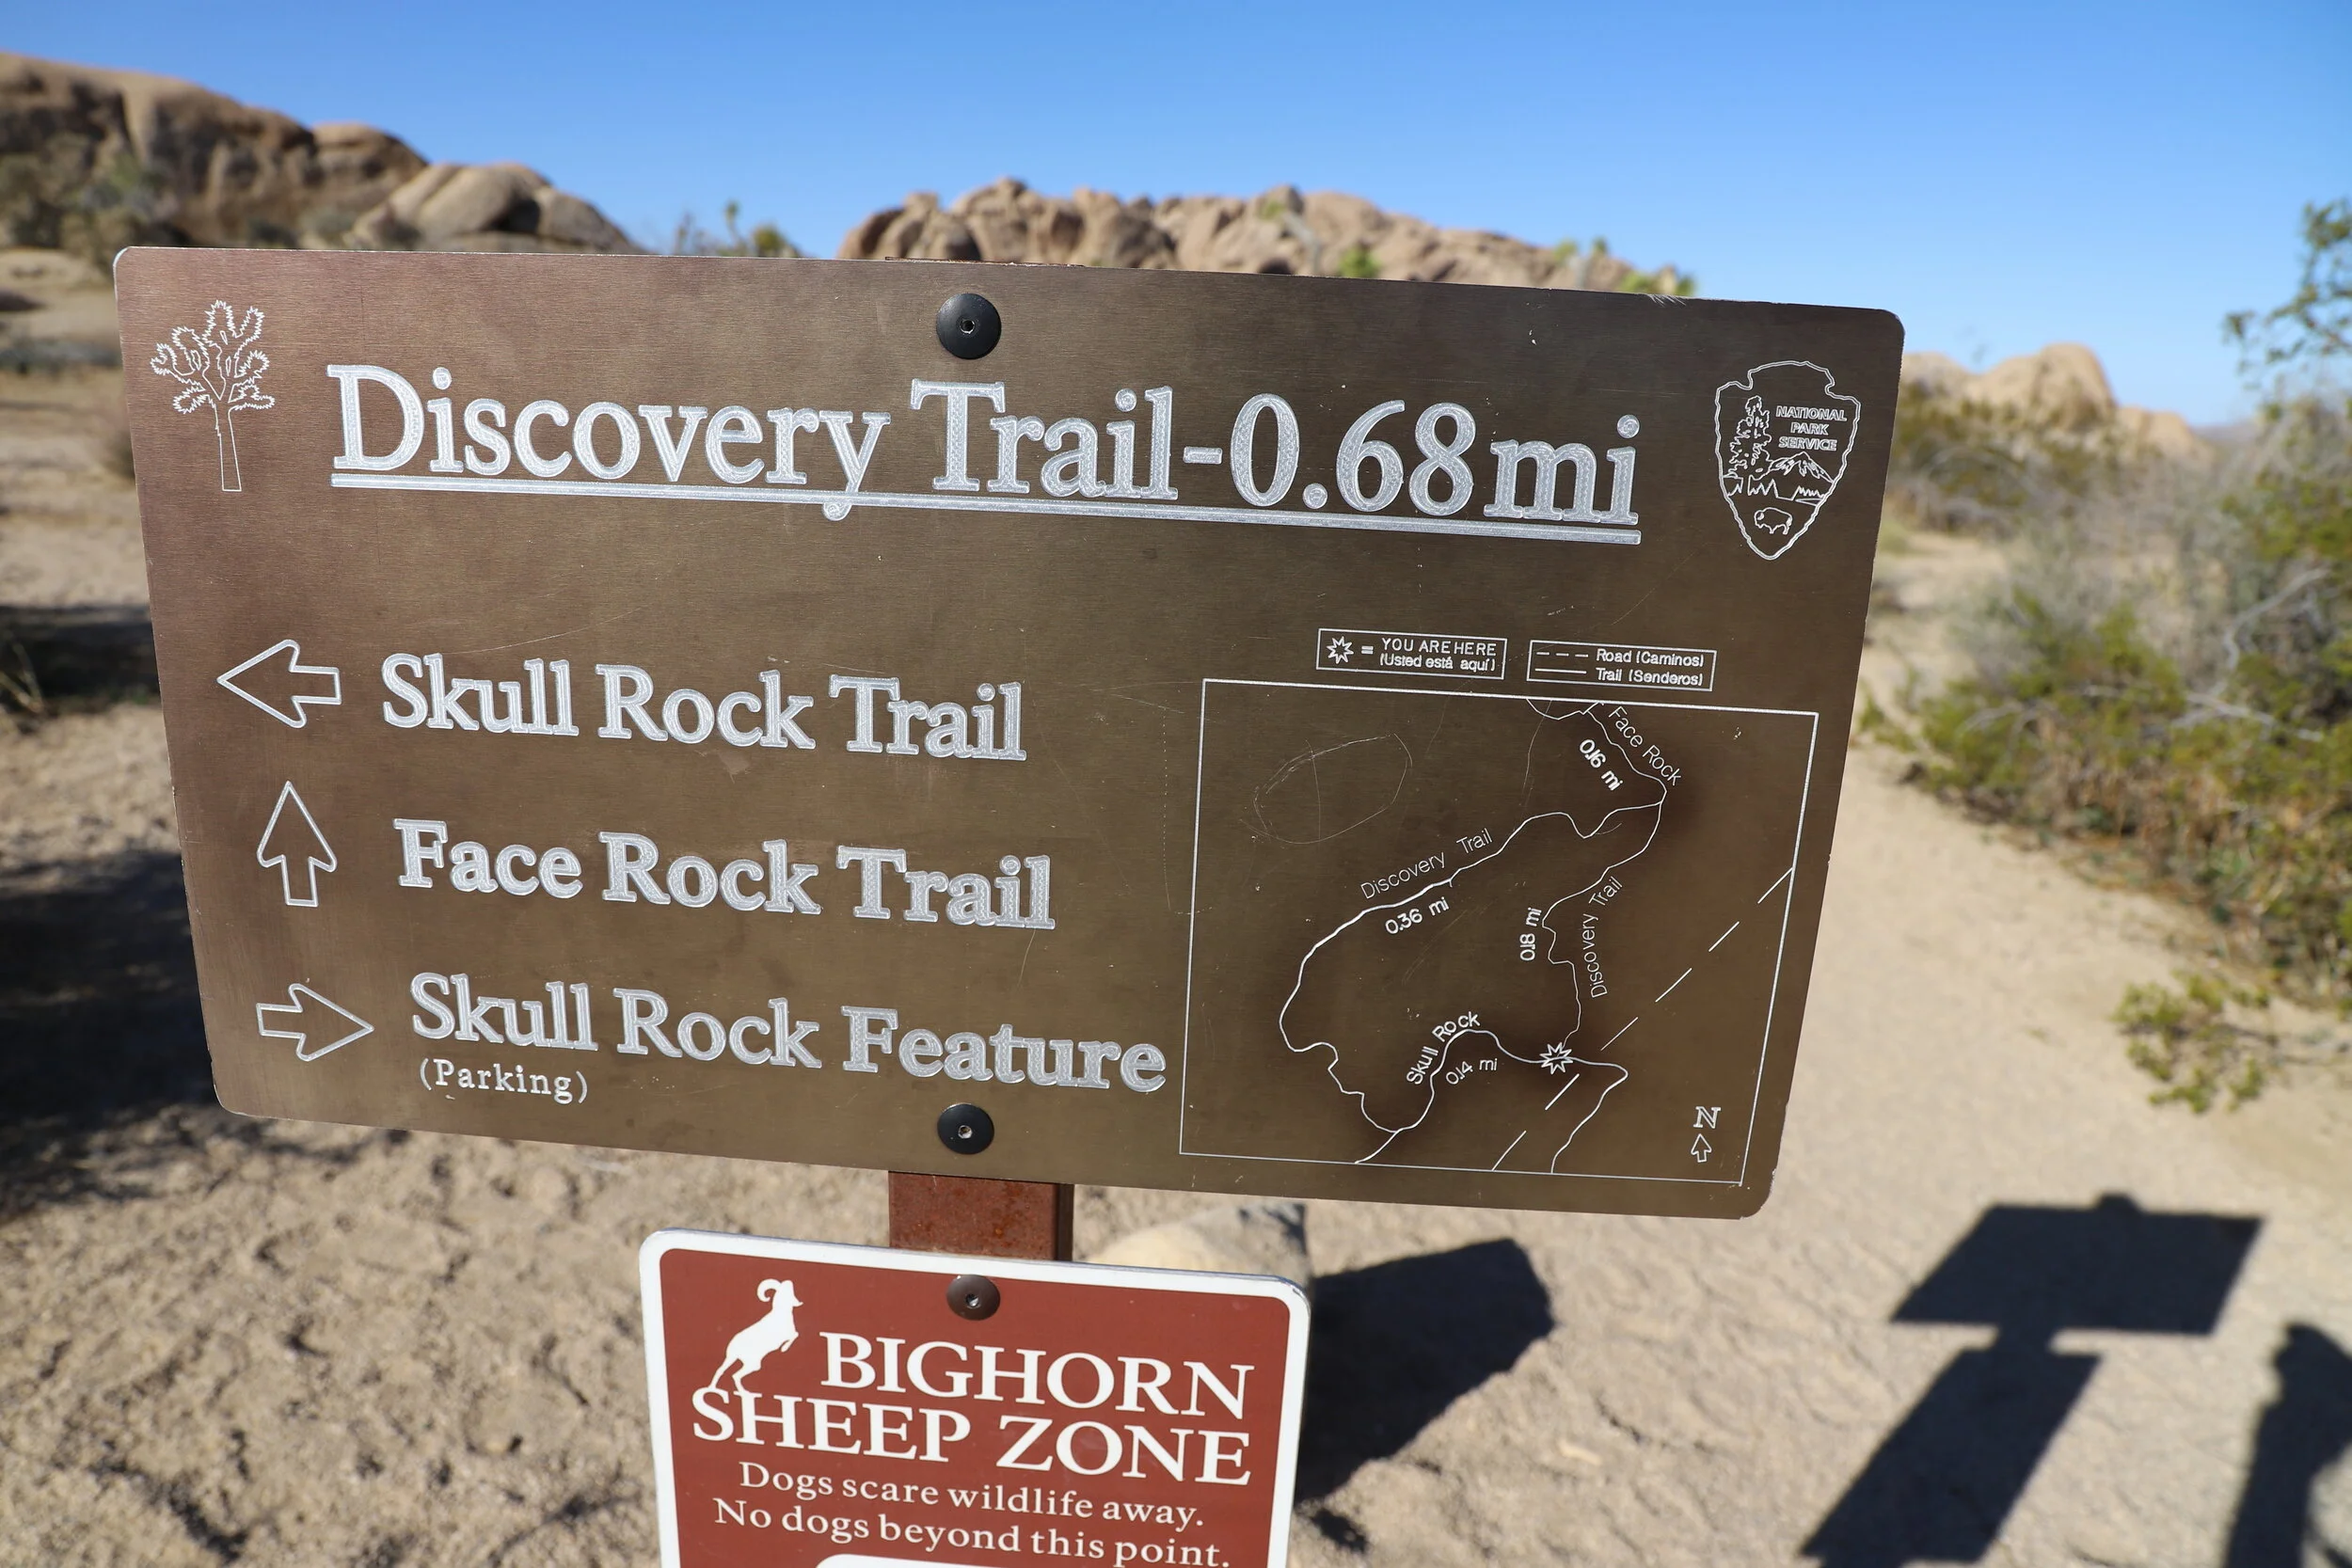
This is the map of Discovery Trail. The full Skull Rock Trail follows the bottom line and continues off the map. This was not obvious. See the below map.

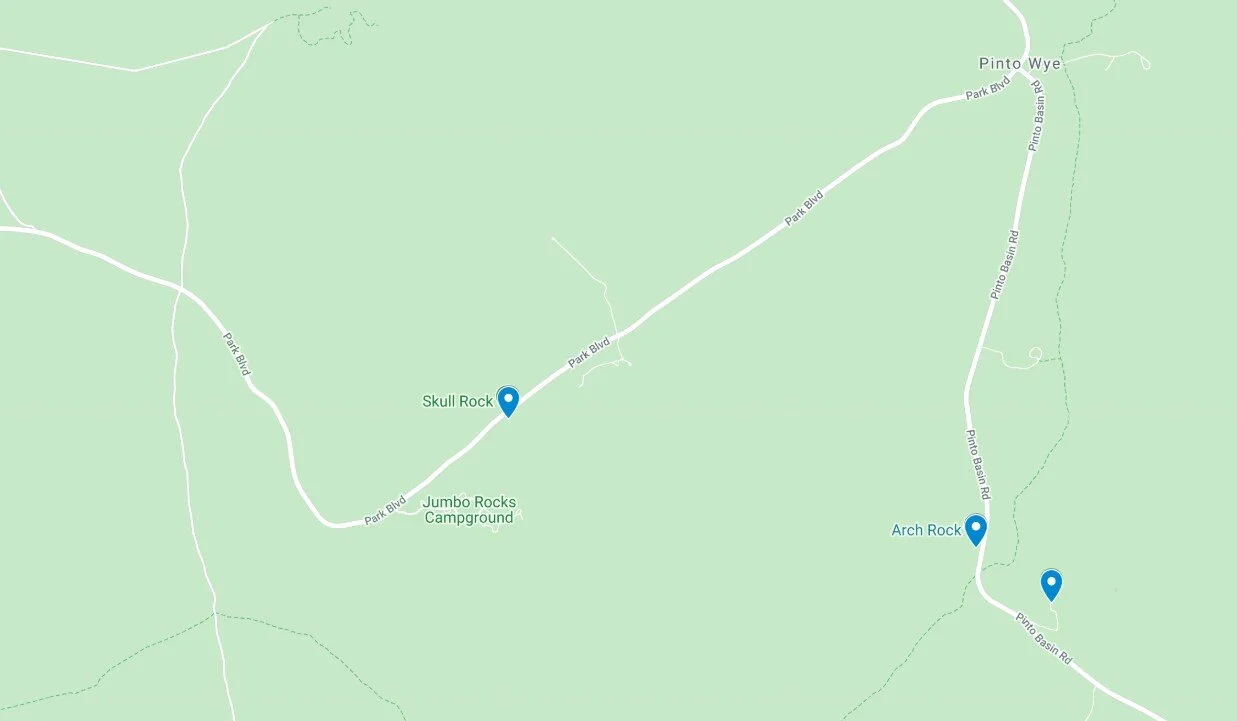
This is a map from GAIA GPS. Highlighted in yellow is the full Skull Rock Trail. Note that it crosses Park Blvd after Skull Rock and that you follow the road towards the Jumbo Rocks Campground to complete the loop.
I felt like this was a very confusing trail with the information I was provided (park brochures and trailhead maps) without having pre-downloaded a map. But that said, it was a fantastic place to hike. This trail just needs a bit of pre-work for you to enjoy yourself. Hopefully this information helps you prepare.
If you park next to Skull Rock, you can start your hike across Park Blvd. Just follow the pedestrian road crossing paint across Park Blvd. When you cross the street, if you go towards the right, there is a small loop - Discovery Trail that you can follow around until you get back to the Skull Rock Loop Trail. This is the first map above from the trailhead. I didn’t realize though that this was a separate loop and thought the picture was the whole Skull Rock Loop.
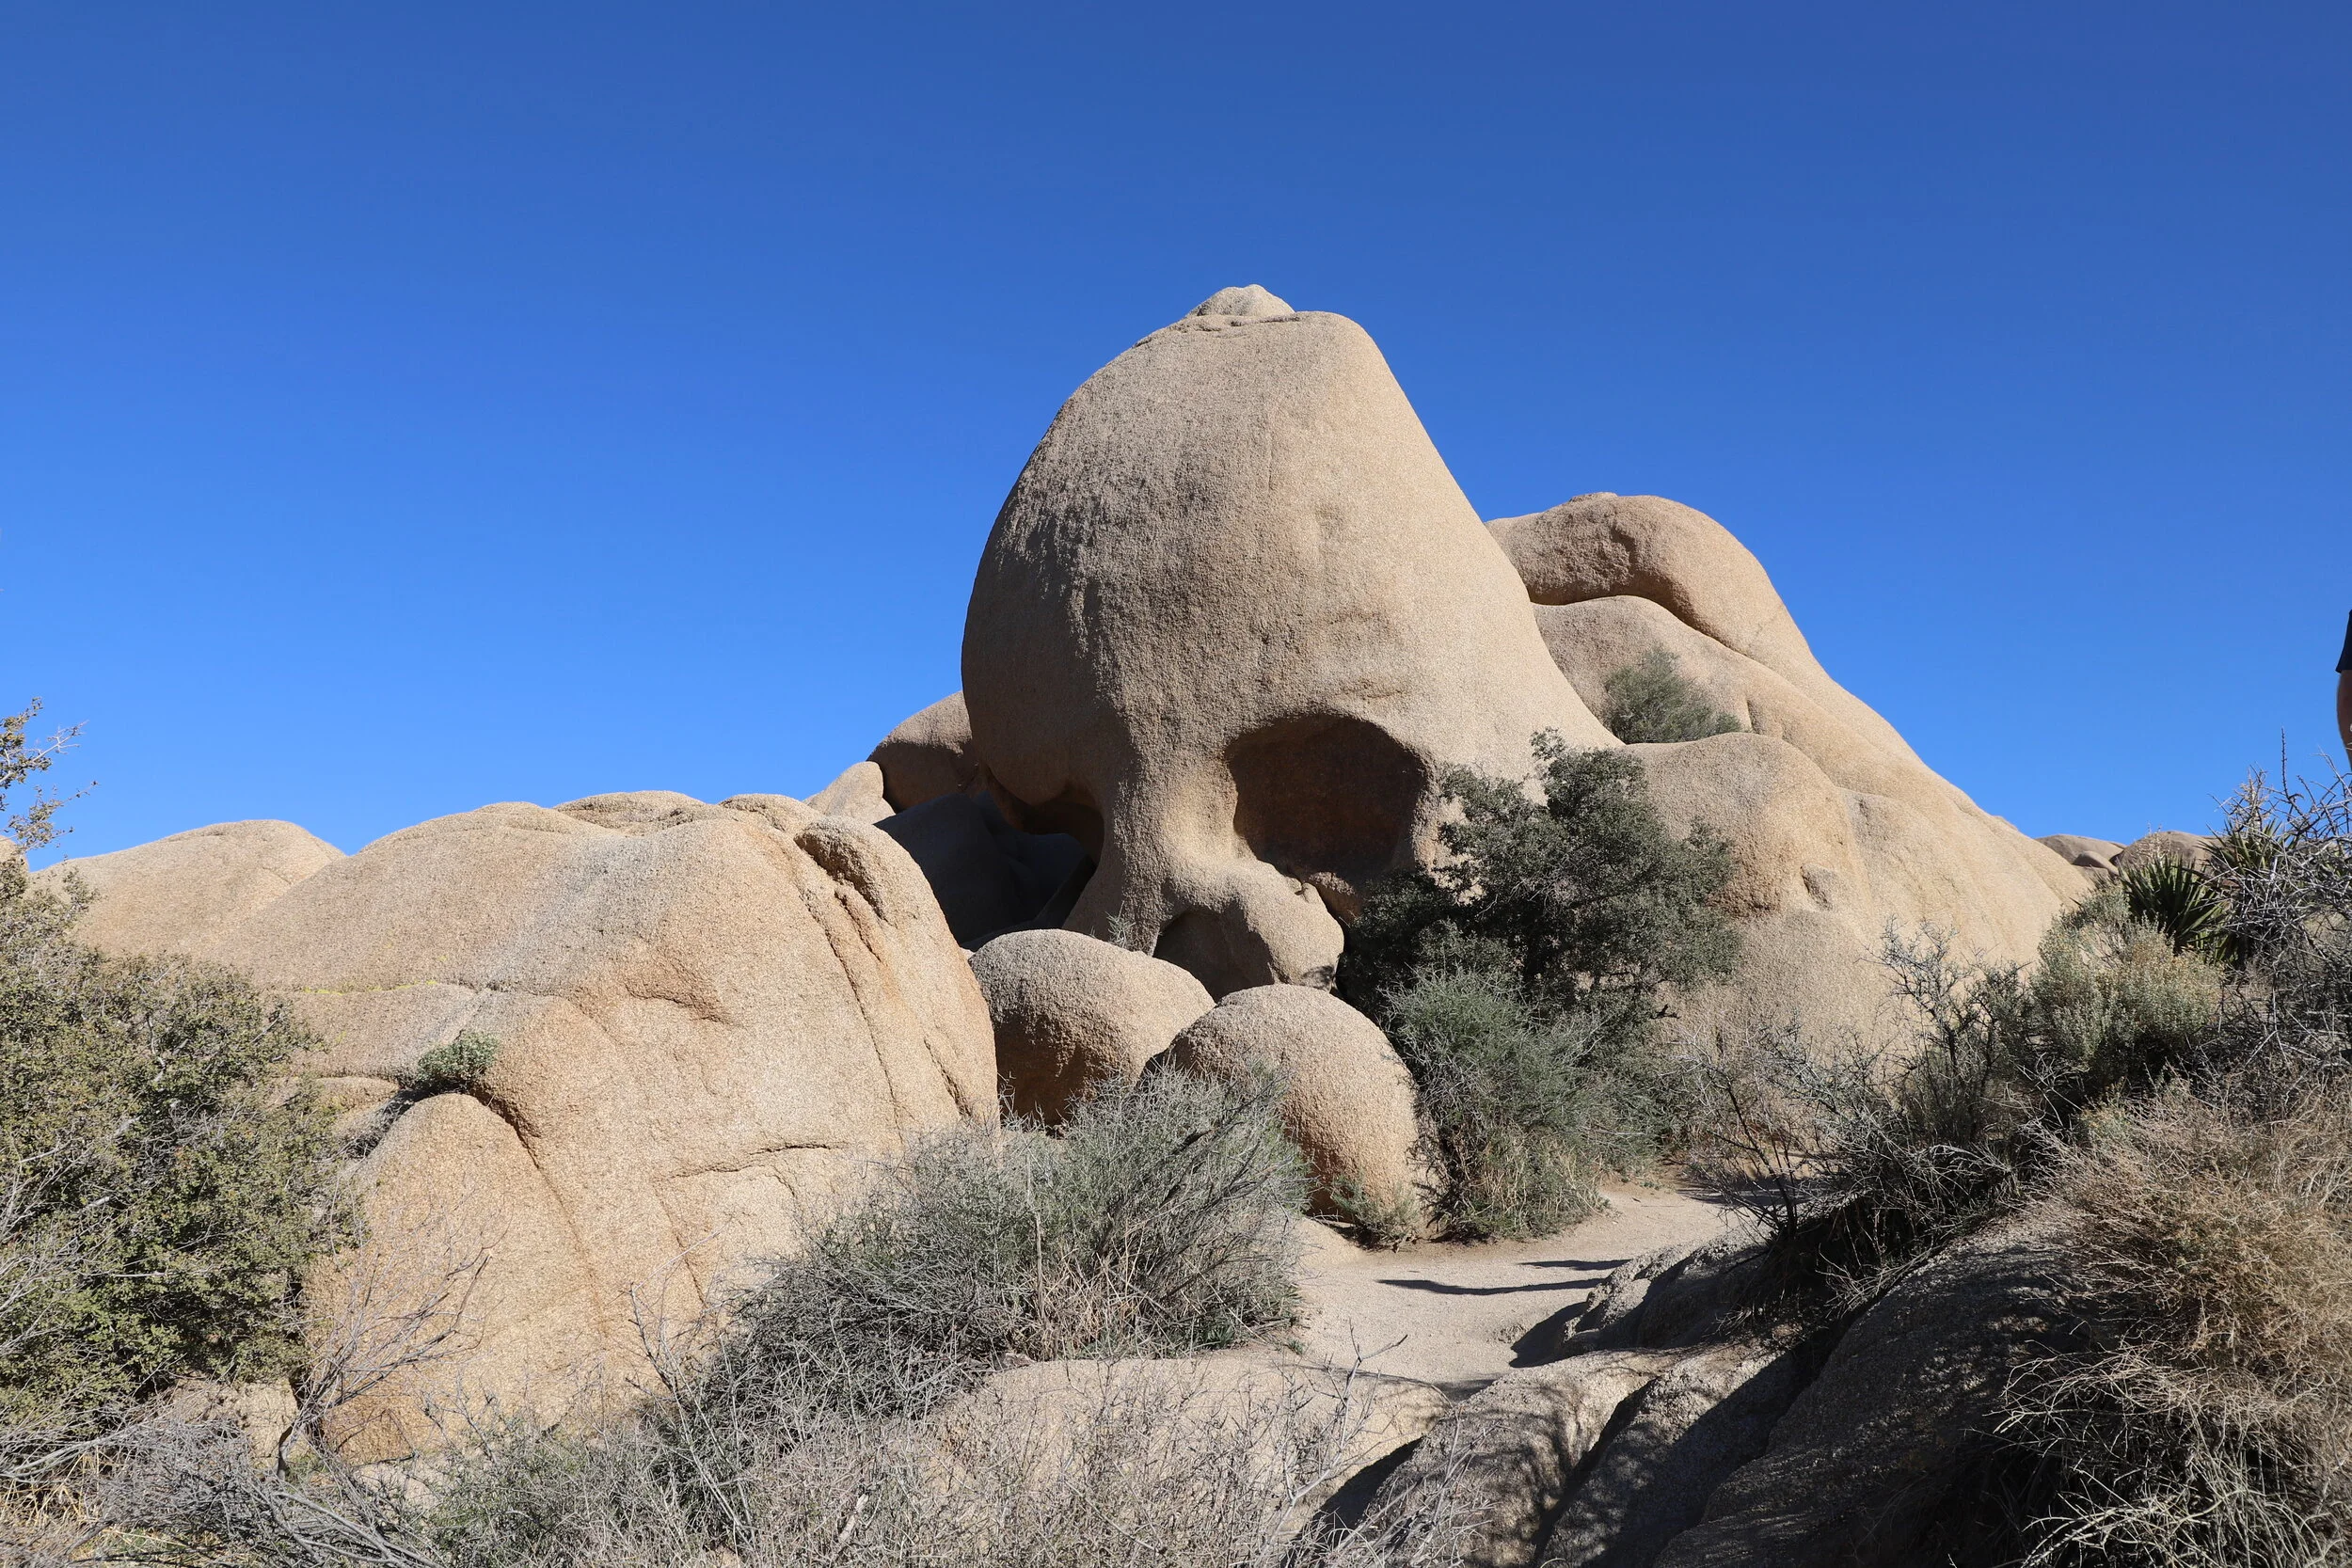
Skull Rock
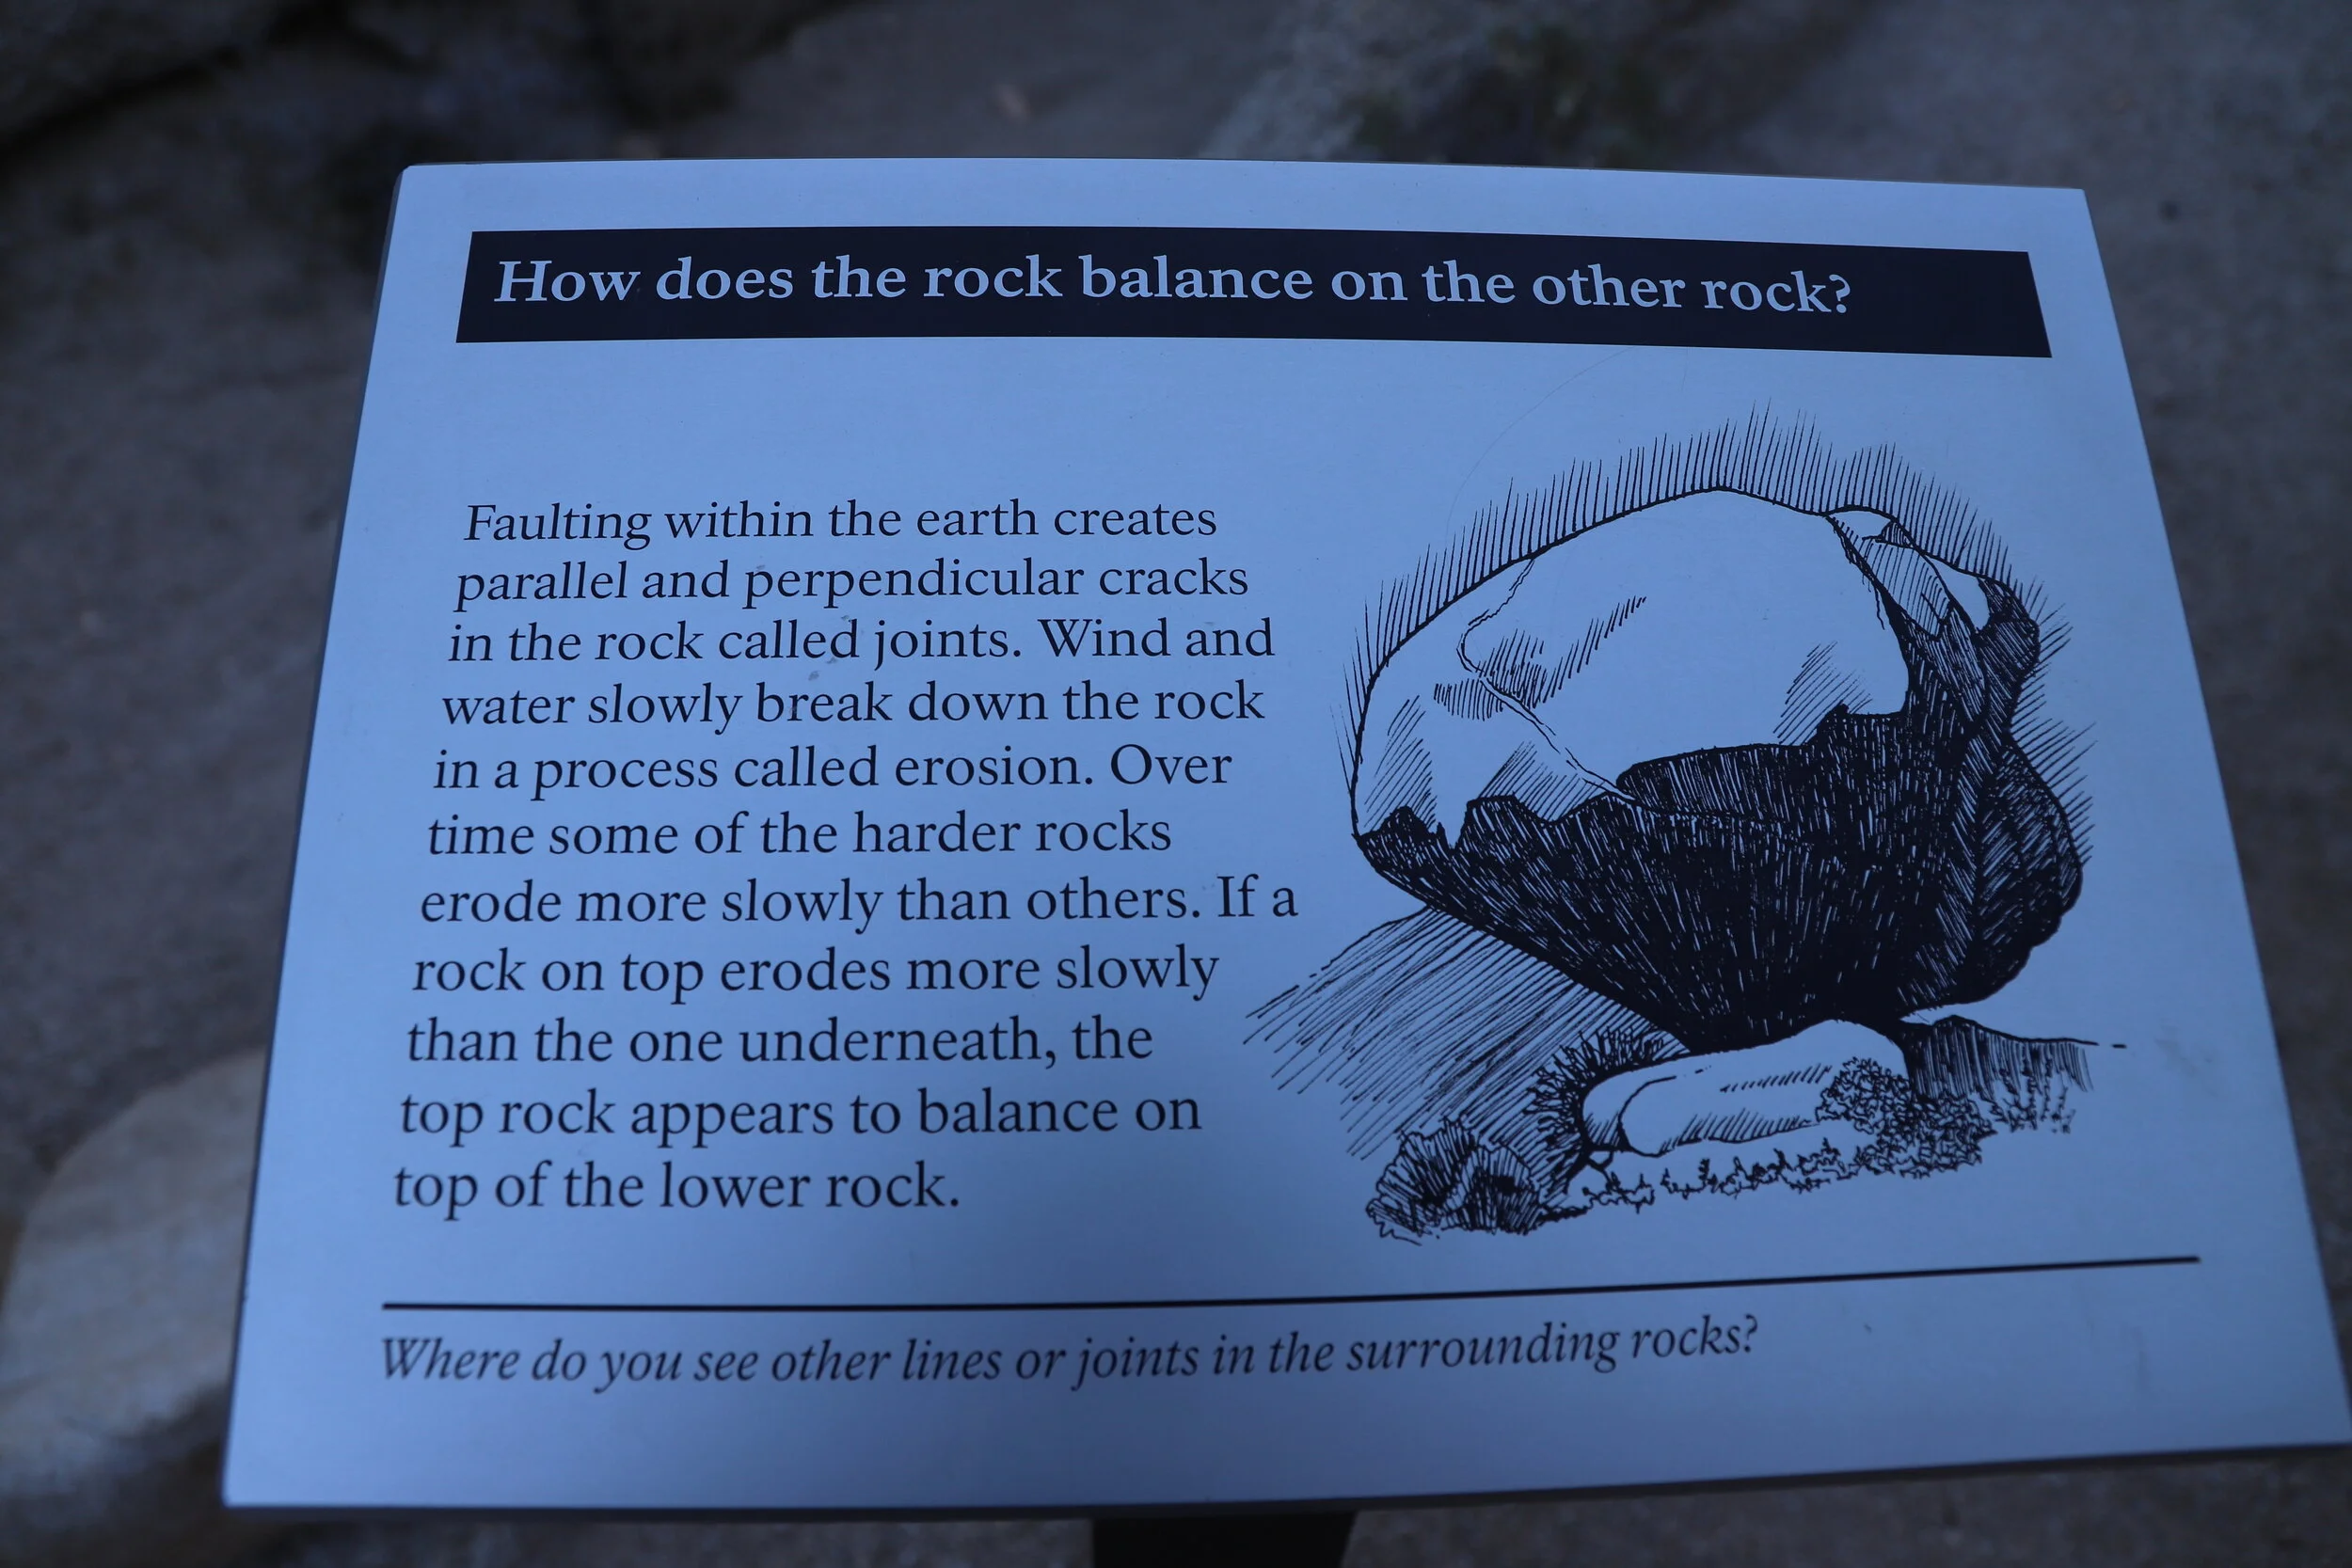
The Discovery Trail loop has 10 markers along it that describe the geology of the area. These signs were written by kids (from the Morongo Unified School District’s Gifted and Talented Education Kaliedoscope Program with Park Rangers) for kids, and they explained these rock formations to the point that I actually understood the ‘how’ behind the geology I was looking at. I’d recommend adding on this fun short hike just so you can learn what these kids are trying to teach you.
Discovery Trail
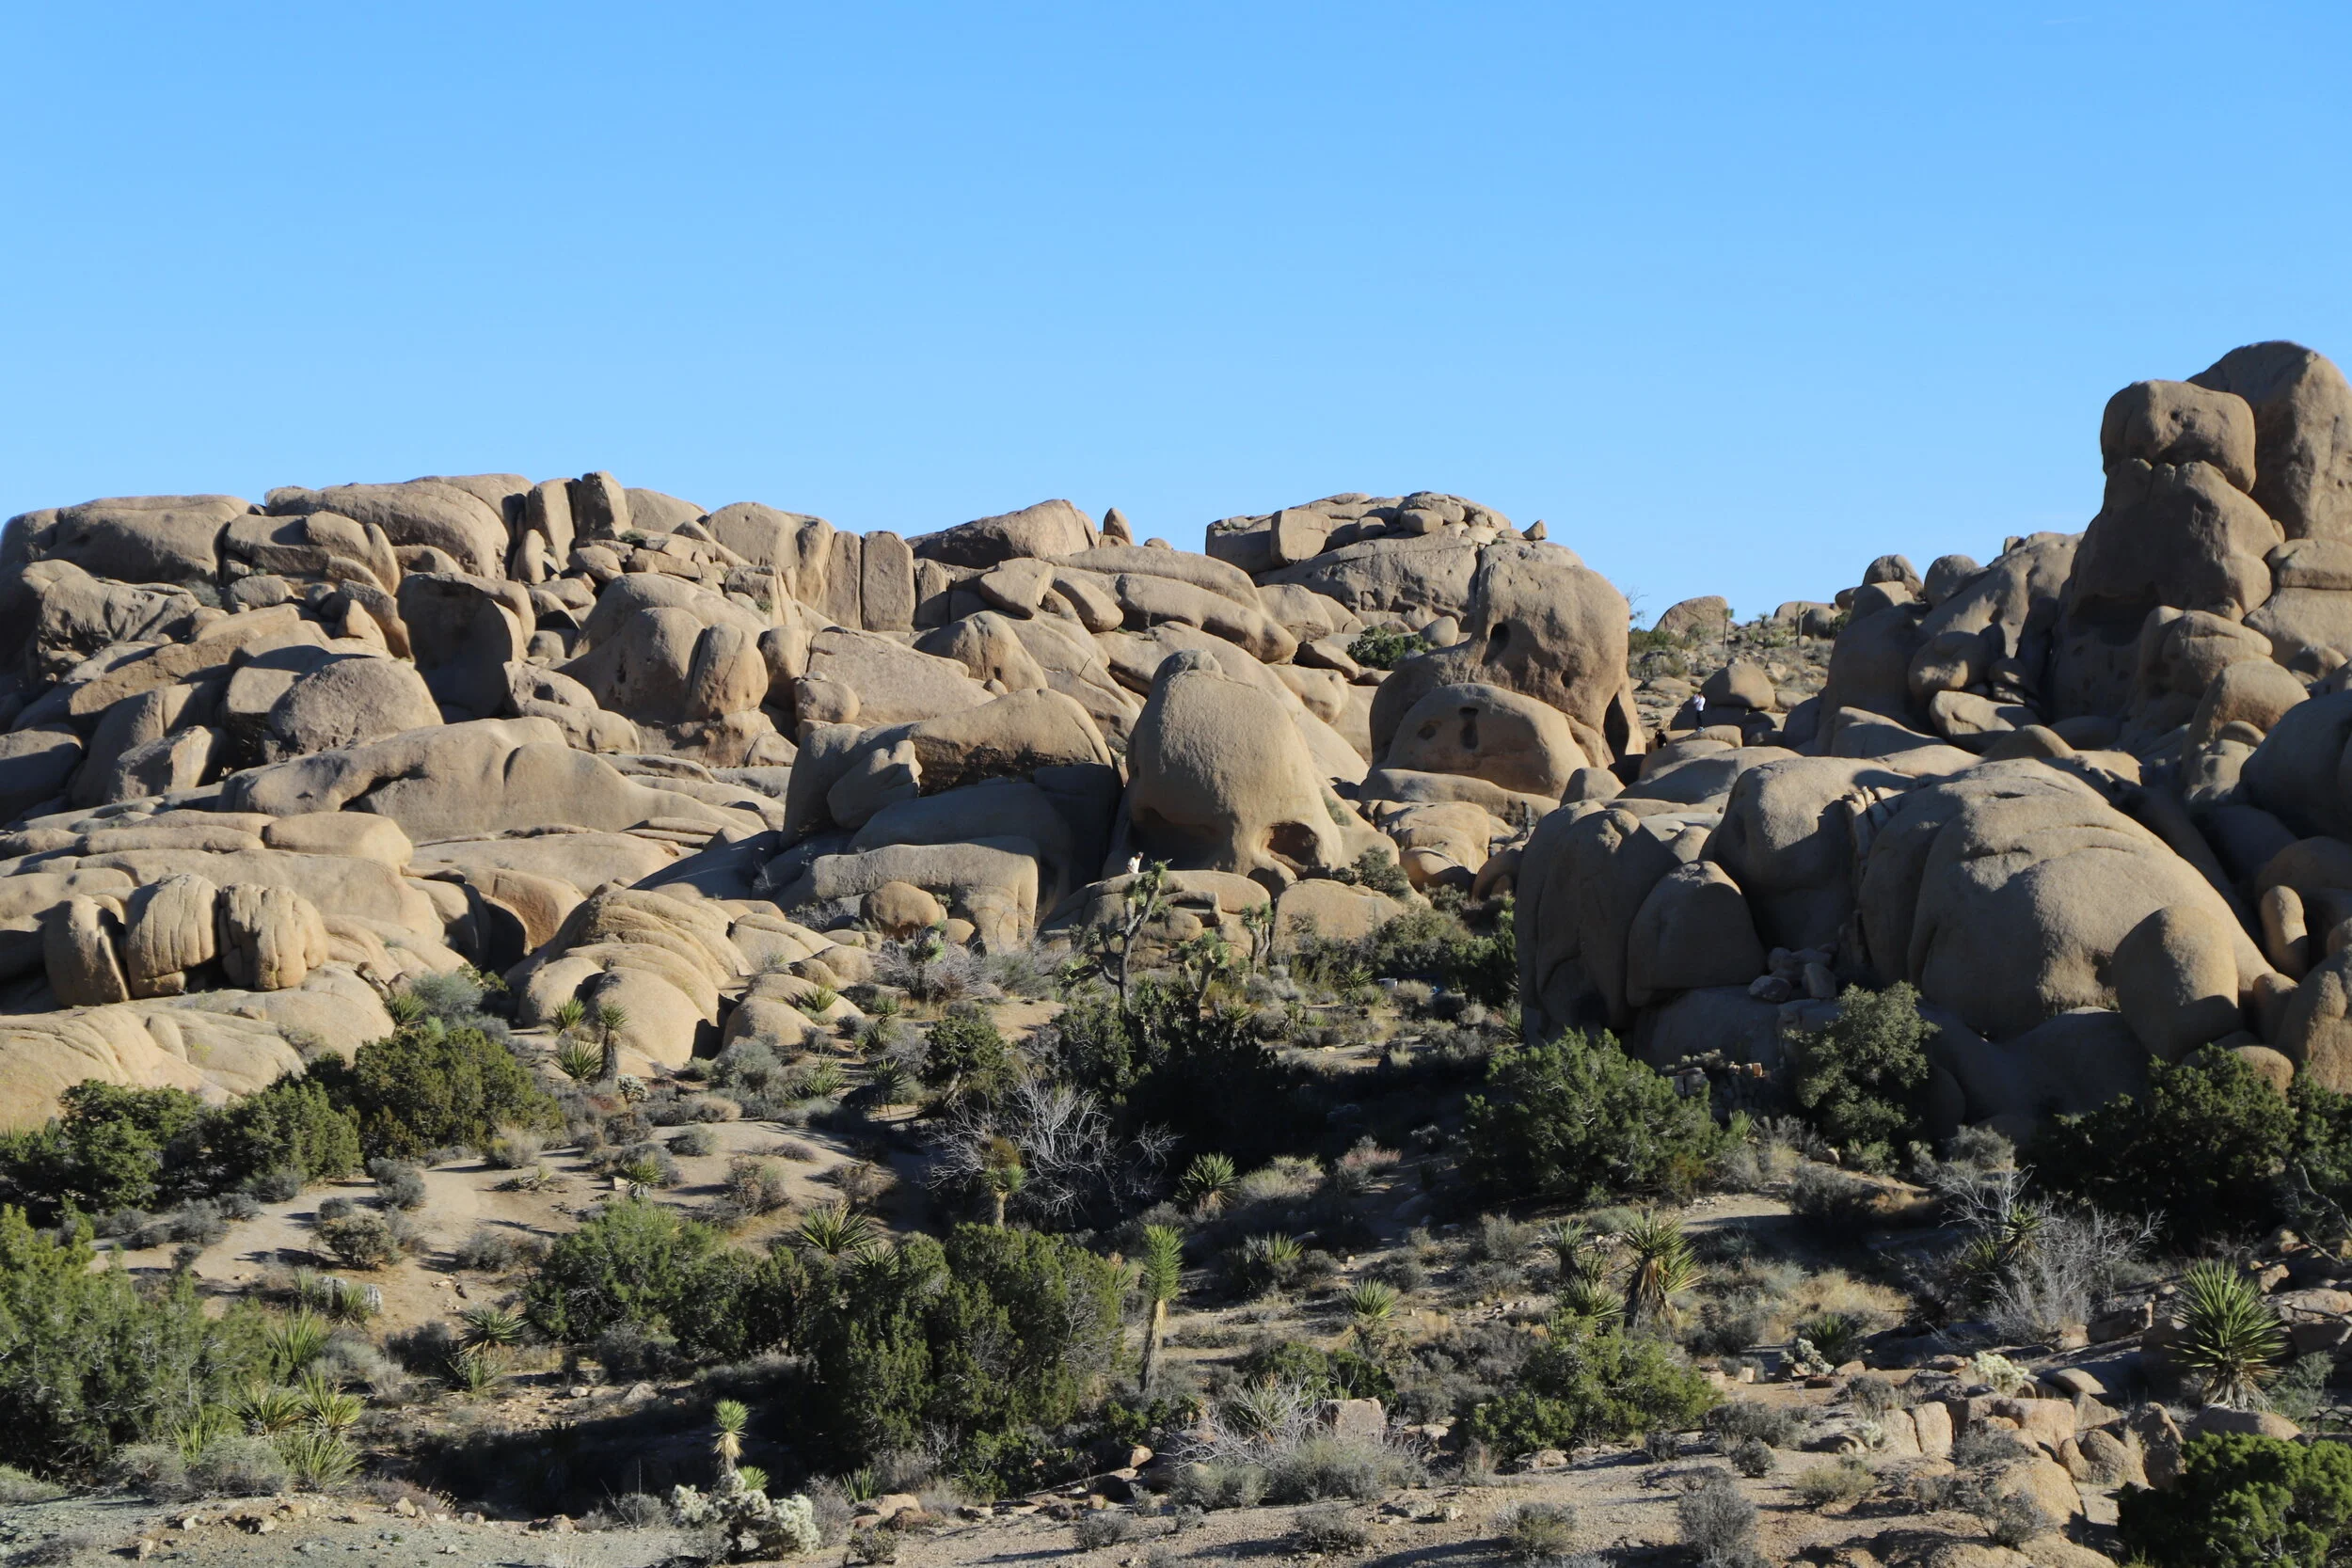
You will reach a marker for Skull Rock Trail going in one direction and Discovery / Face Trail in the other direction. Follow the Skull Rock Trail. Eventually you will notice Park Blvd off on your left. Keep following until the trail crosses the road. Follow the road into the Jumbo Campground.
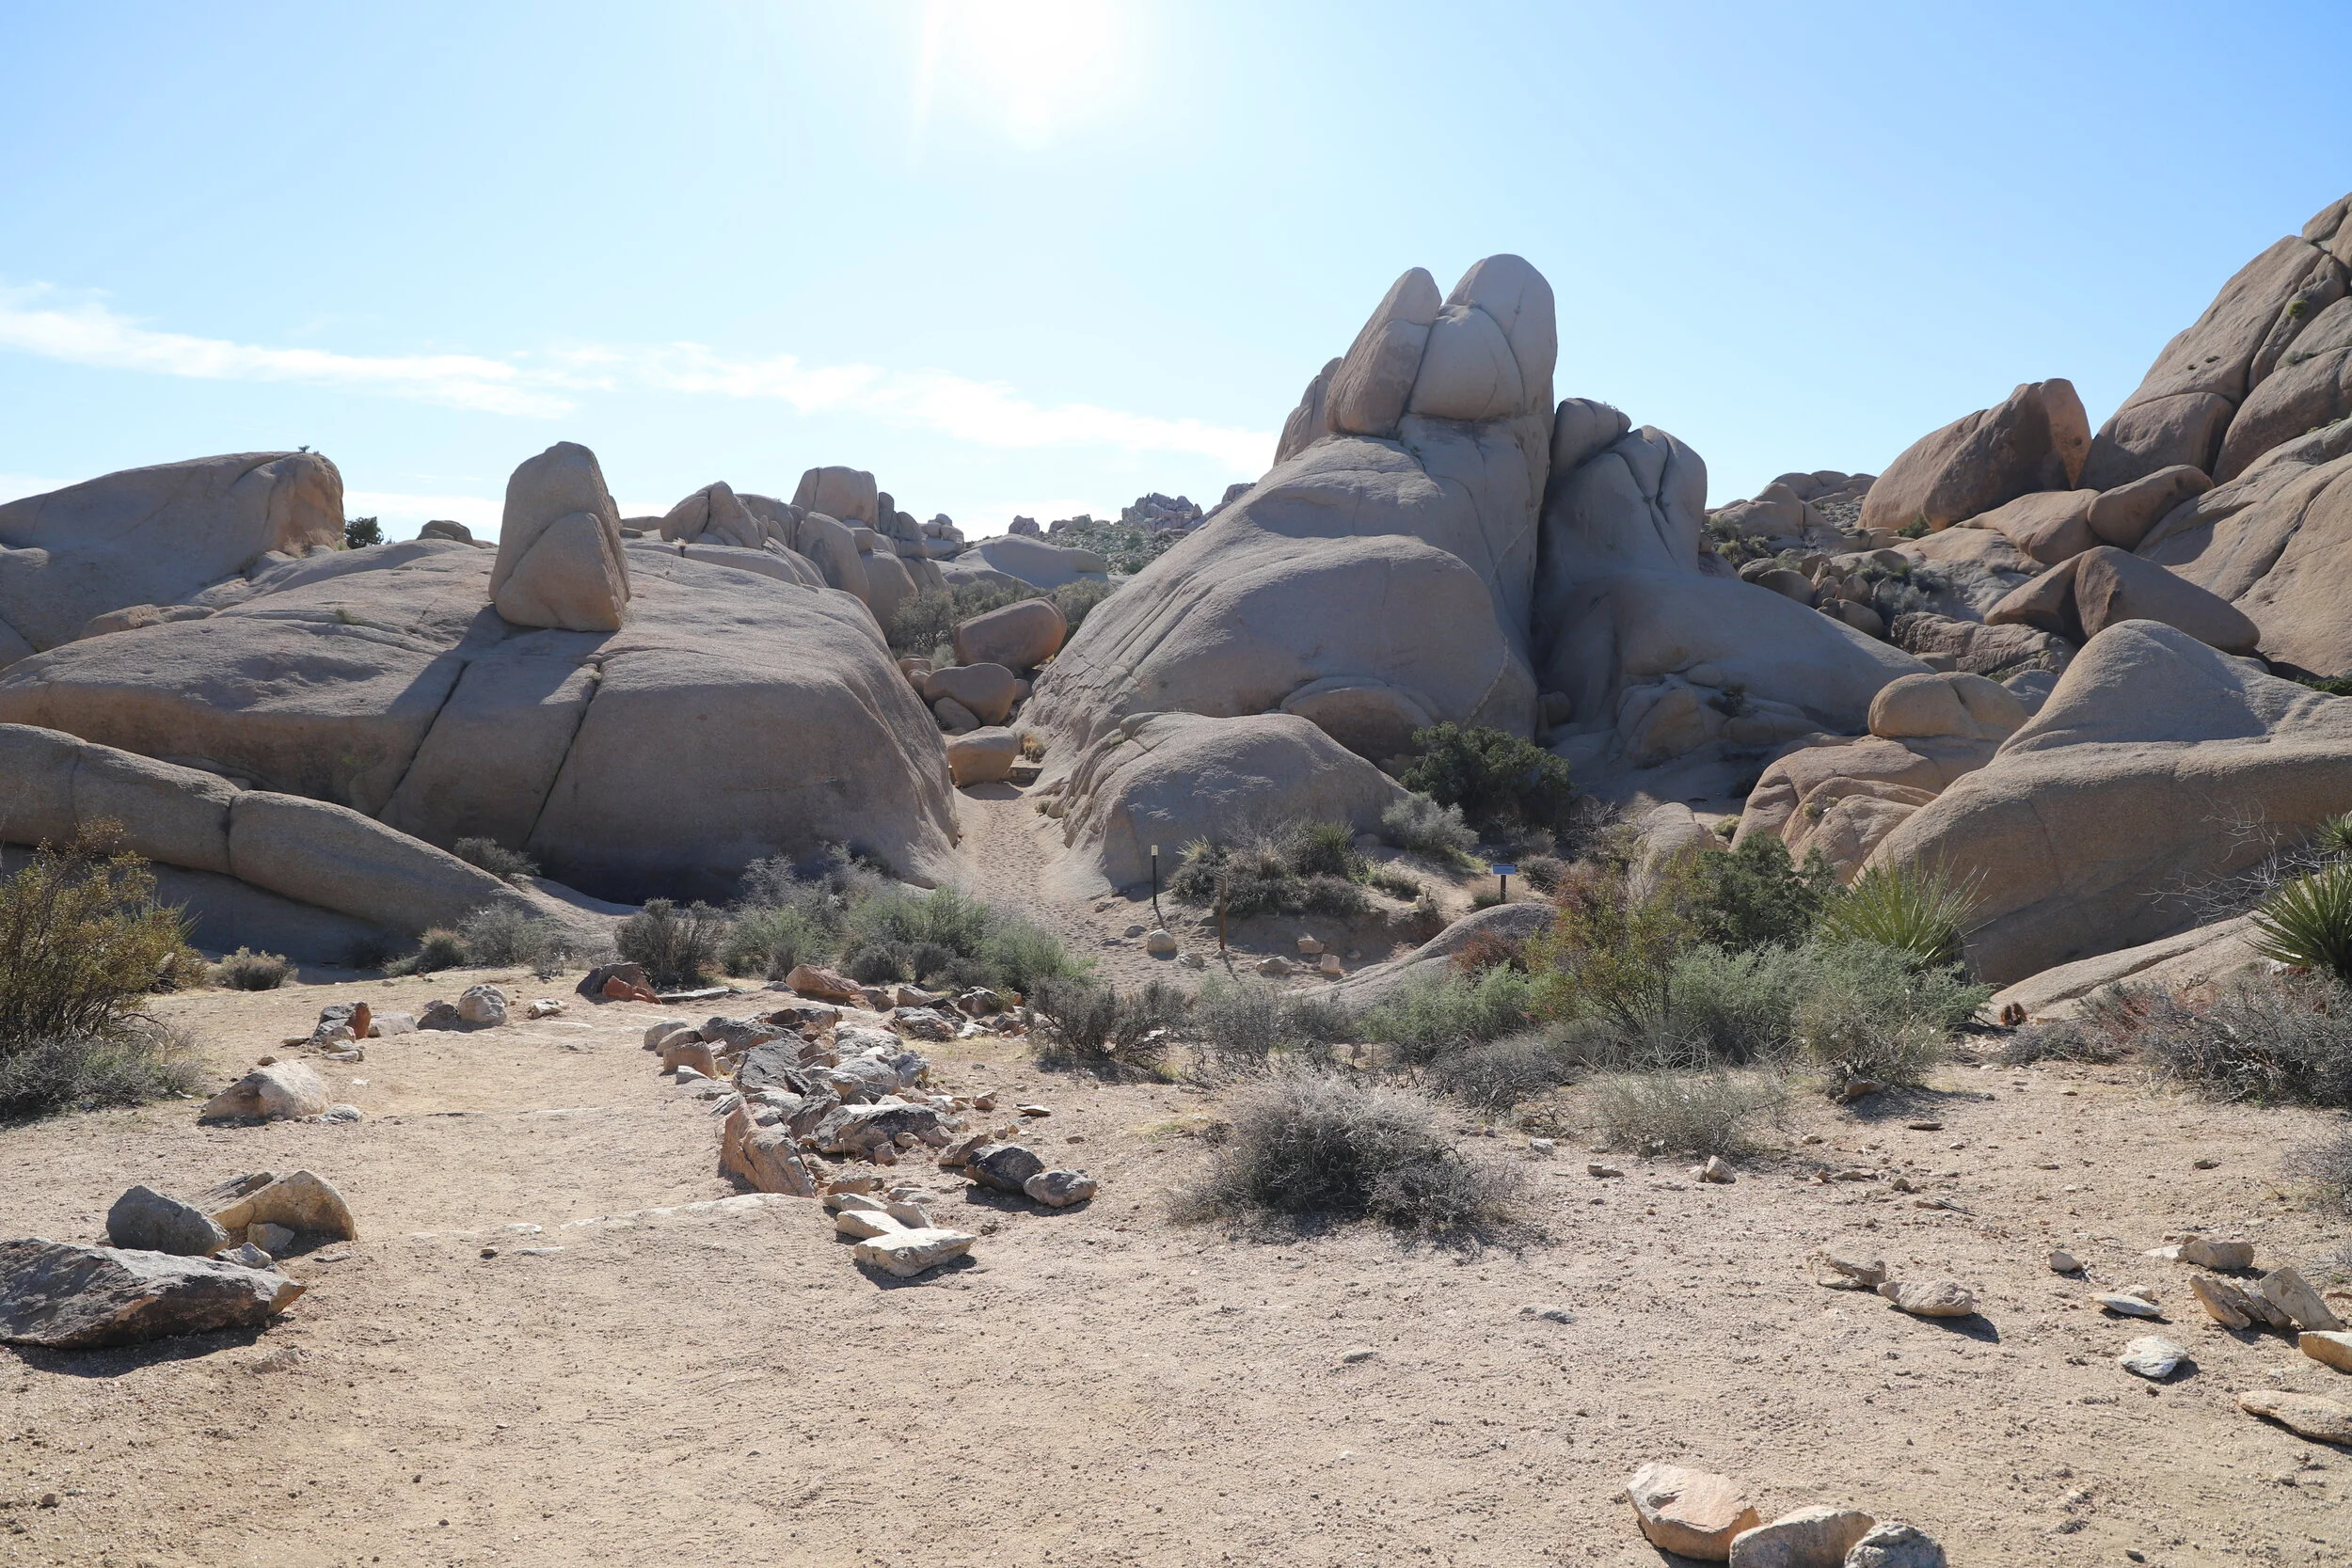
Skull Rock Trail
Skull Rock Trail
6 - Ryan Mountain
Distance - 3.0 miles
Elevation Gain - 1,050 ft
Trailhead Location - As you are driving down Park Blvd from Skull Rock, you will be getting close to the Ryan Mountain trailhead when you pass the Sheep Pass Campground. Keep going a little further. Ryan Mountain is well marked and includes its own parking area.
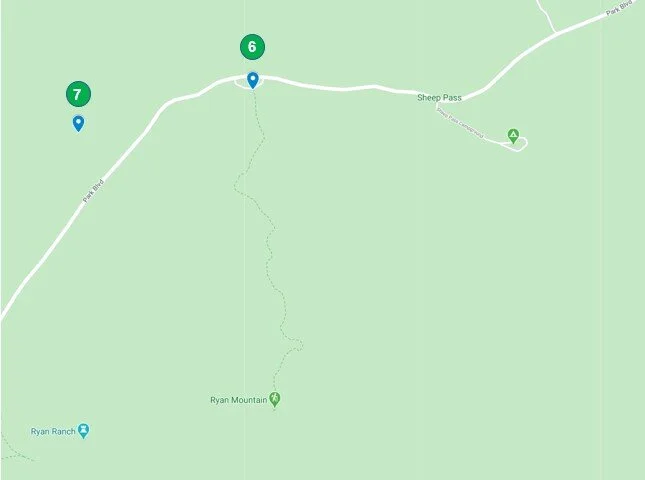
6 - Ryan Mountain, 7 - Hall of Horrors
Ryan Mountain is just shy of 1.5 miles and a climb of 1,000 ft to get to the top. The trail starts off with a moderate incline and this continues most of the way. There are a few short sections where the trail levels off. As you wrap around the back of the mountain, you will be able to see the peak, but it’s still a ways off. We passed several hikers who commented it felt that this trail goes on forever. Combine that with with no shade and warm to hot temperatures. The prettiest views of the park are at the top of this mountain, but know what you are getting into before you start, and pack enough snacks, water and sunscreen.
Ryan Mountain from the trailhead. The trail wraps around the backside of this mountain, towards the right.
On the way up, Hall of Horrors and it’s parking area is visible past the Yucca Plants
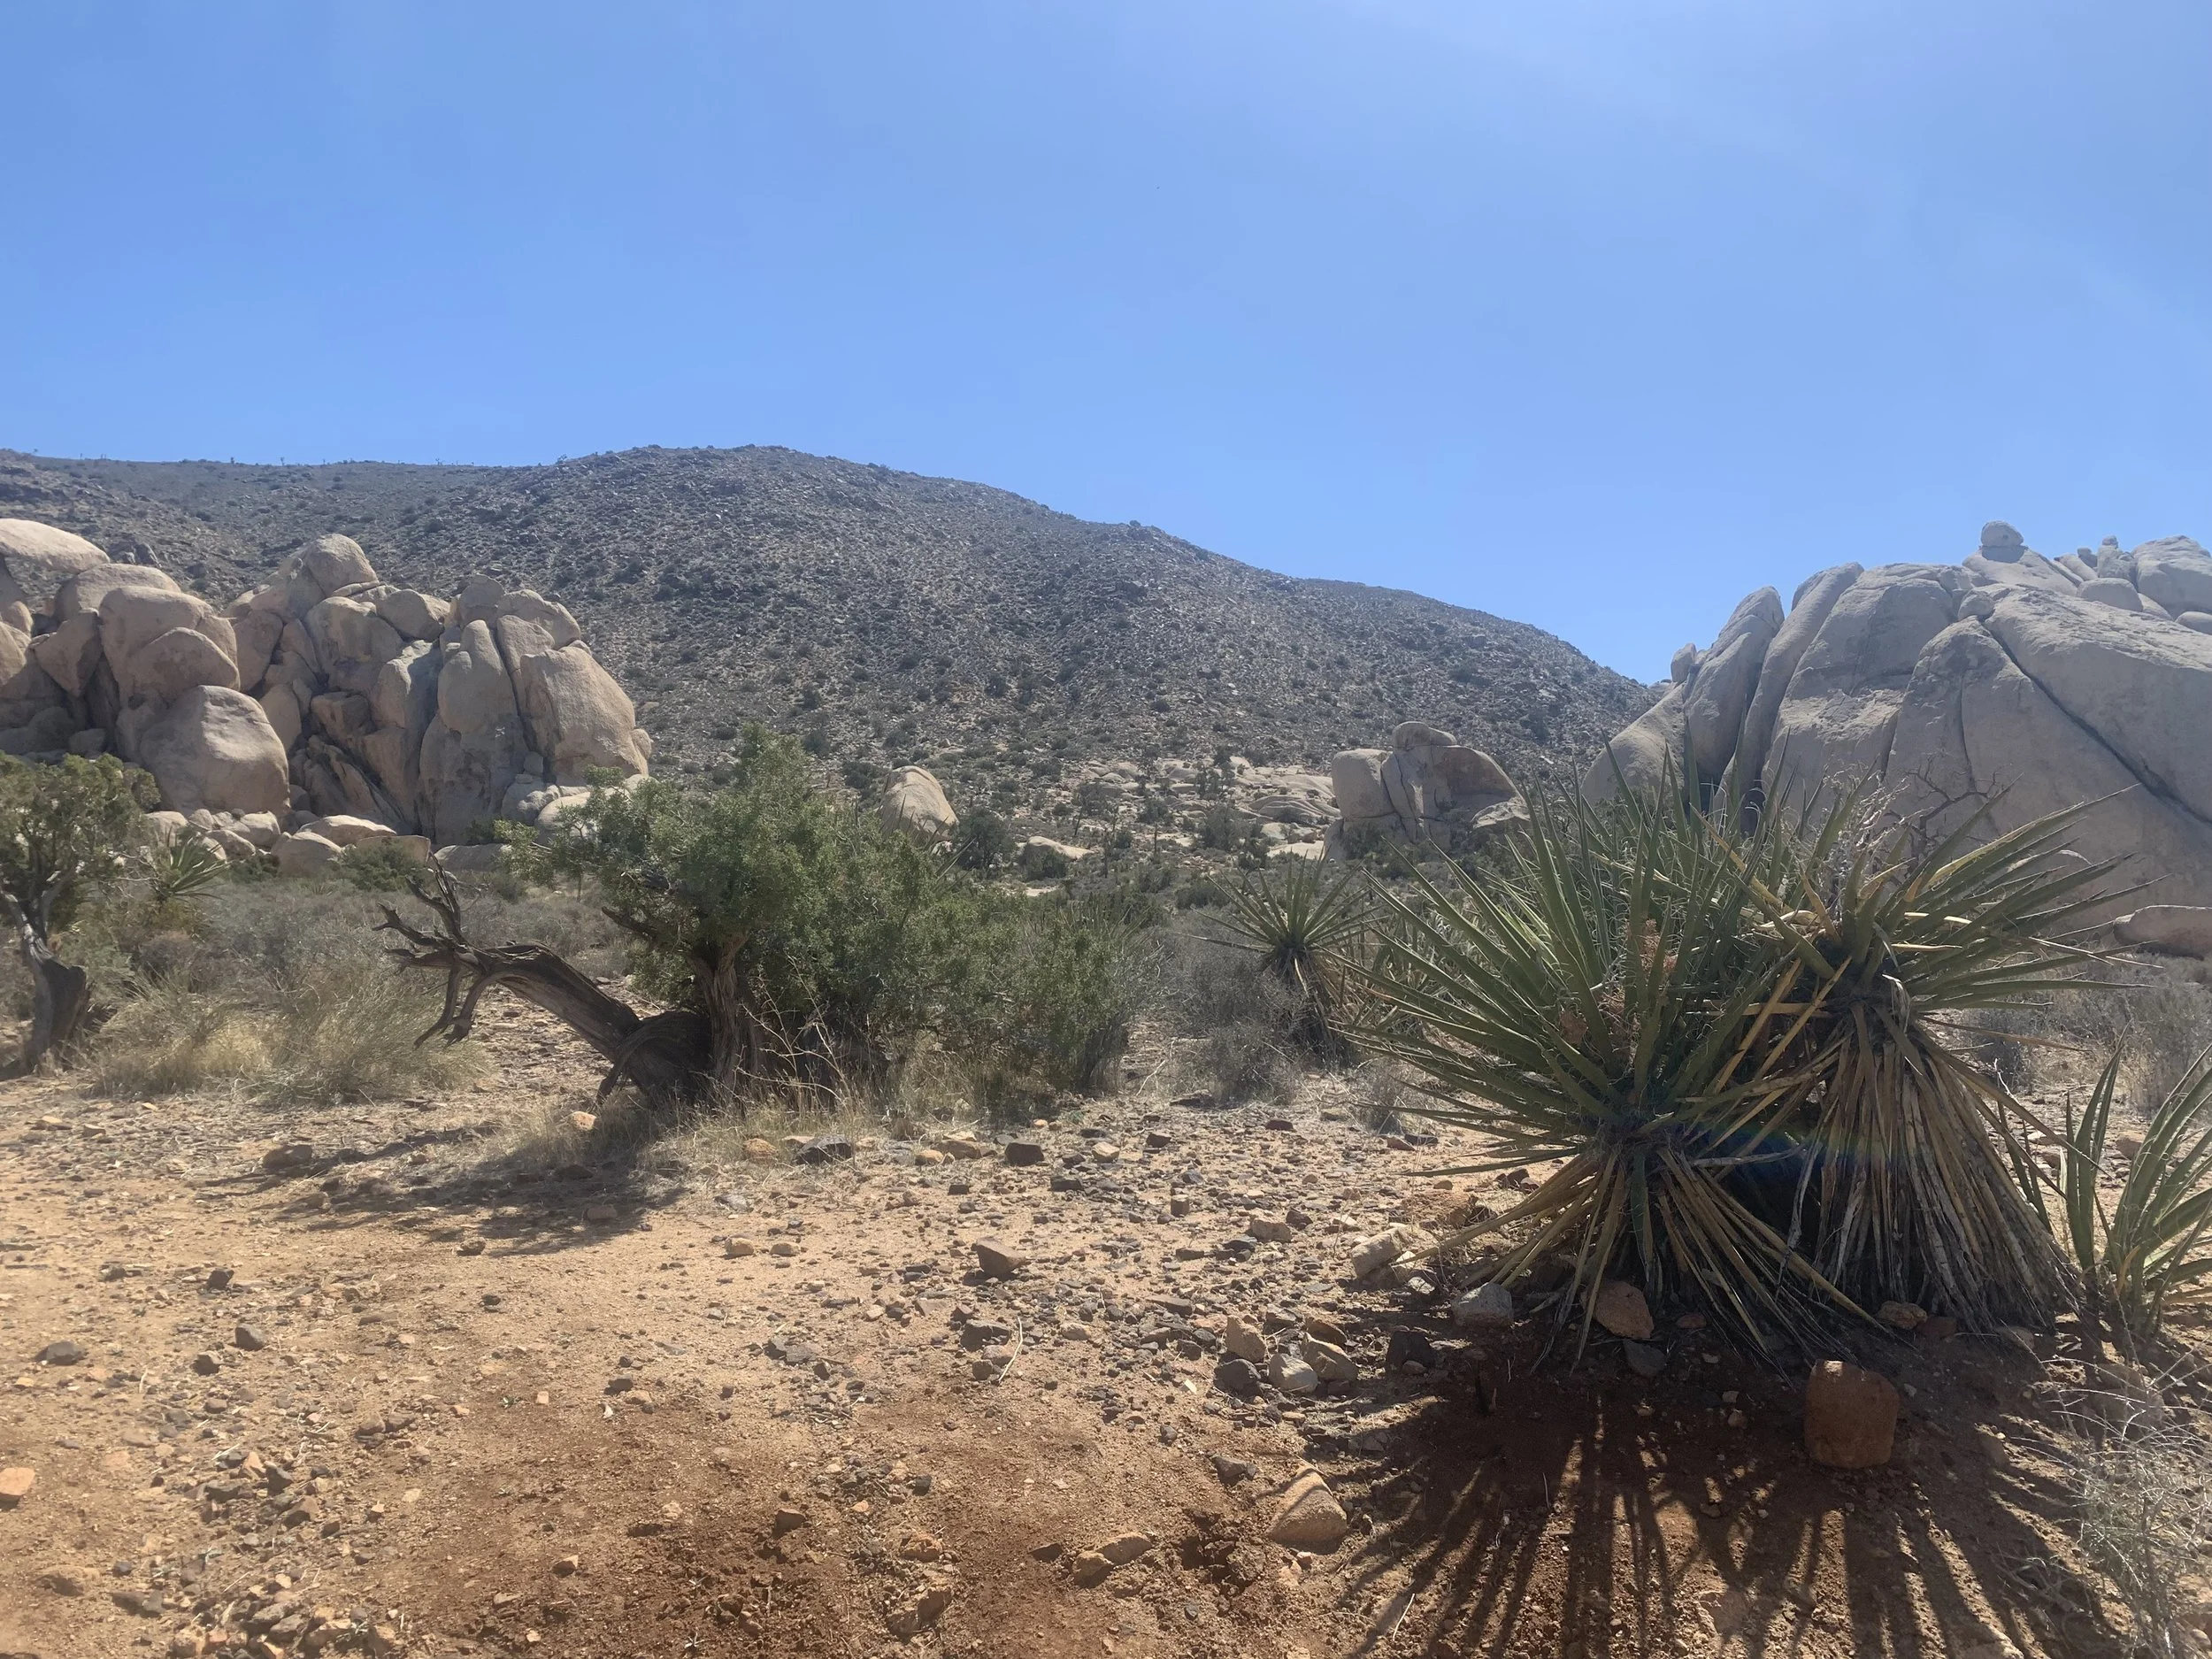
I thought the views from the top were incredible. My boys though thought this was an unnecessary hike because it was such a tough climb due to the sun.. Their favorites were Hall of Horrors and Rattlesnake Canyon.

We made it!
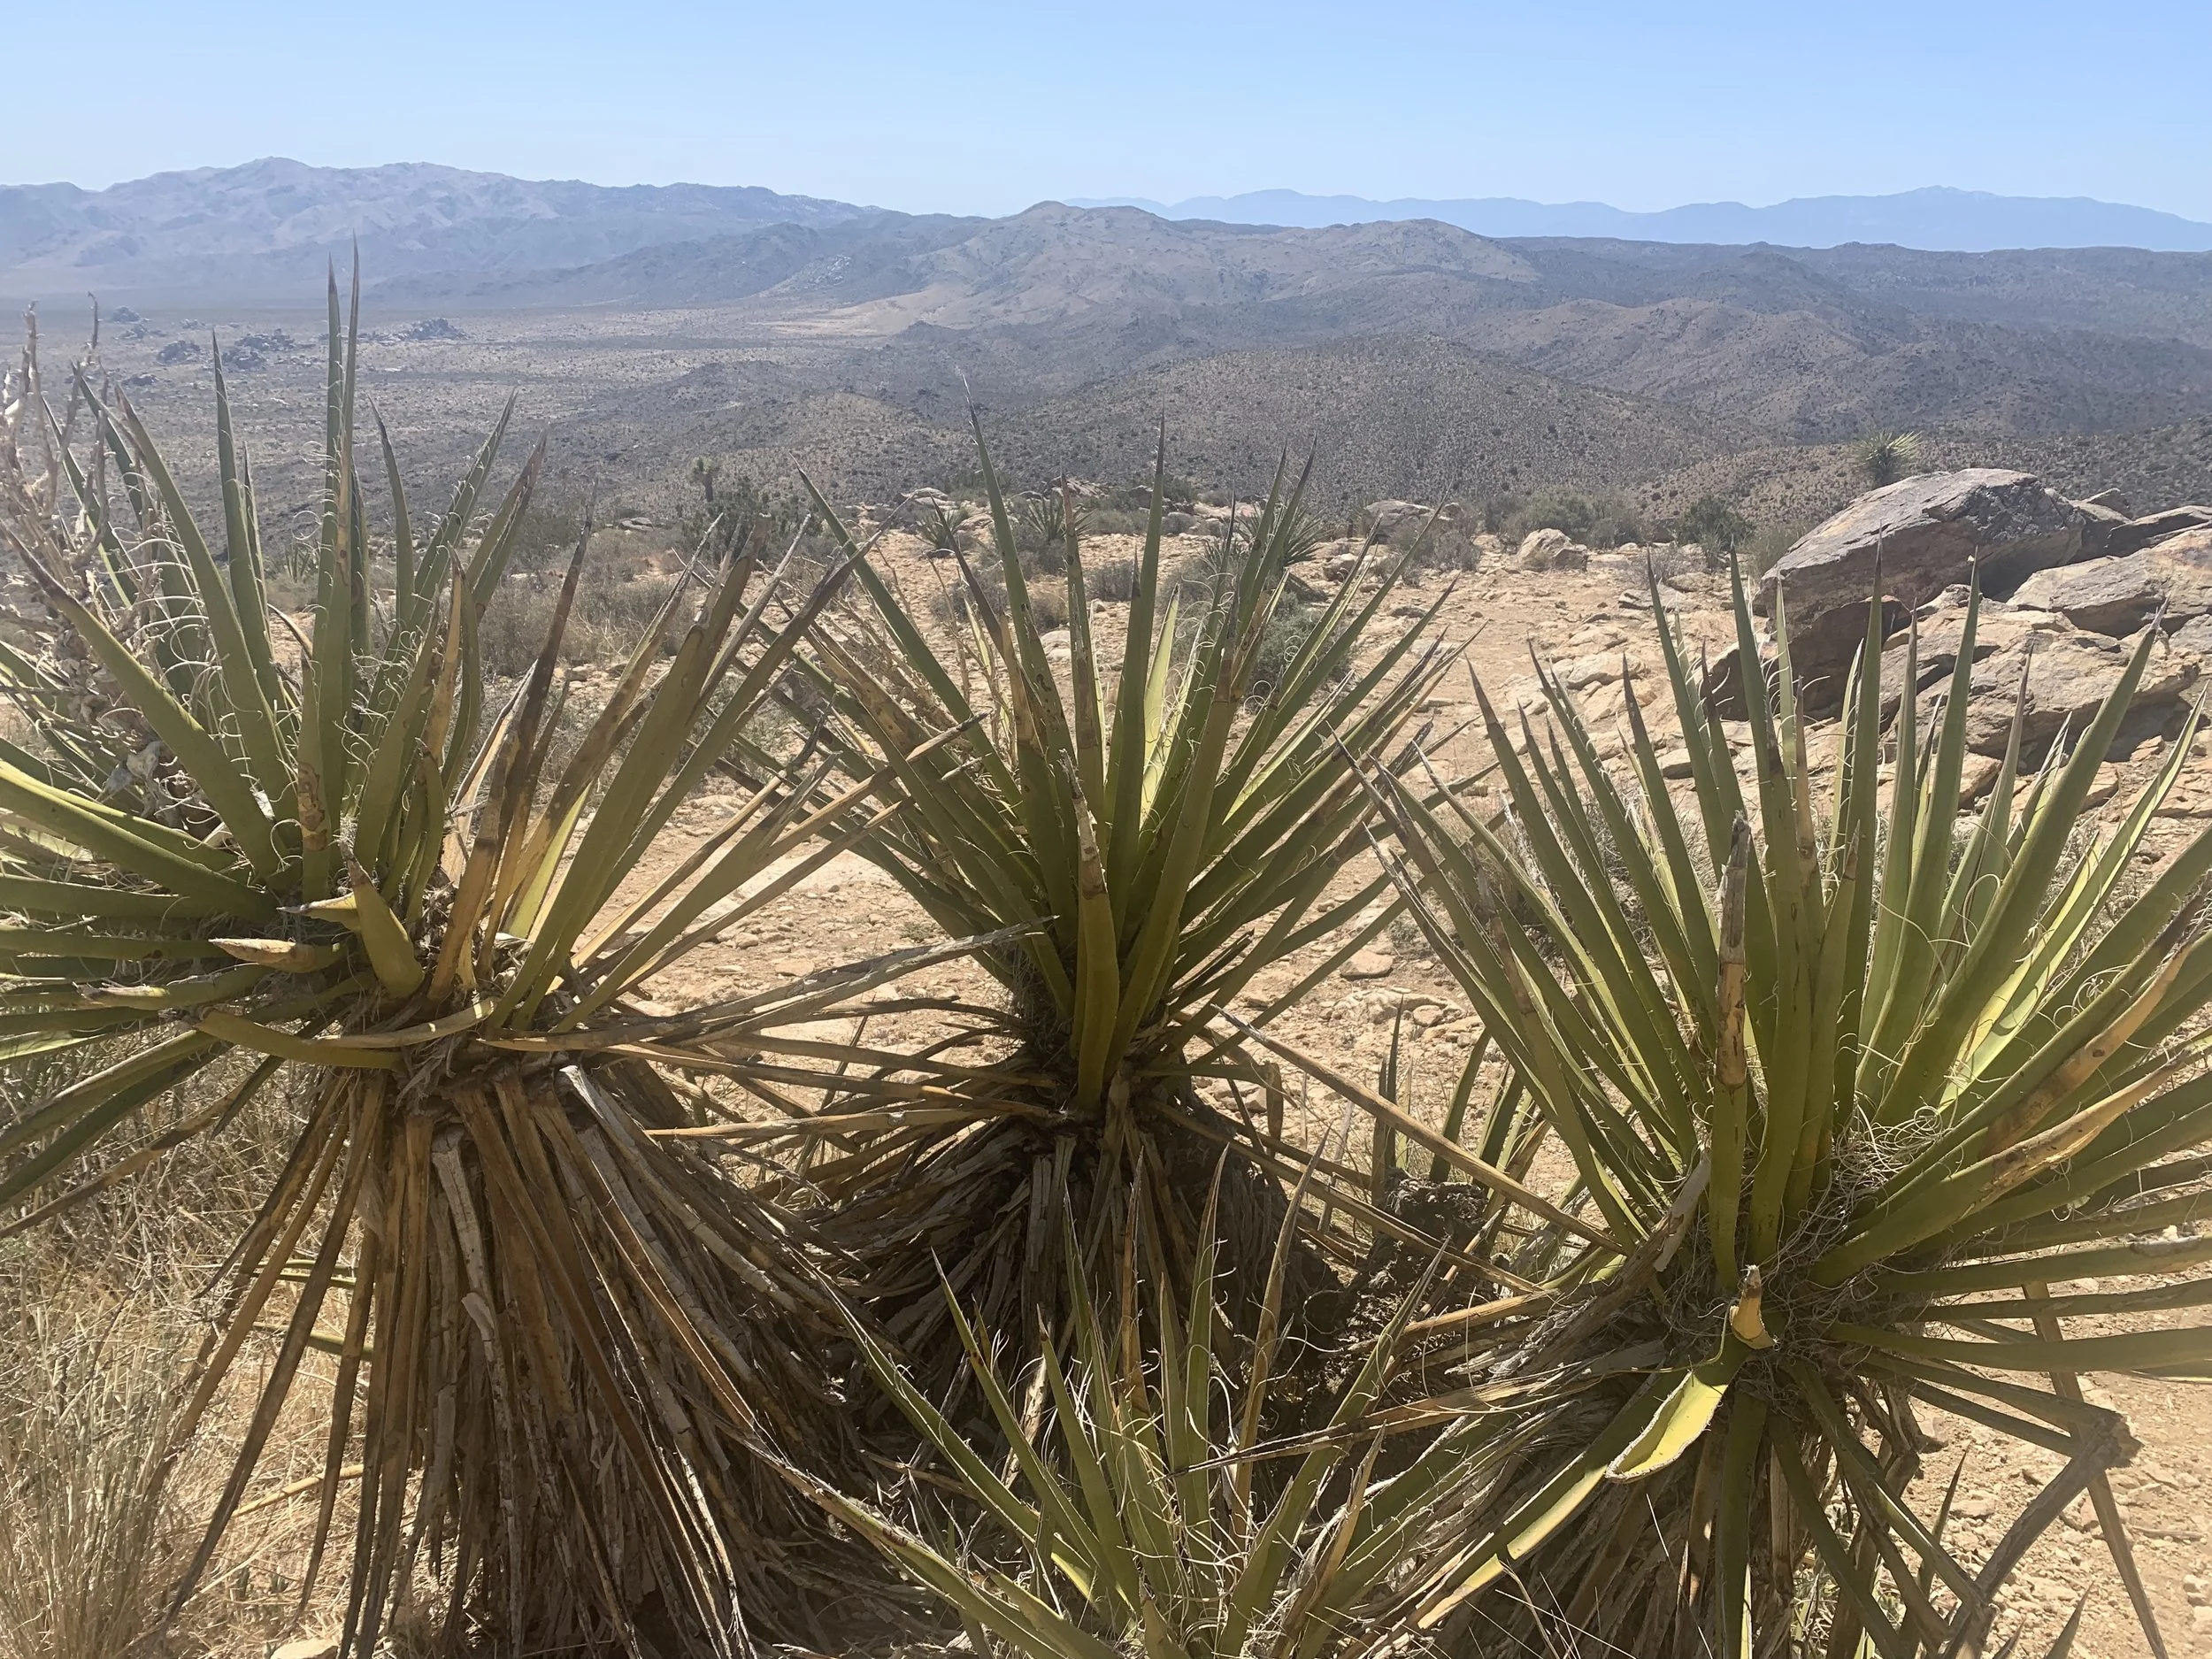
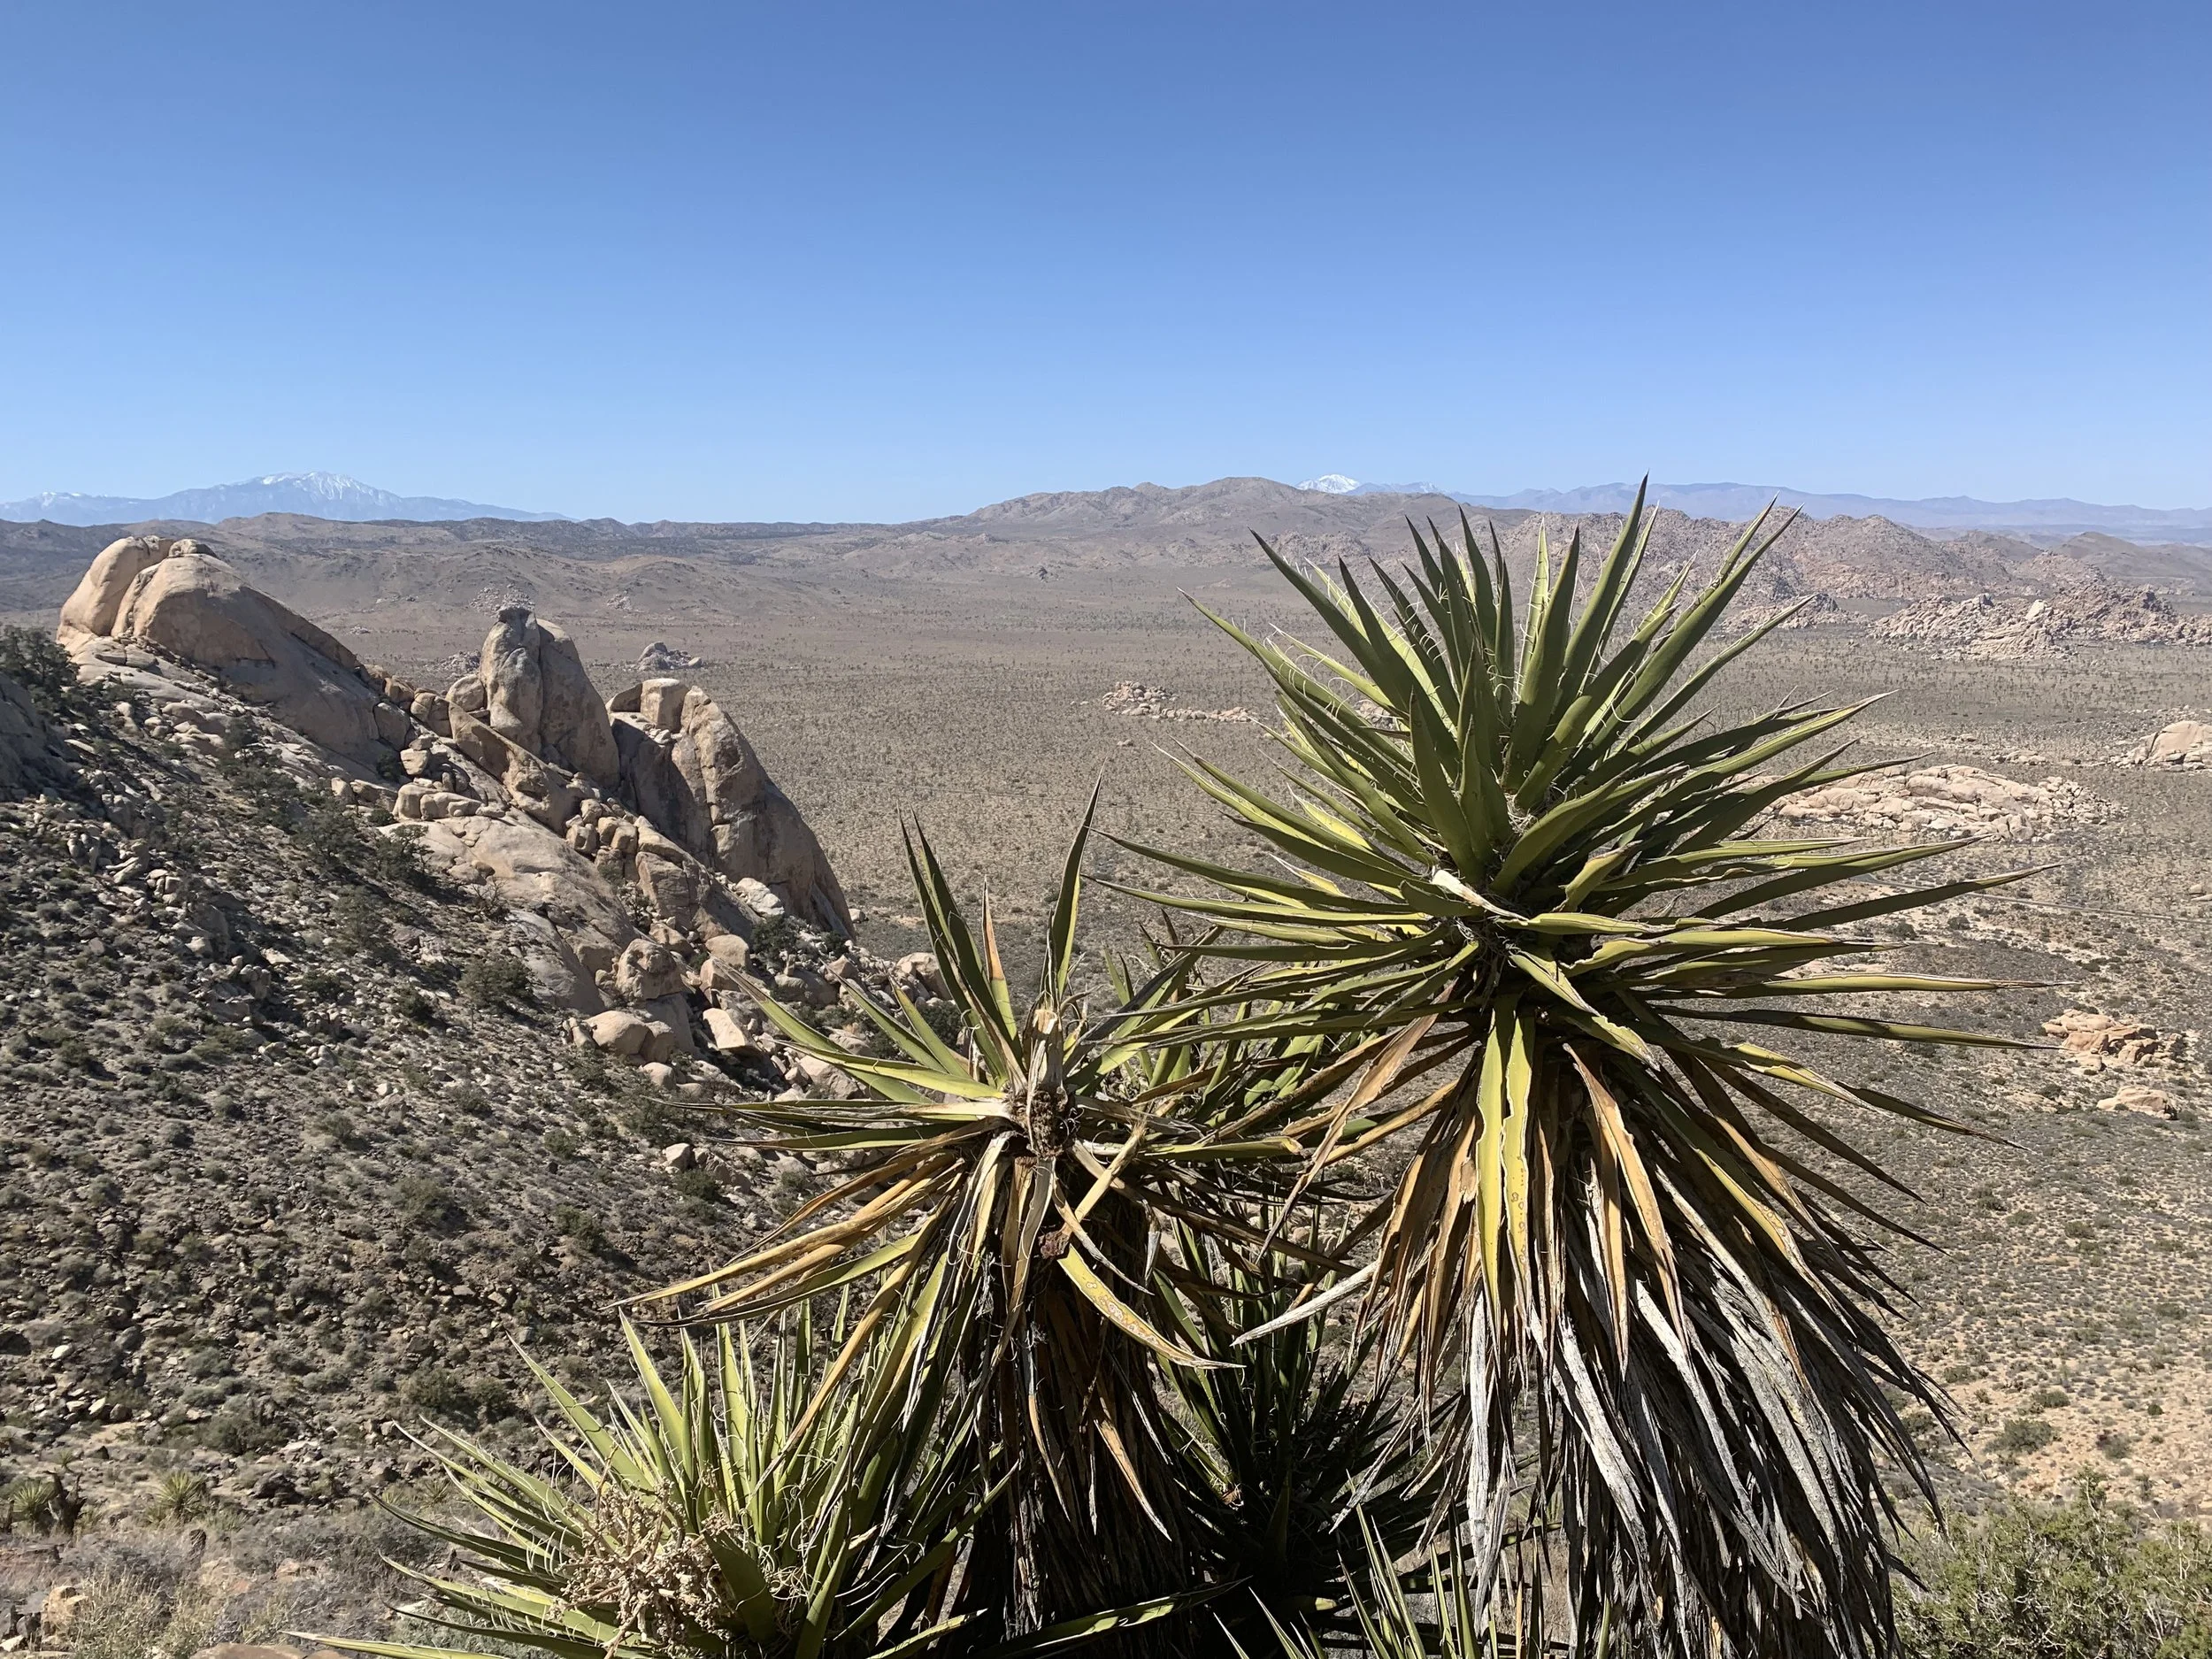
Views from the top of Ryan Mountain. Can you tell I love Yucca Plants?
And Chollas!

On the way down you will be able to better appreciate the views

This shows the incline of the trail. At least the 1.5 miles back to the car are relatively easy!
7 - Hall of Horrors - Slot Canyon
Distance - Approximately 1 mile
Elevation Gain - N/A
Trailhead Location - Just past Ryan Mountain is a pullout for the Hall of Horrors. If you are into rock climbing, this would be a great place to do it. We had a blast exploring the slot canyon.

6 - Ryan Mountain, 7 - Hall of Horrors
The parking lot for Hall of Horrors is easy to find. Access to the slot canyon though is going to require you to follow some vague directions as well as some exploration on your own to find. There is not a trail that will lead you to the entrance.
To try and help you find this slot canyon, I took this picture of the Hall of Horrors from Ryan Mountain. You can see the parking lot, and there is a large group of boulders. This group of rocks is actually two groups of rocks. You will need to walk around the first group of rocks. On the backside of the first group of rocks you will be in-between both sets of rocks. The slot canyon is in the second set of rocks.
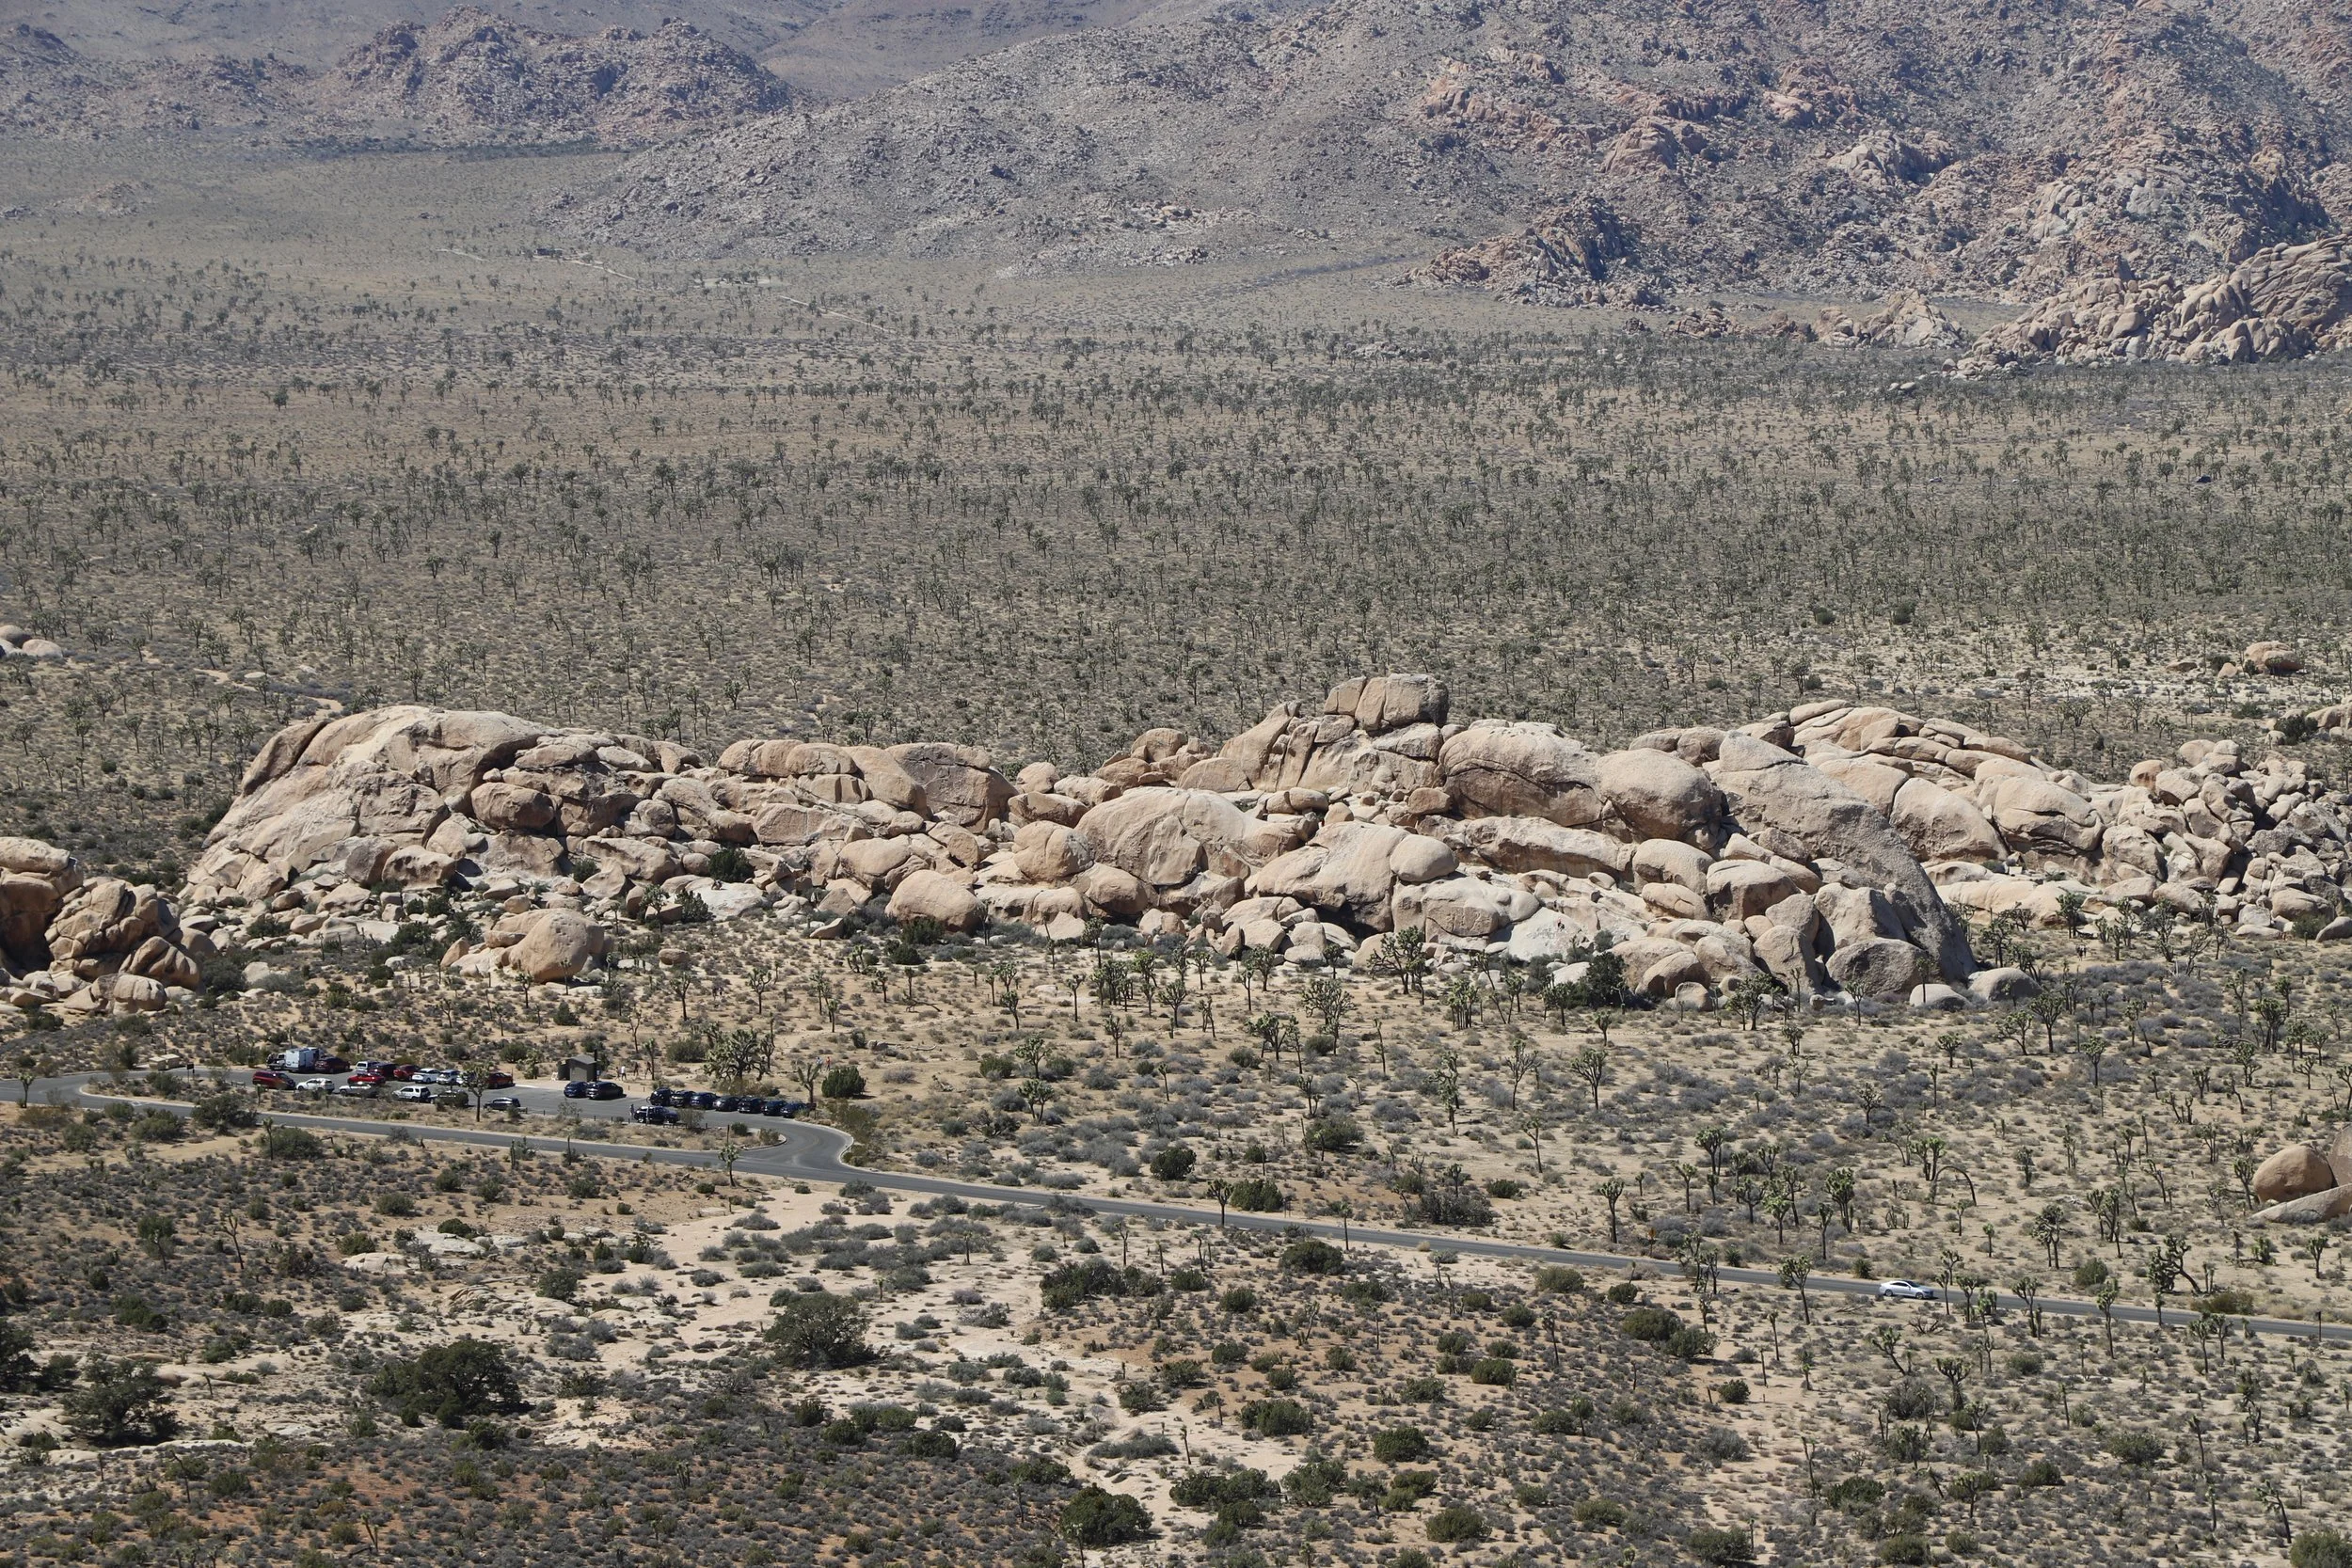
Hall of Horrors as viewed from above on the Ryan Mountain Trail
Below is our map as recorded by the GAIA app. The slot canyon is at the top with the back and forth’s and squiggly lines.
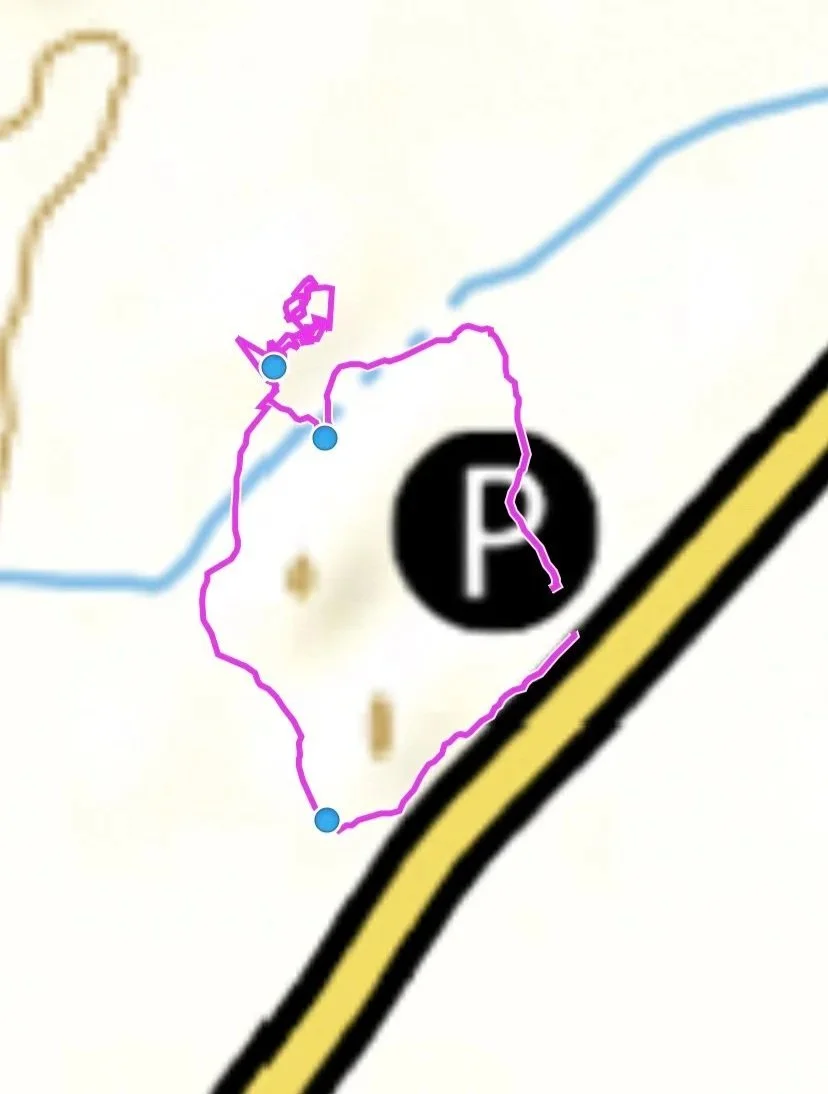
Map to find the Hall of Horrors Slot Canyon
This is the picture of where we entered the slot canyon. In the middle of the picture, there is a larger rock casting a shadow and you can just see a small sliver that is not in the shadow. That’s where there is a gap that you can climb into the rocks.
Entrance to the Hall of Horrors Slot Canyon
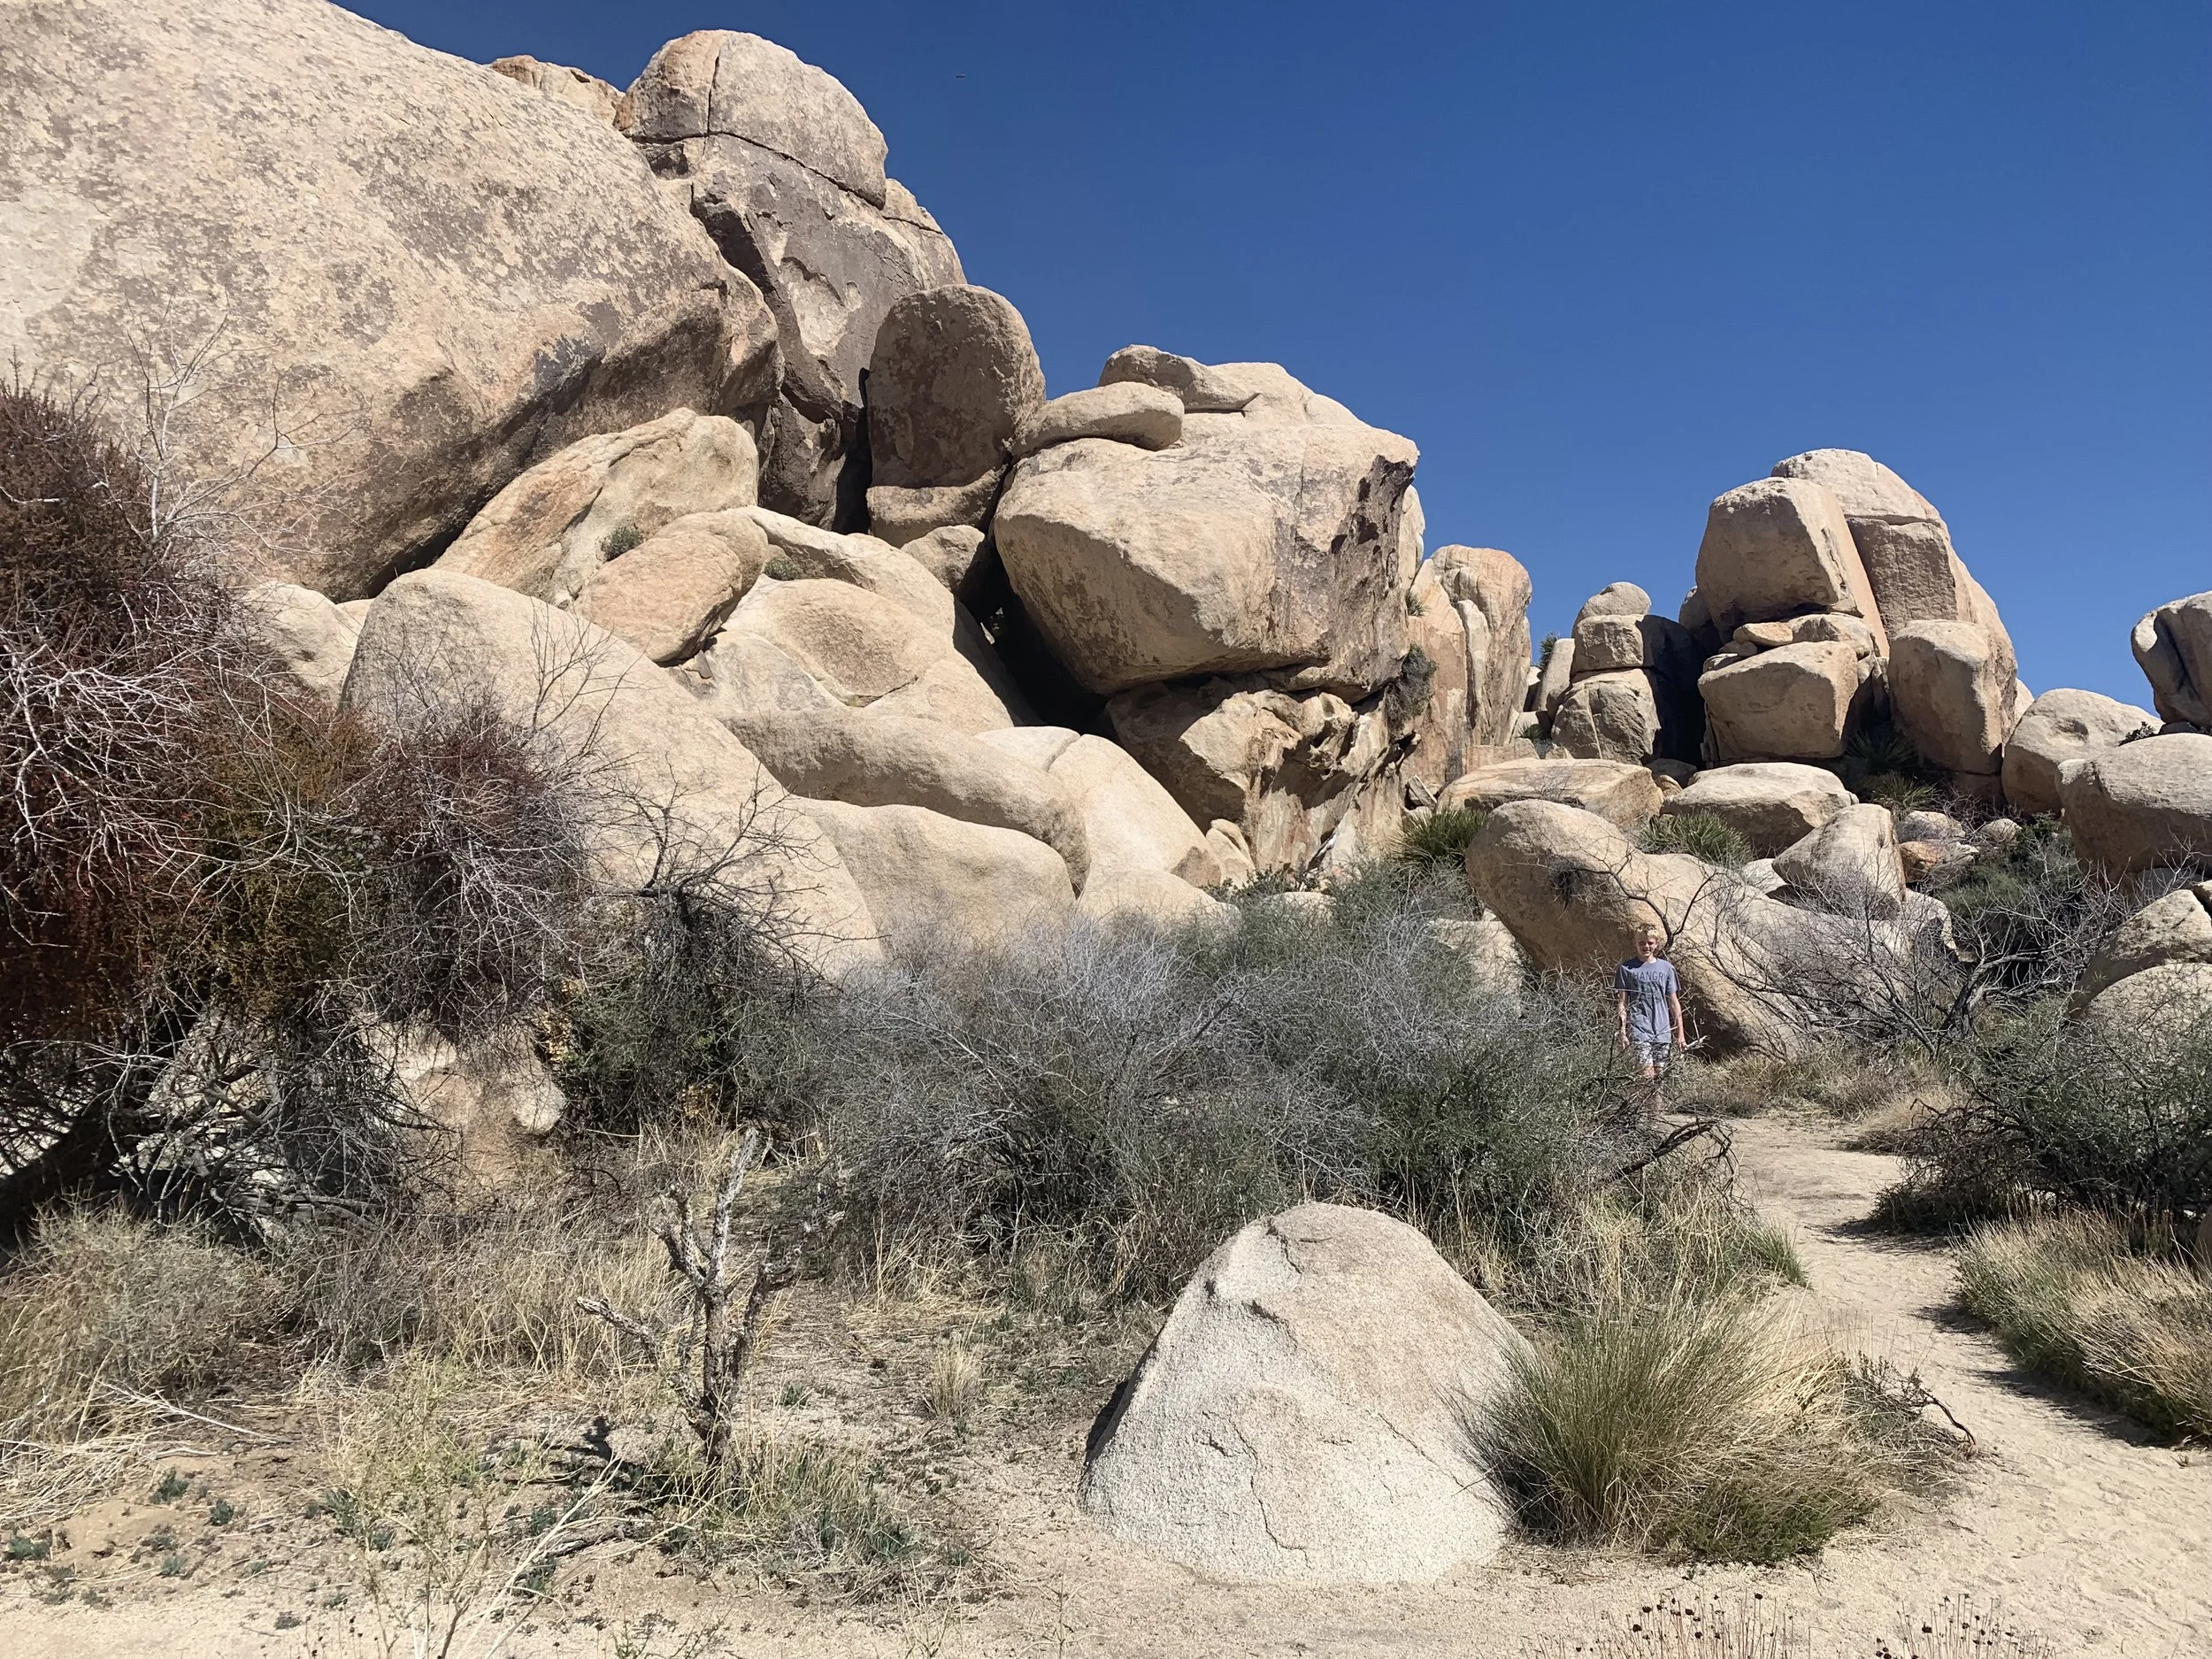
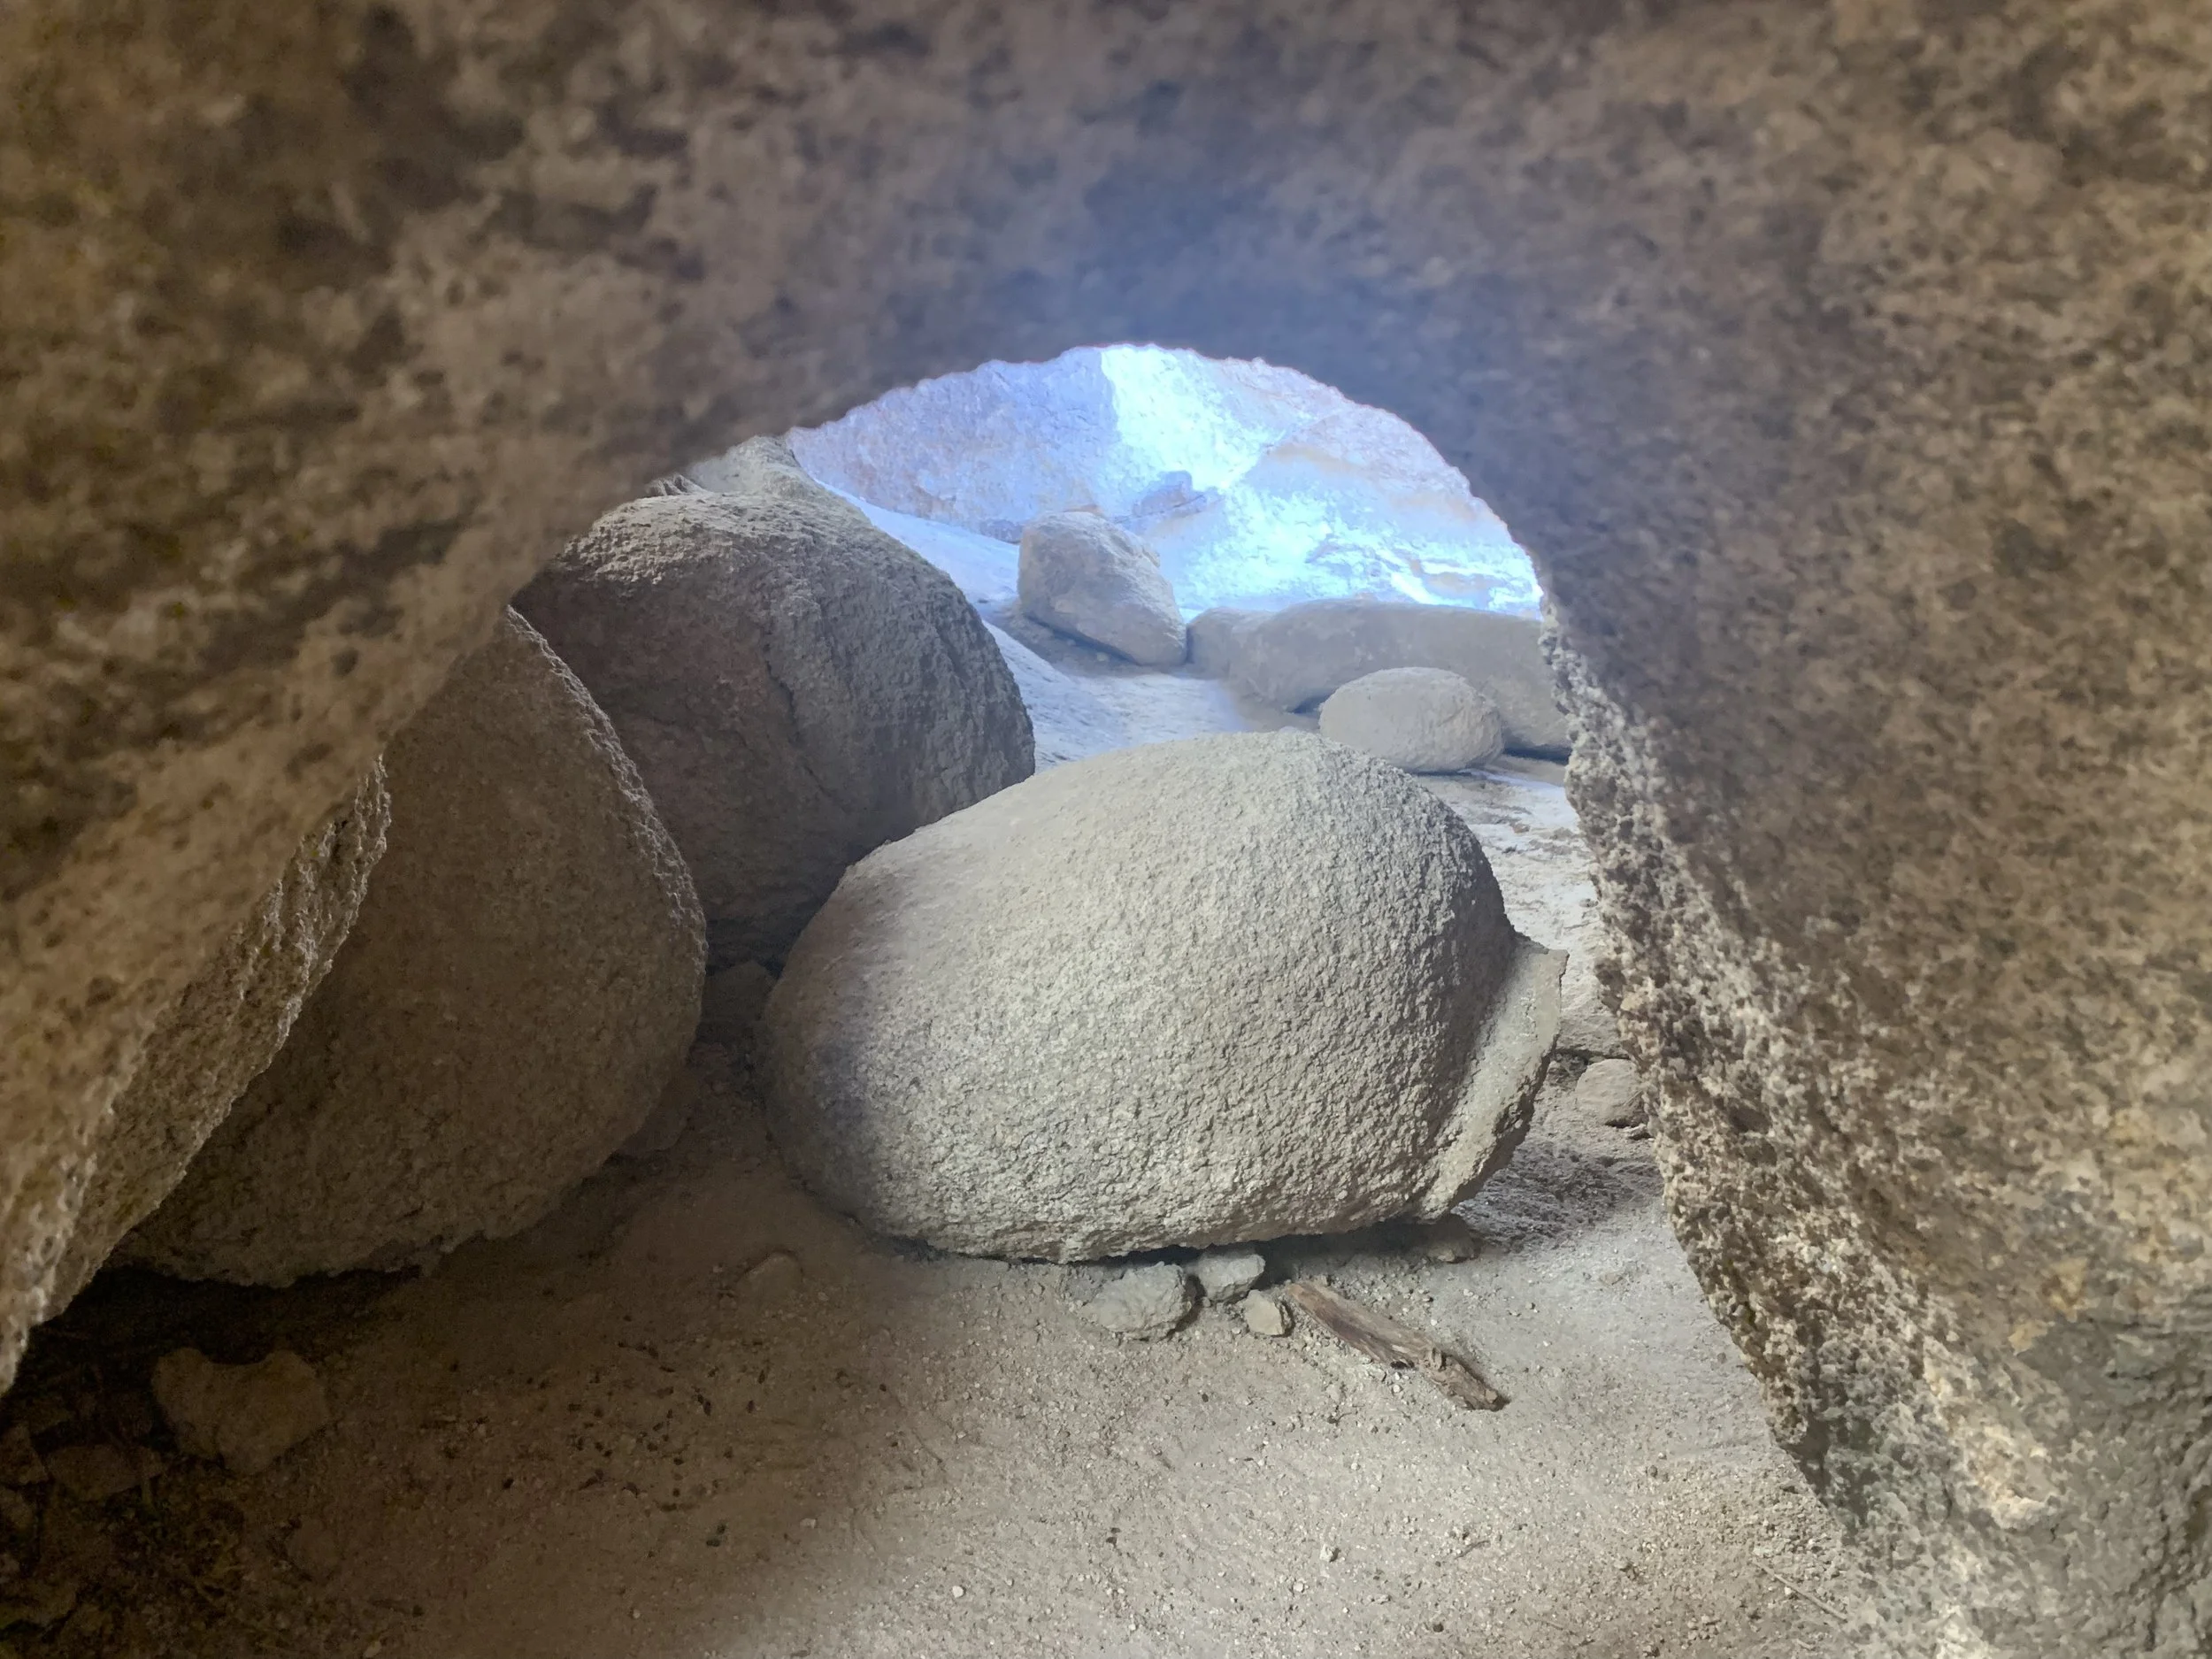
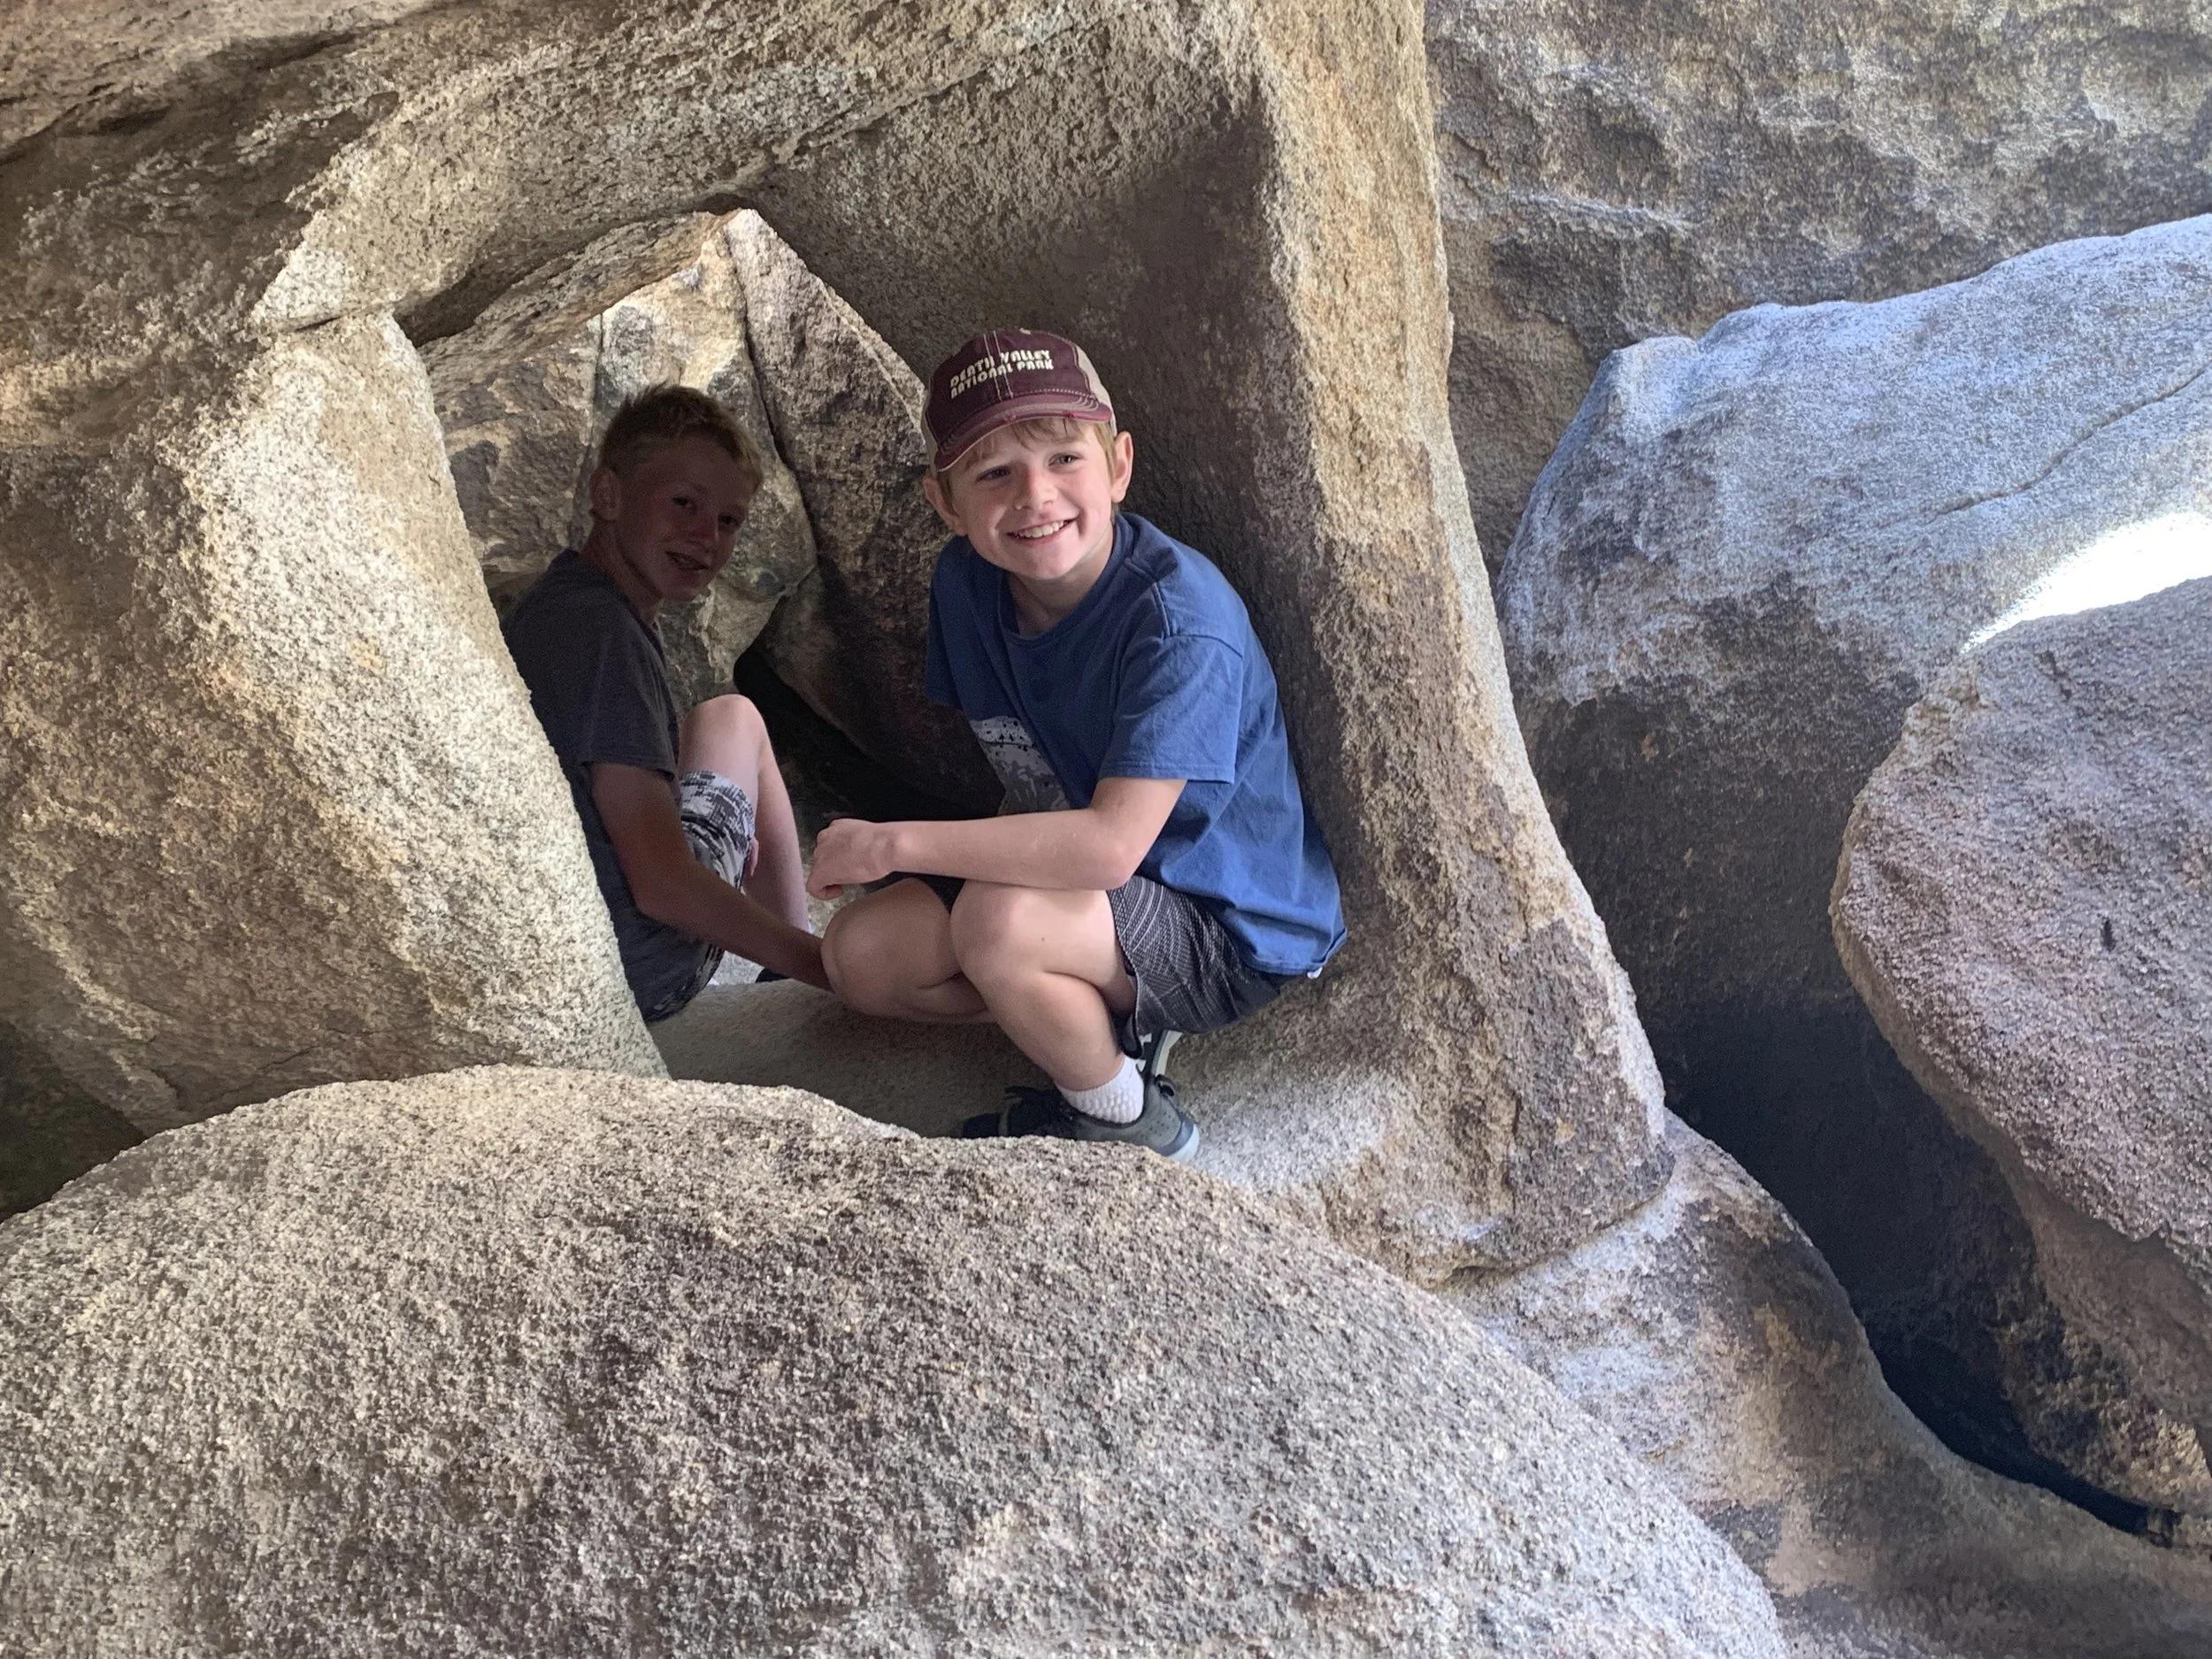
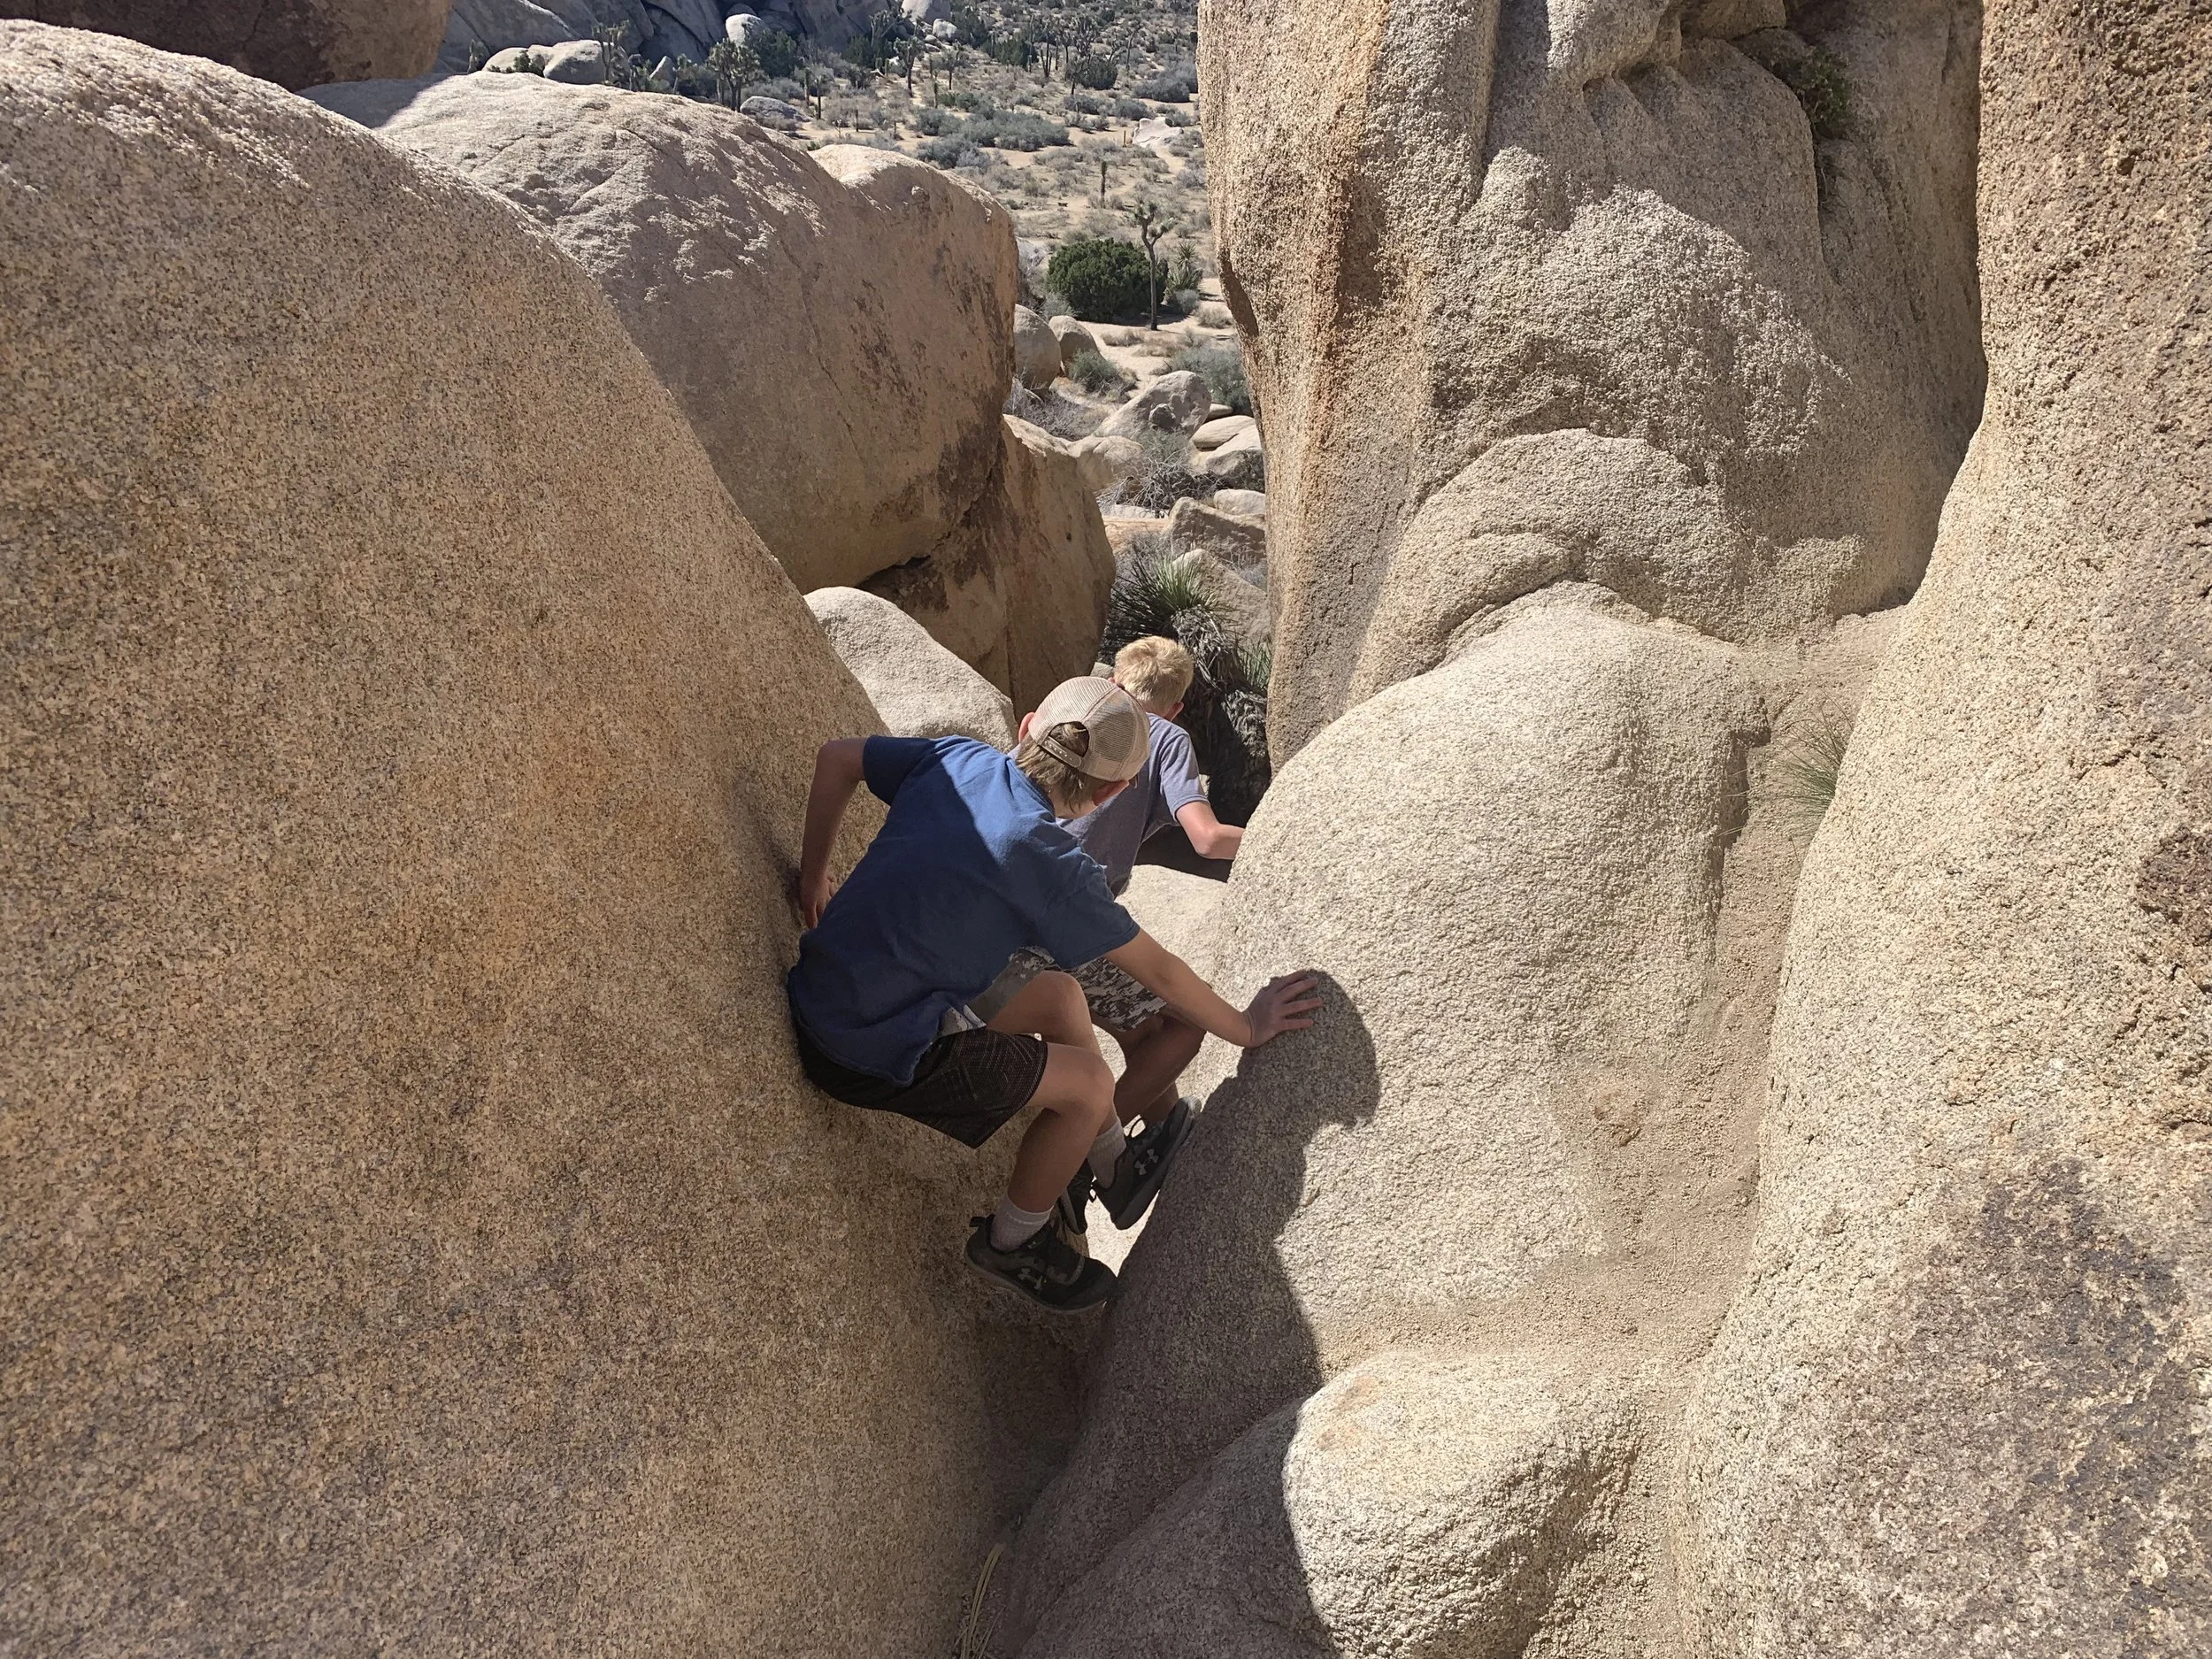
Once you are in the rocks, it’s a choose-your-own-adventure kind of hike that will require going under rocks, over rocks, crawling, and spider-walking. Hard to say I have just one favorite hike at Joshua Tree, but this was probably the highlight of our day.

Climbing up the entrance to later access the slot canyon. My son is 13 in this picture, so you can get an idea of how large the rocks are.
We shimmied under this rock
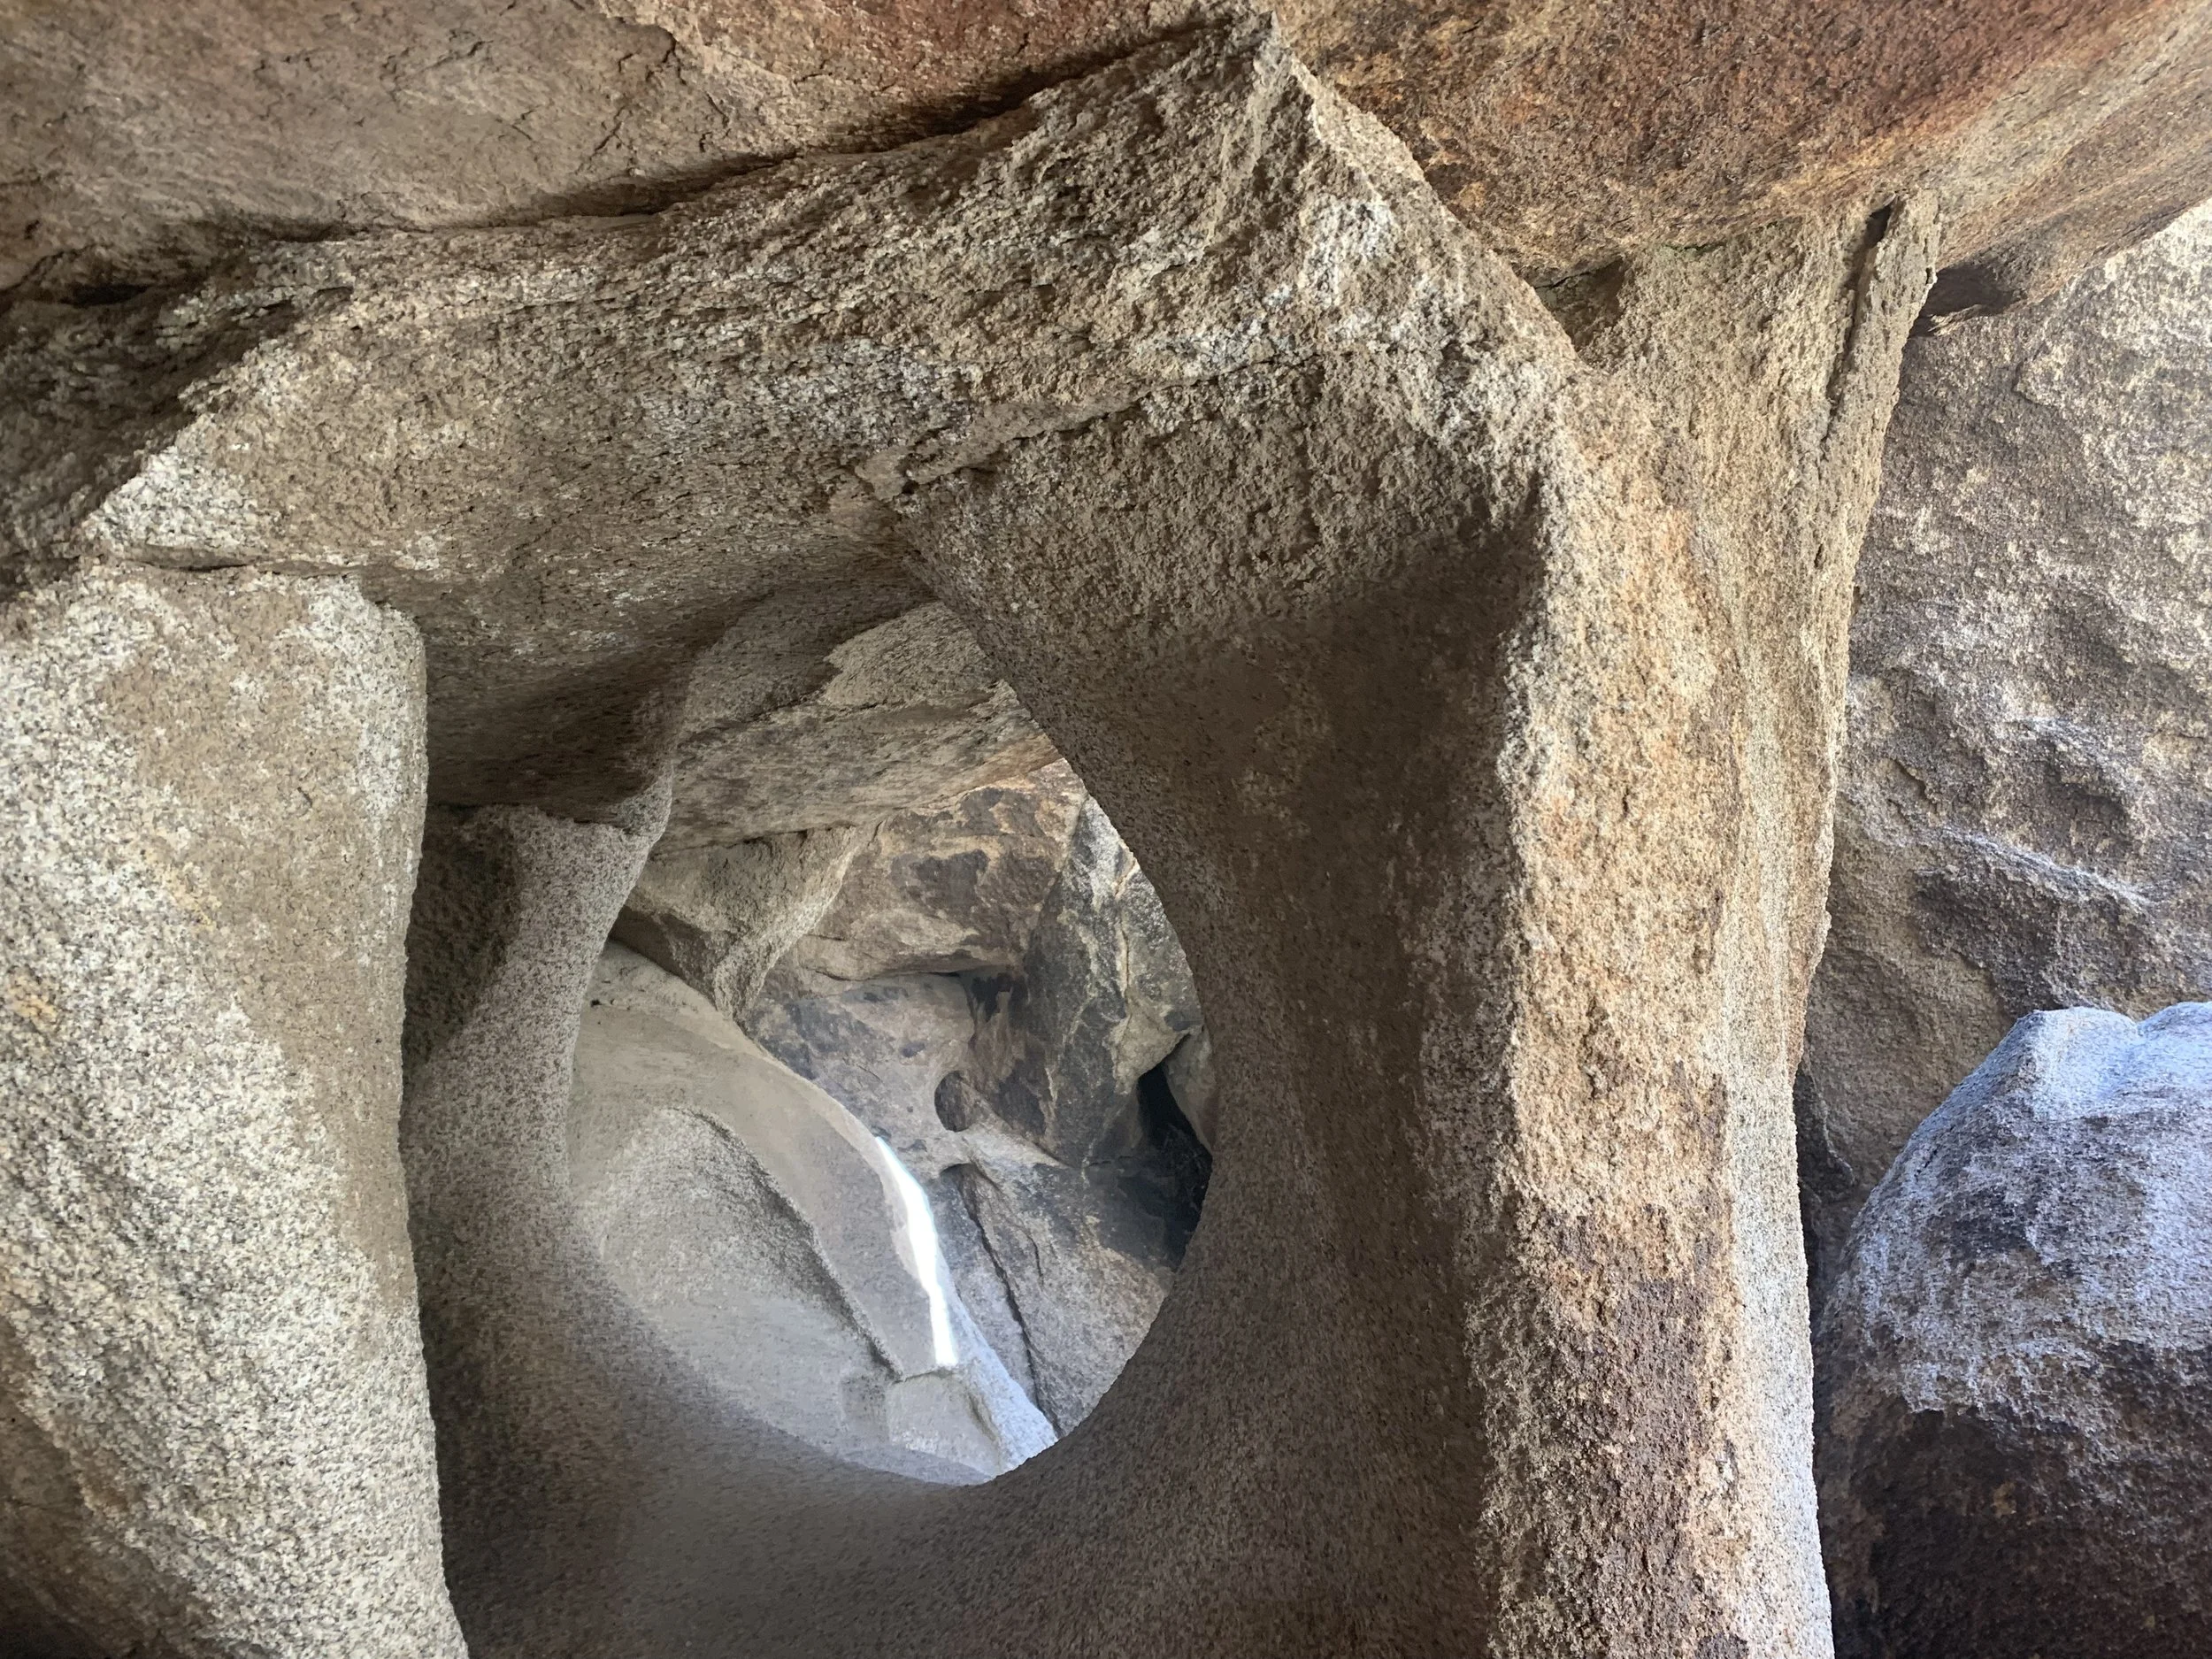
Amazing rock formation within the Hall of Horrors
There’s not a direct route to the slot canyon. We explored quite a bit before we found it, but that was what made this area so fun.
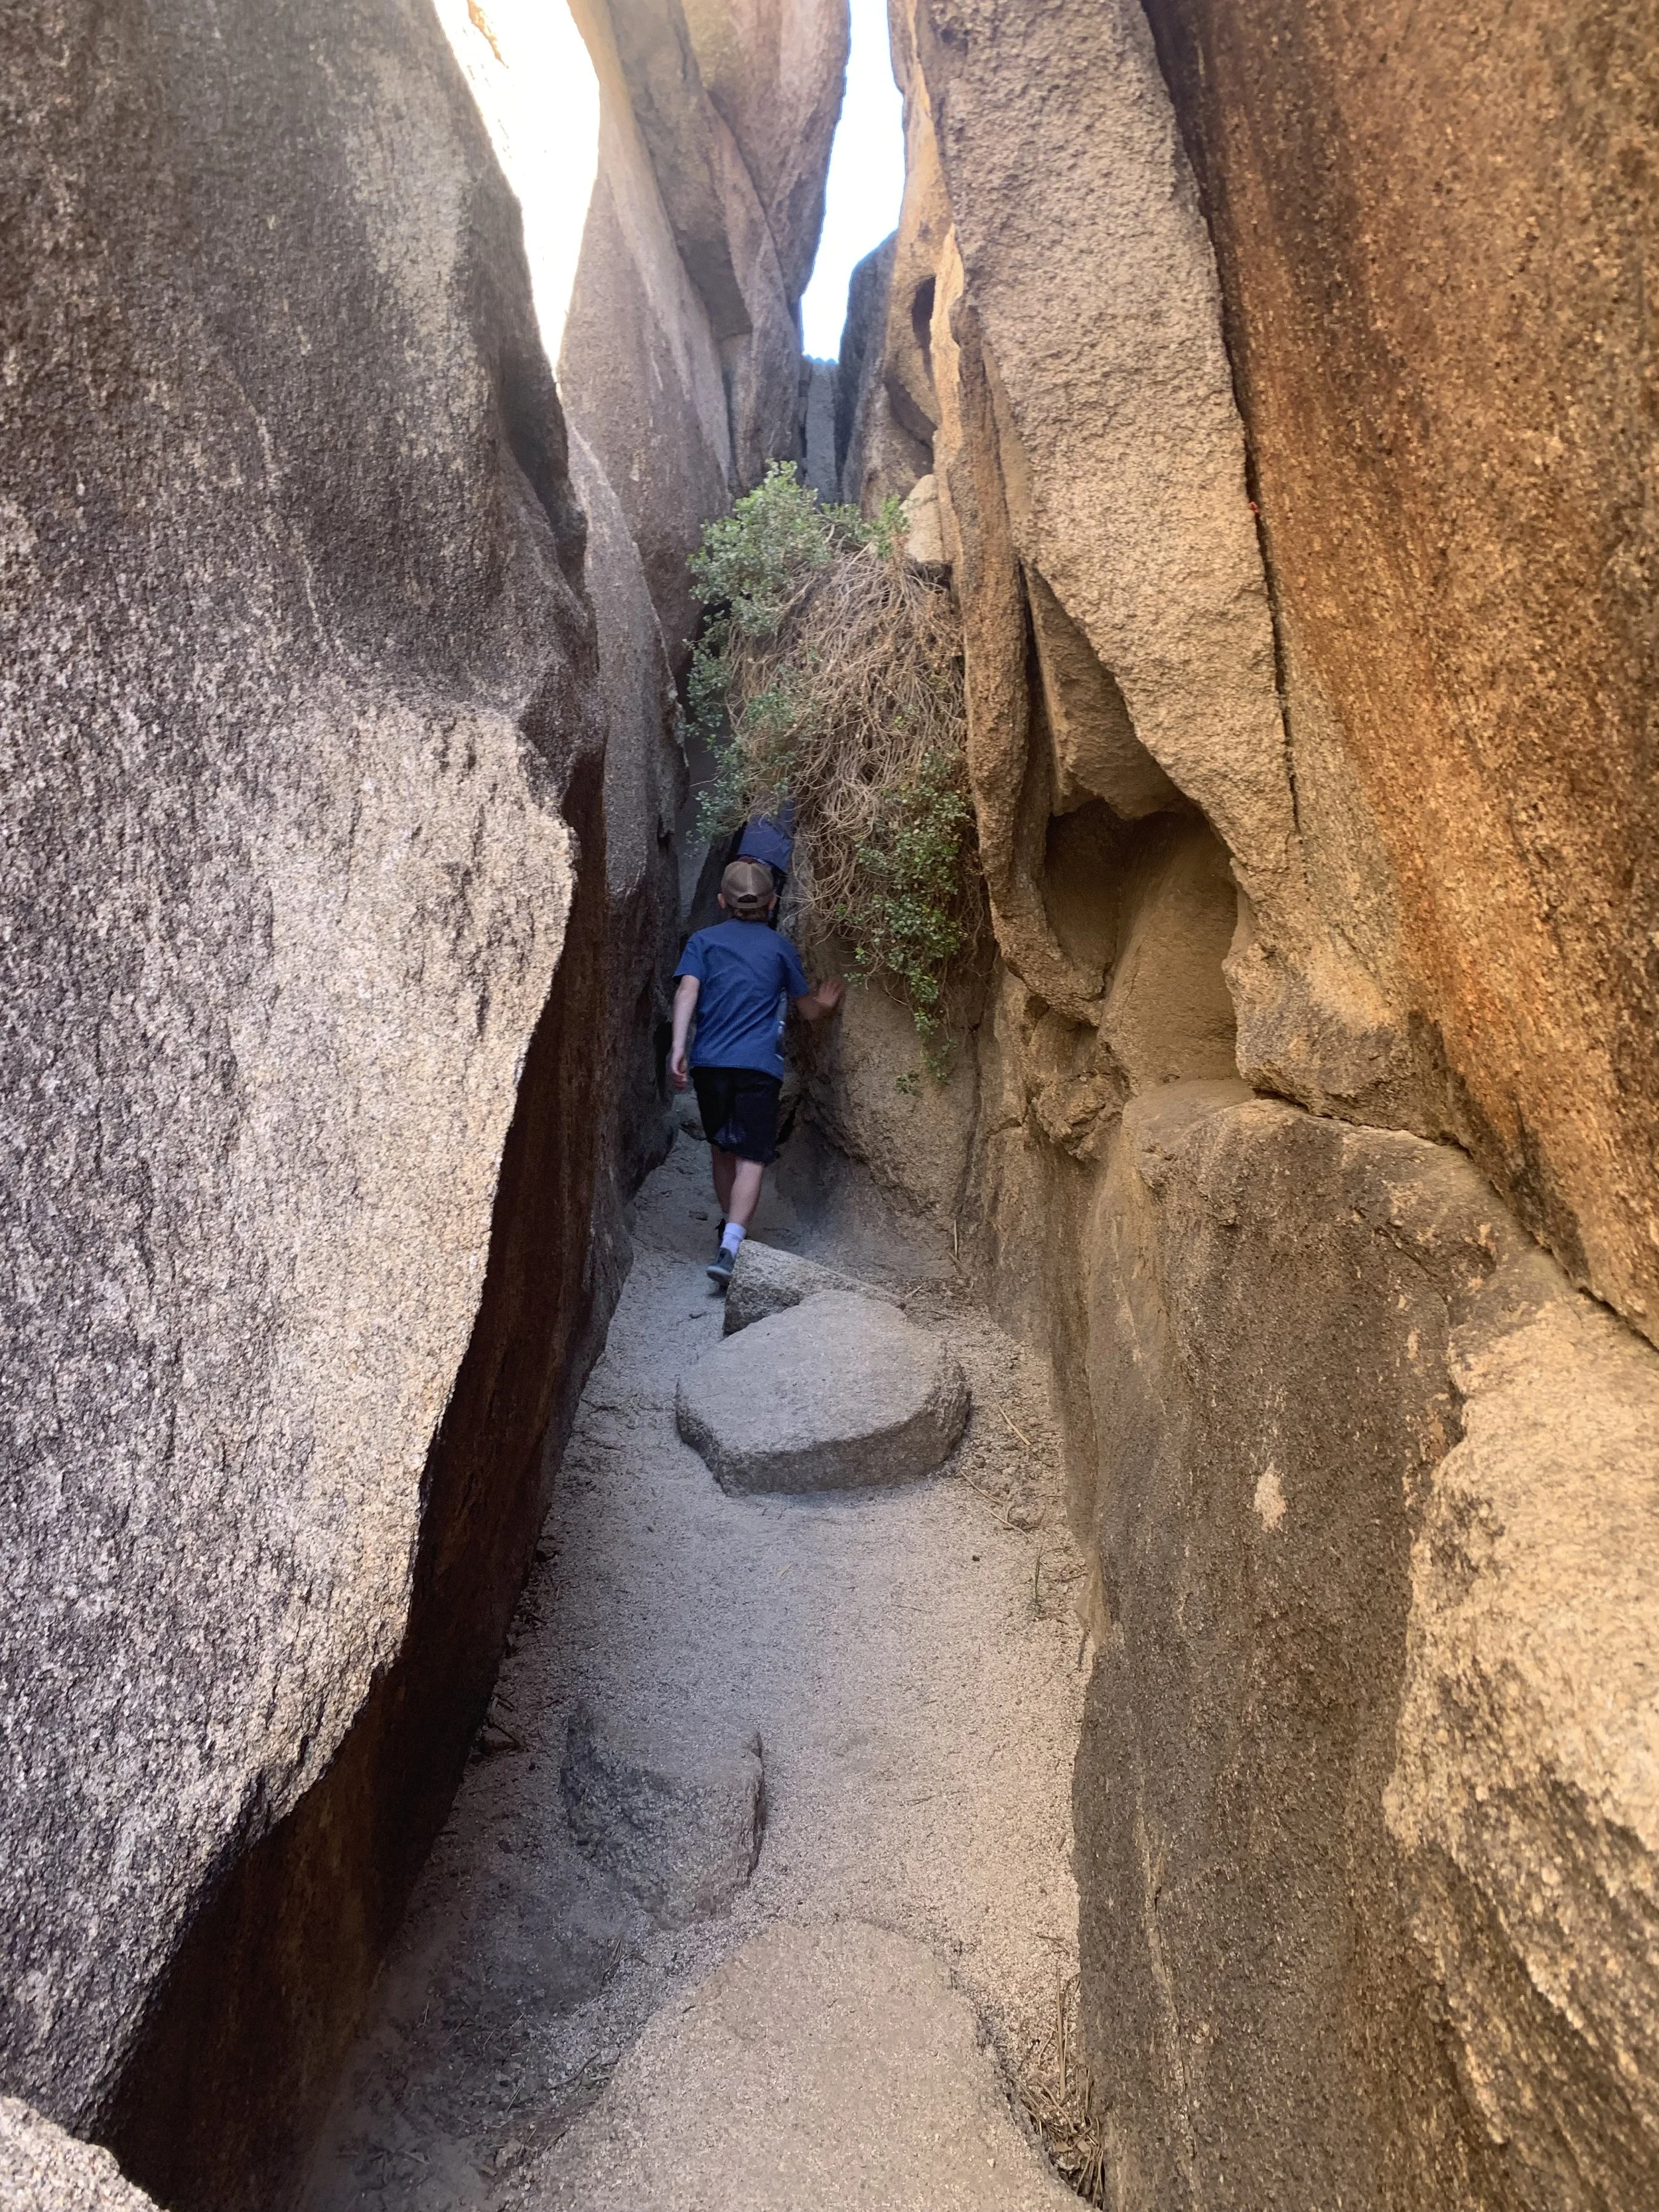
The slot canyon was pretty short, but quite fun to say we found
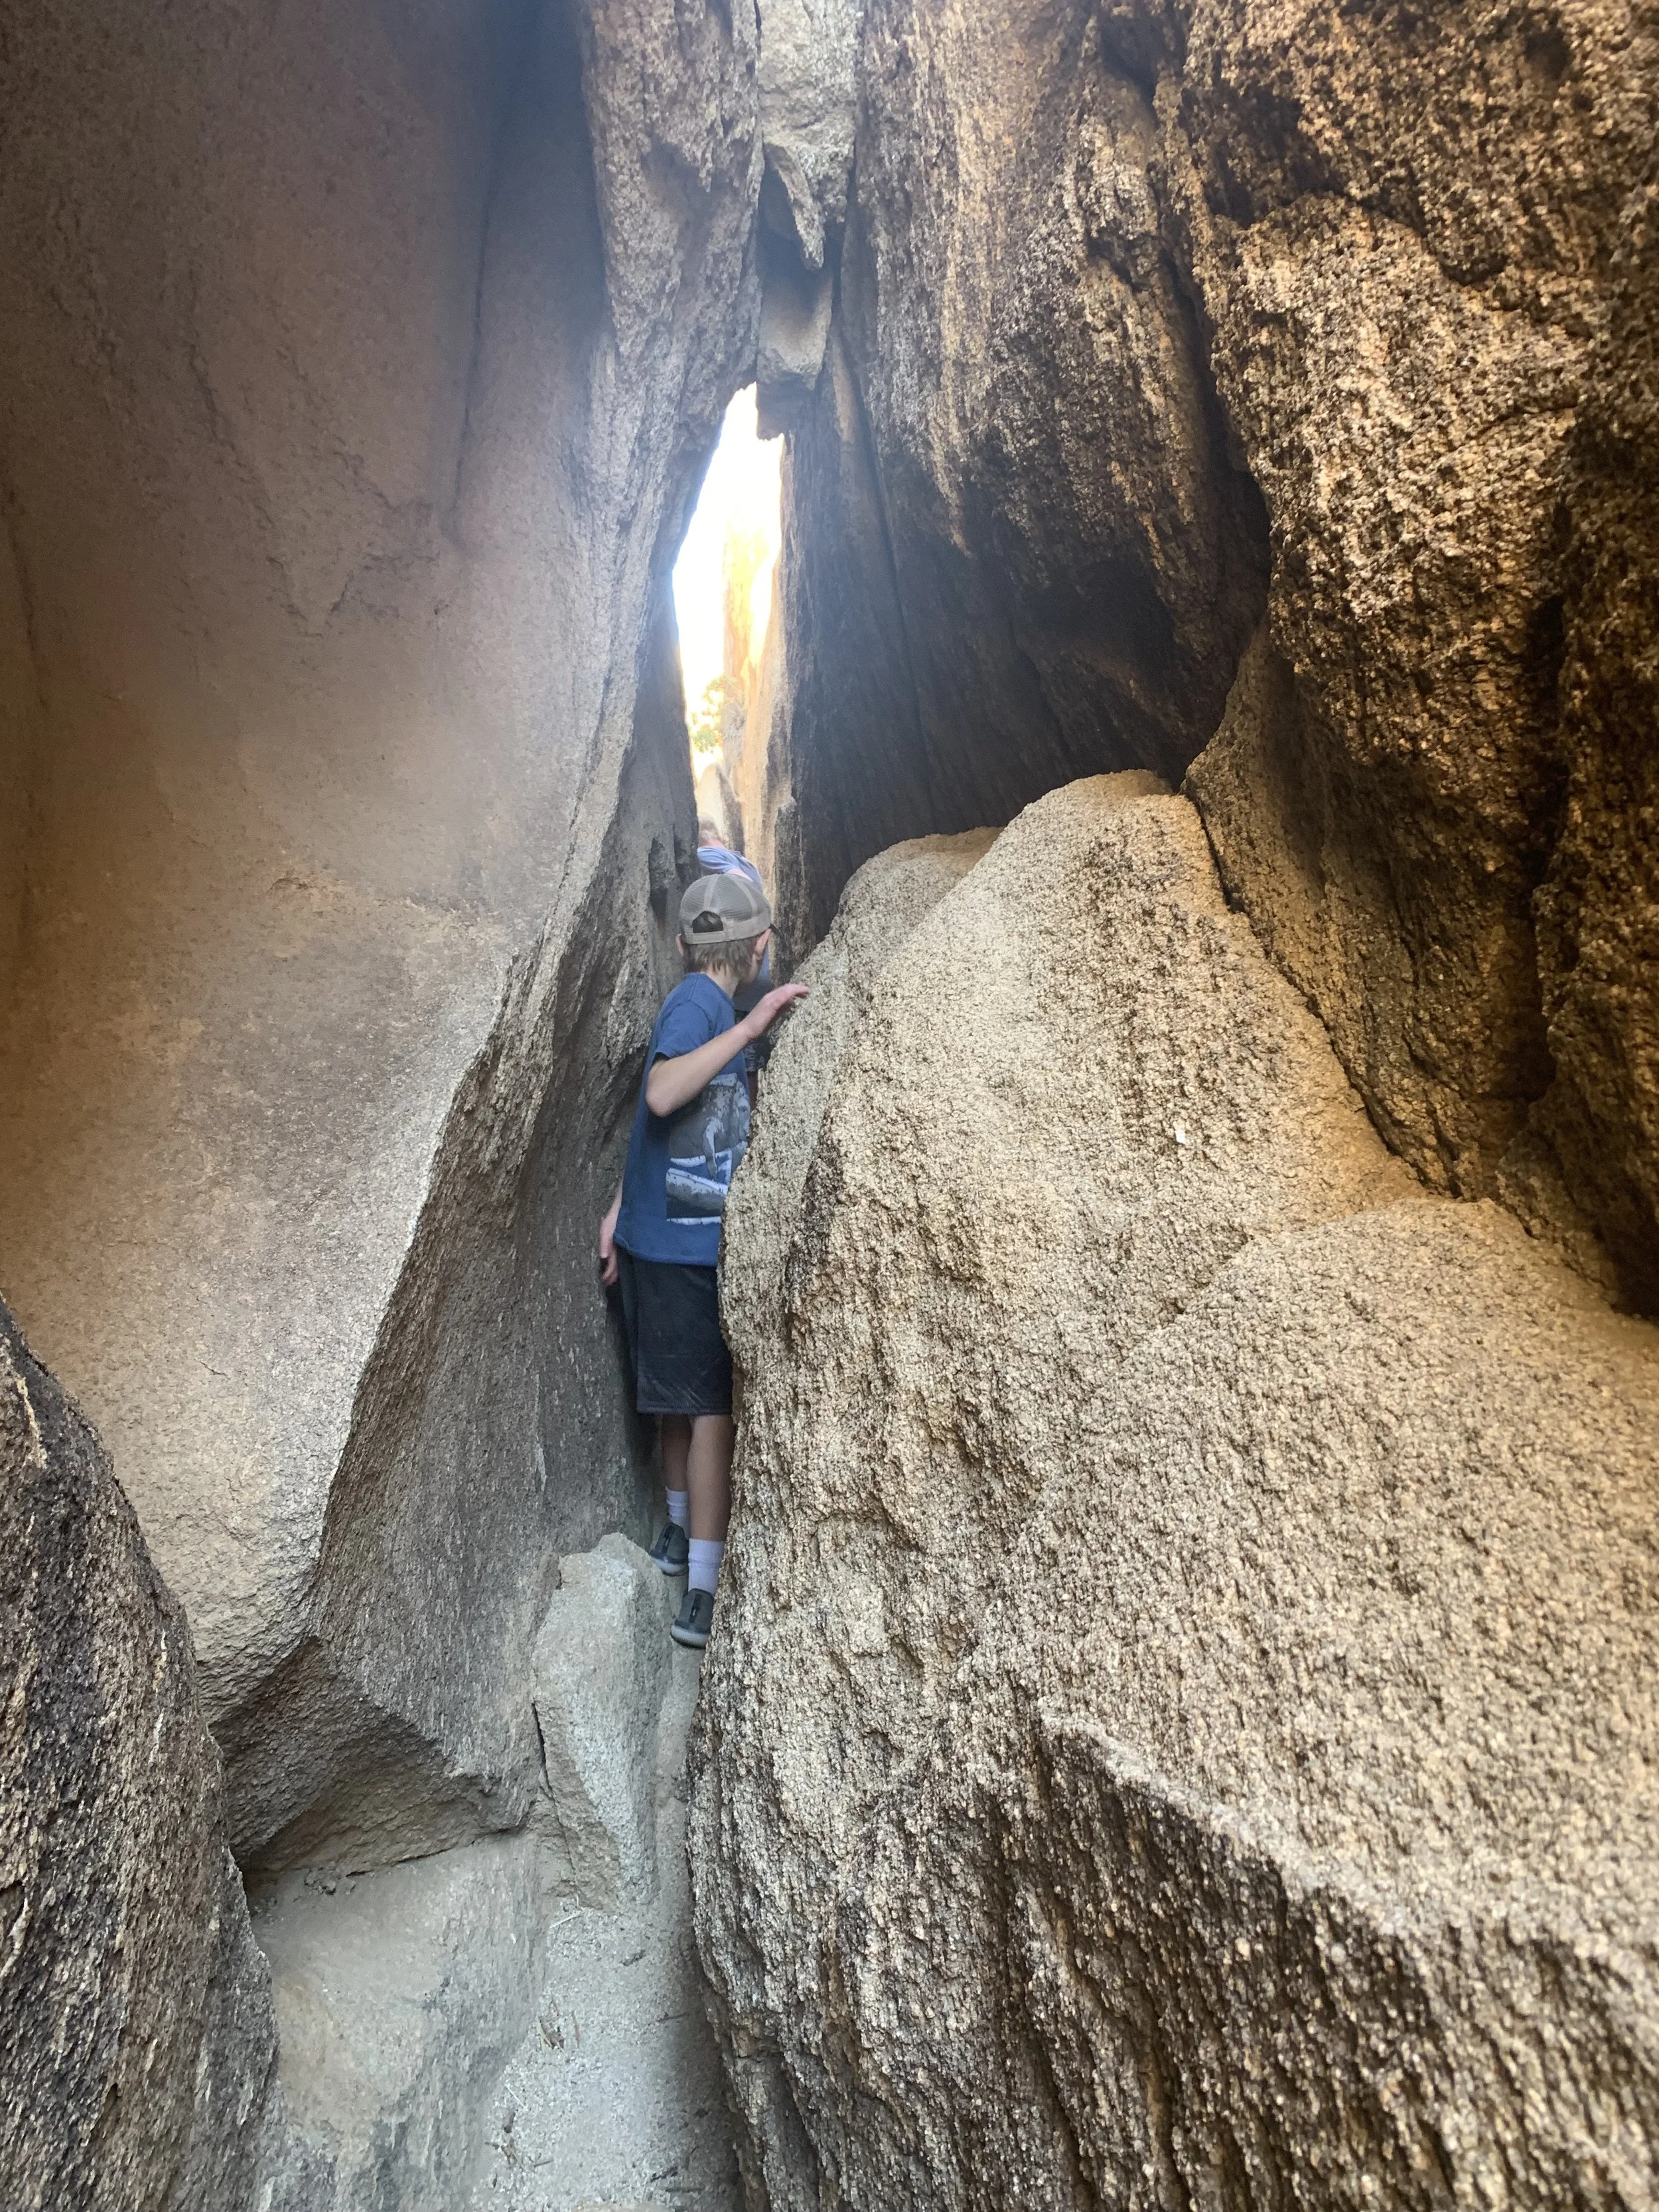
A tight squeeze - you will need to take your backpack of and carry it alongside. There was enough space for us all to make it through.
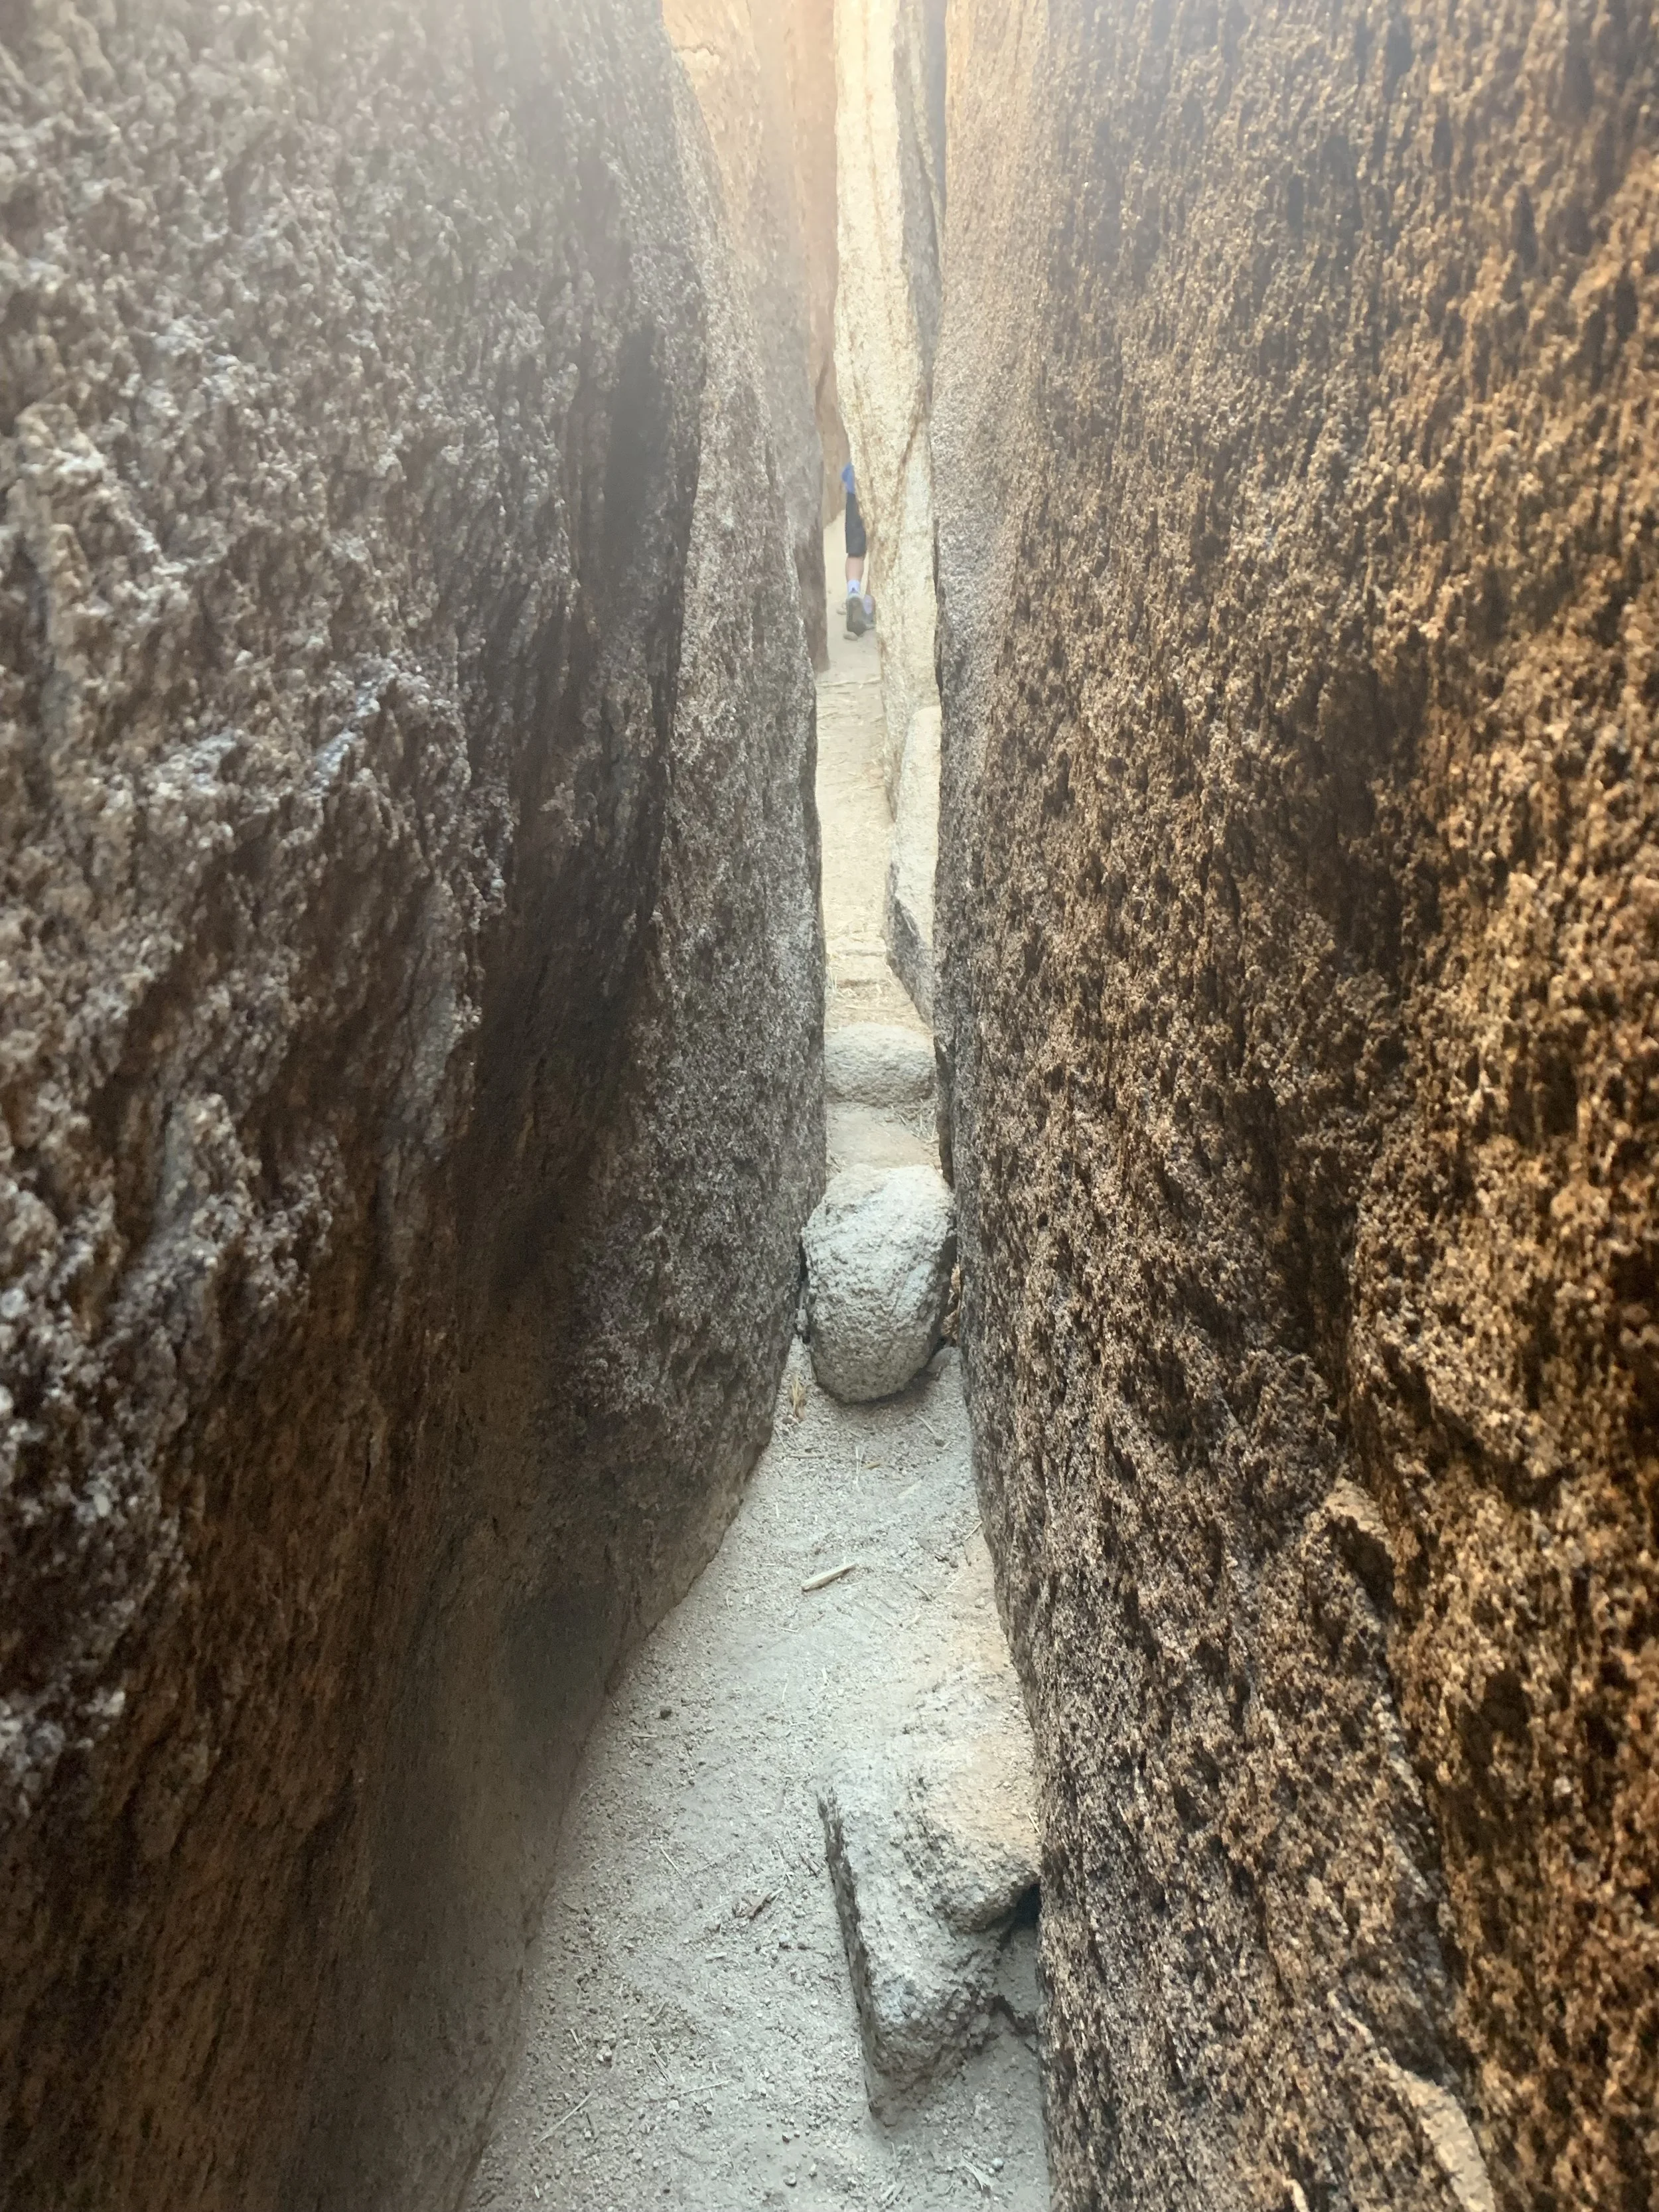
Hall of Horrors Slot Canyon
Hall of Horrors
I thought the name “Hall of Horrors” was funny, until we needed to figure out how to find a route to get back out of the rocks. We made up a new way down rather than re-tracing our steps. Going up into the rocks is easier than scrambling back down. Lots of spider crawling was needed.
As you can see from our map, we walked around the other side of the first group of rocks to get back to our car. It took us about an hour here to feel like we had explored everywhere we wanted to.
8 - Cap Rock
Distance - 0.4 miles
Elevation Gain - N/A
Trailhead Location - To get to Cap Rock, continue on Park Blvd past Ryan Campground, and turn left onto Keys View Rd (this is on your way to Keys View).
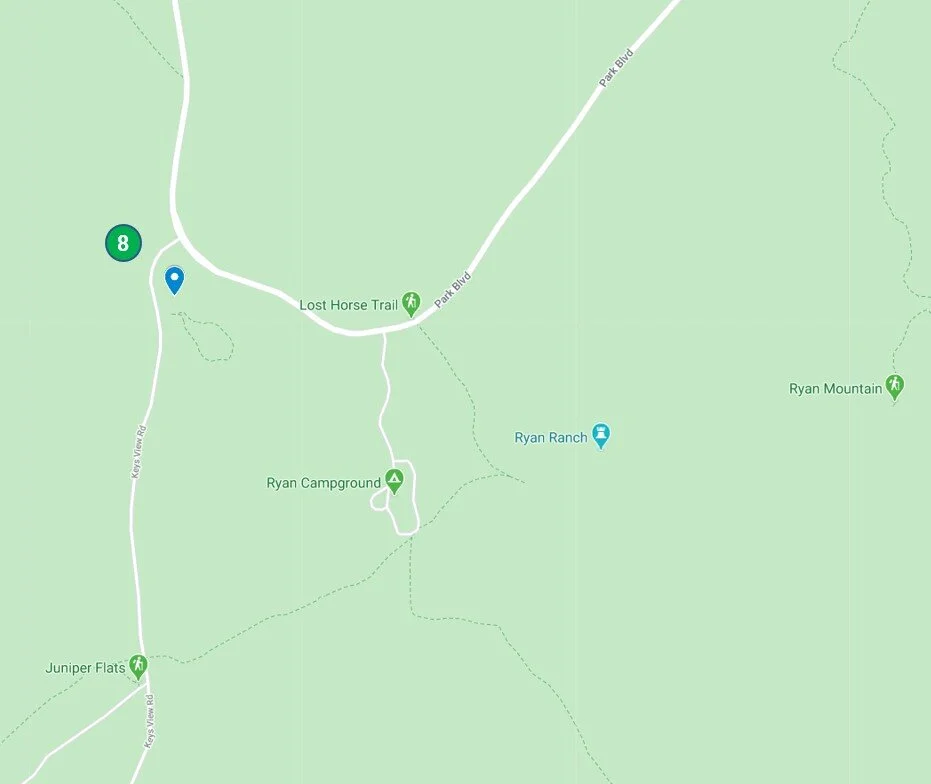
8 - Cap Rock
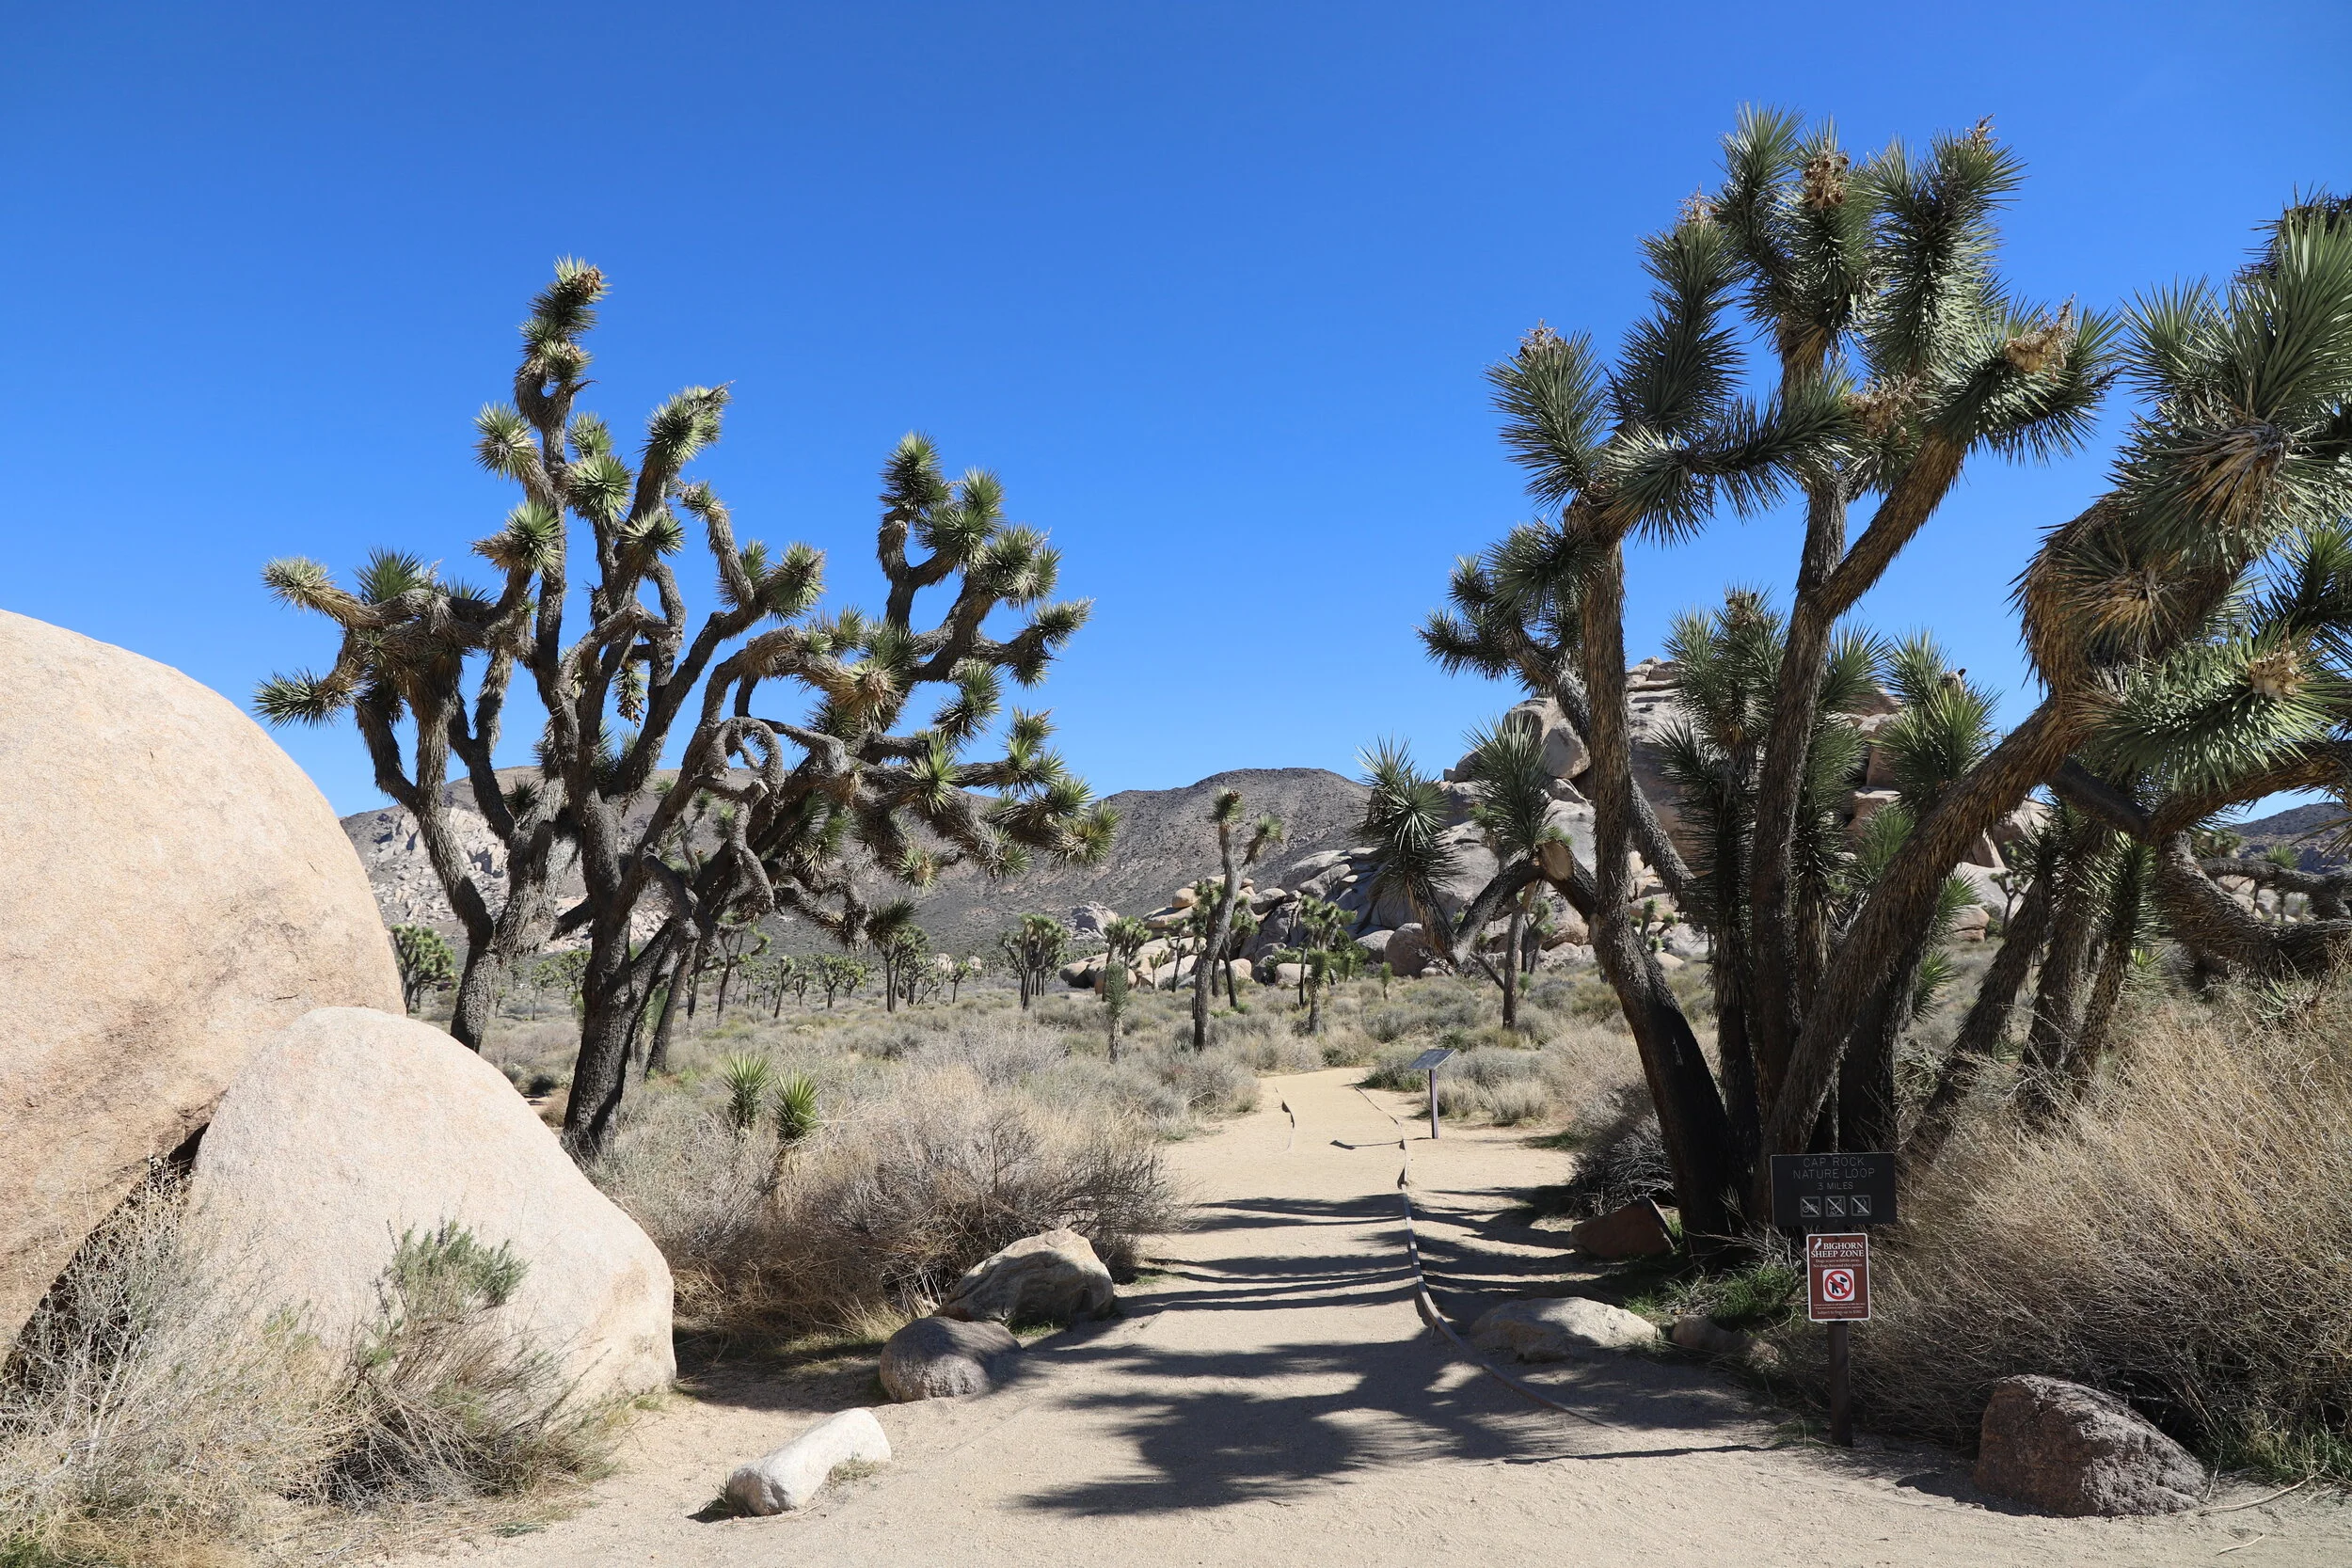
Cap Rock Trailhead
I loved this simple trail. It was flat and easily accessible and situated in a forest of Joshua Trees. It was an interpretive hike, meaning there were informative signs along the way, including information about Joshua Trees.
Cap Rock
More Joshua Trees
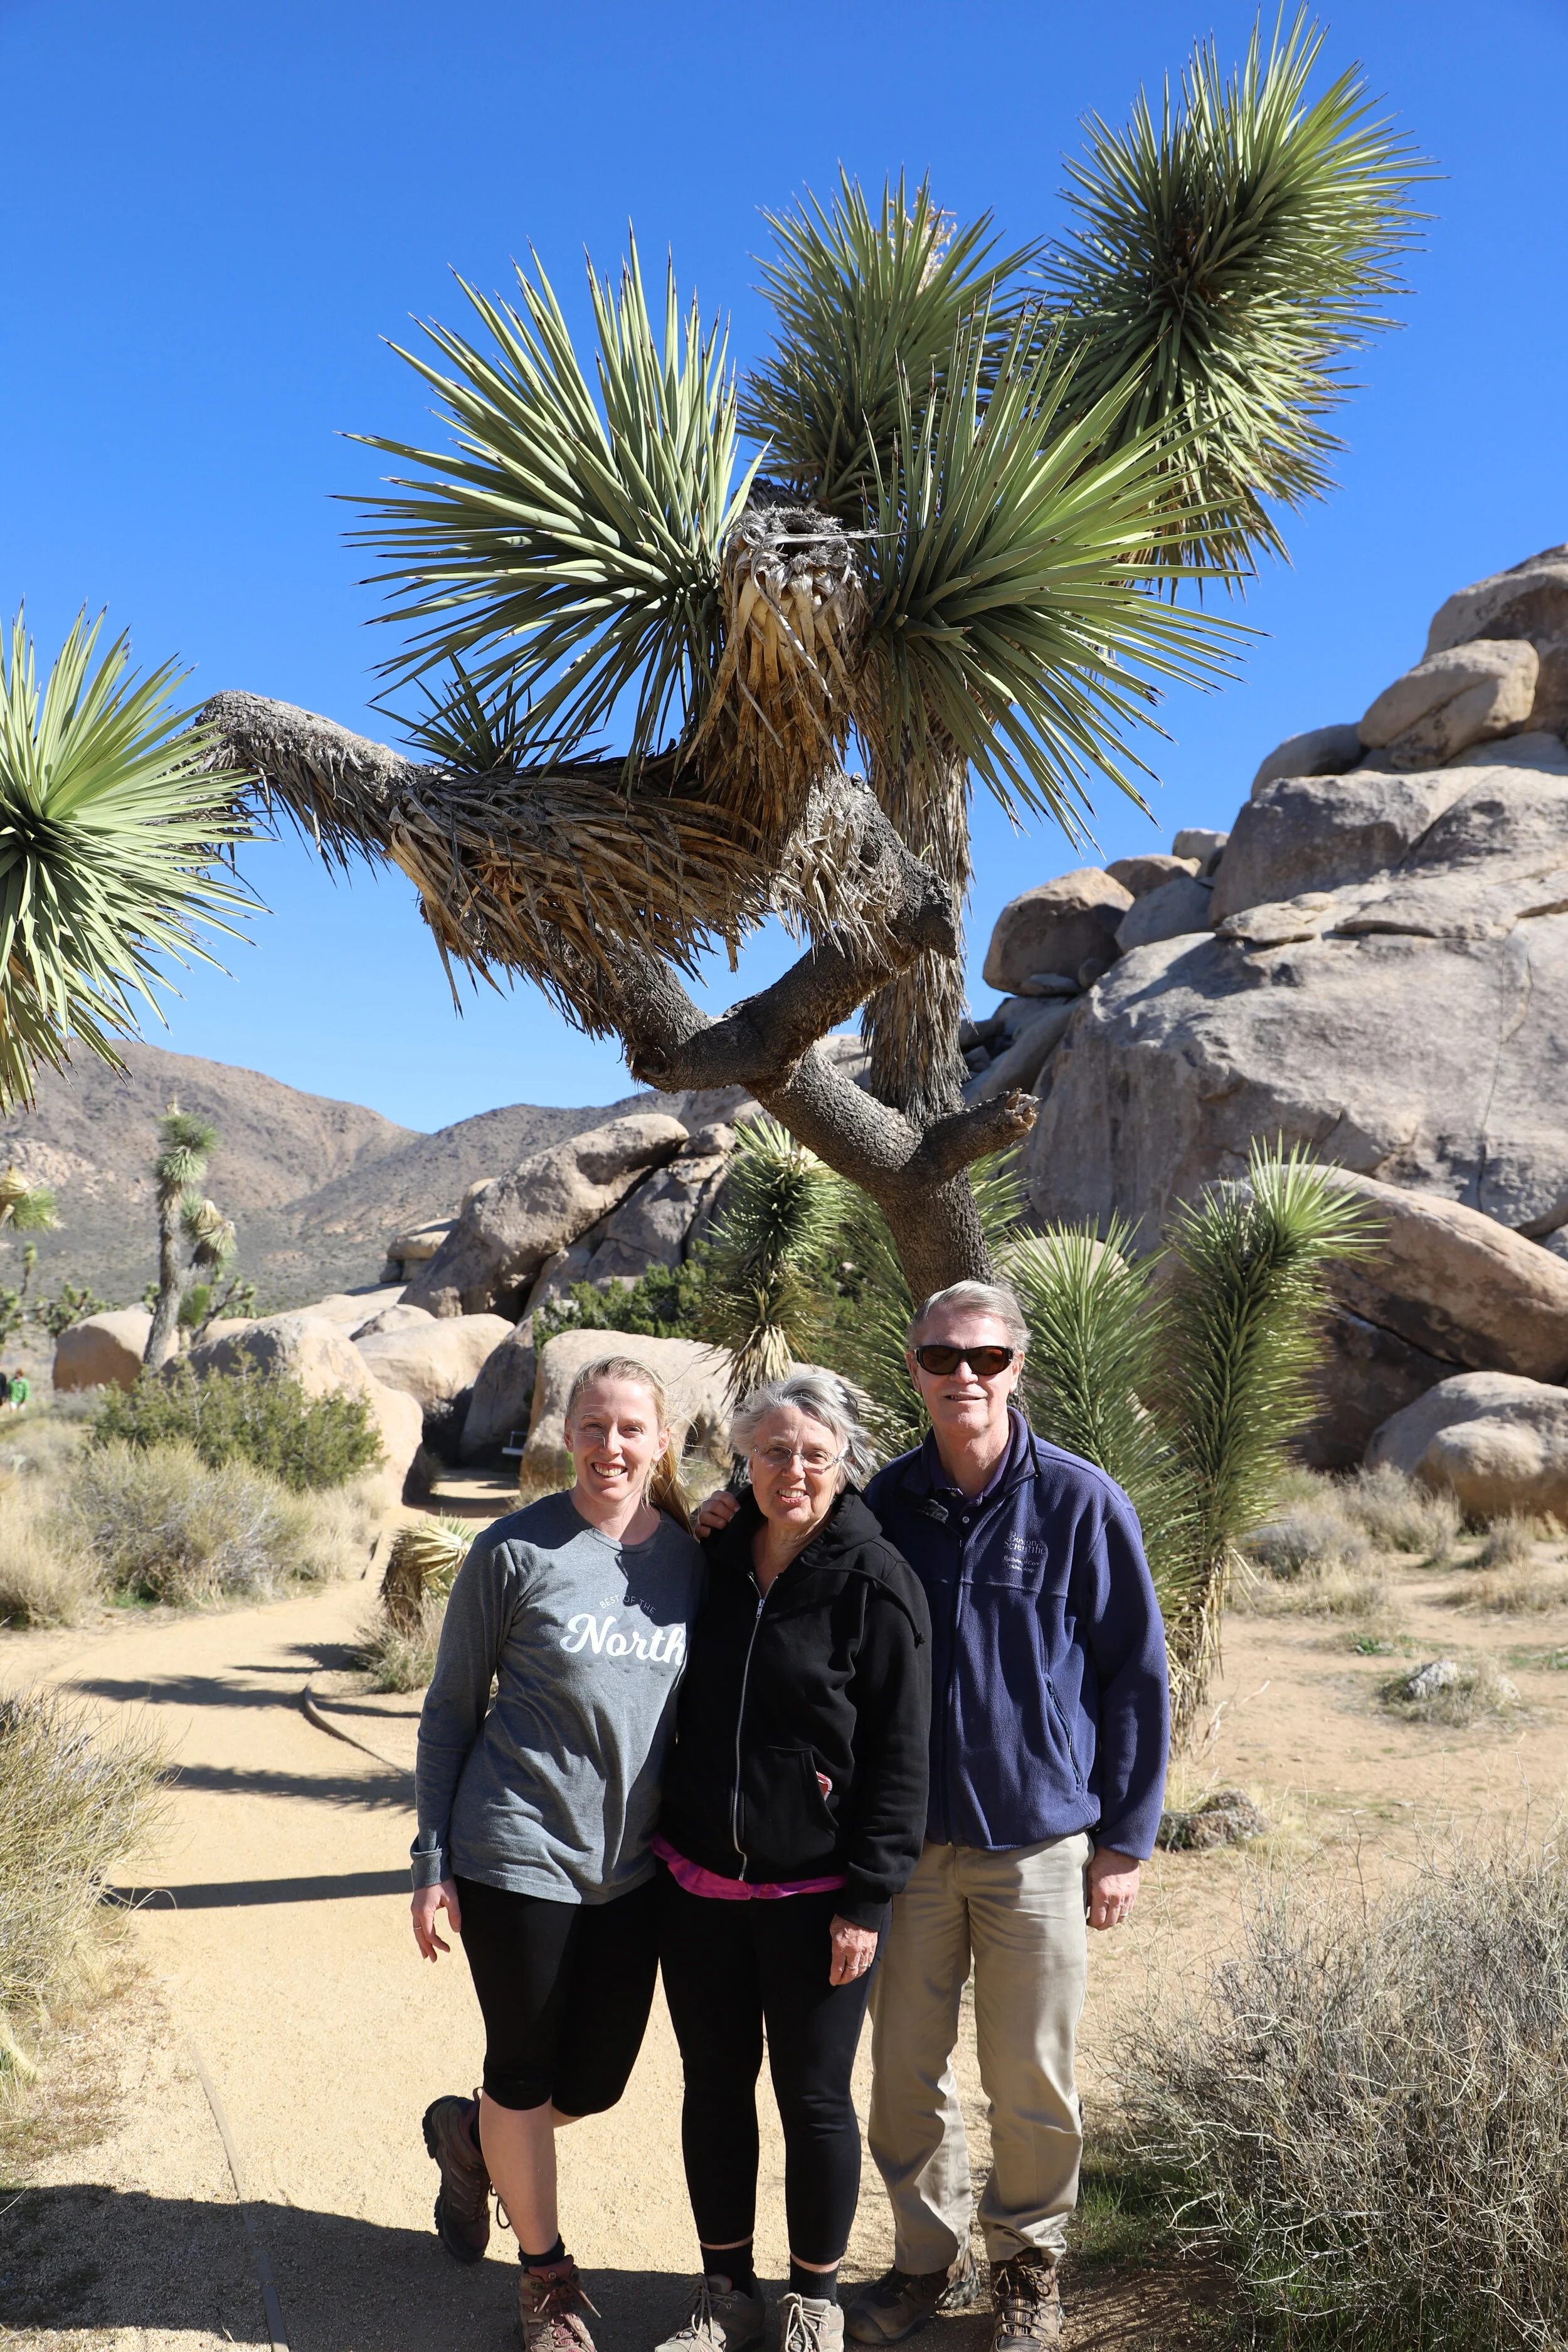
Hiking with my parents
9 - Keys Viewpoint
Distance - 500 ft - This is a viewpoint not a trail. From the parking lot you will walk up a short but rather steep hill.
Trailhead Location - Continue to the end of Keys View Rd (5.5 miles). Park at the parking lot, and follow the paved path to the top of the hill for the overlook.

9 - Key’s Viewpoint
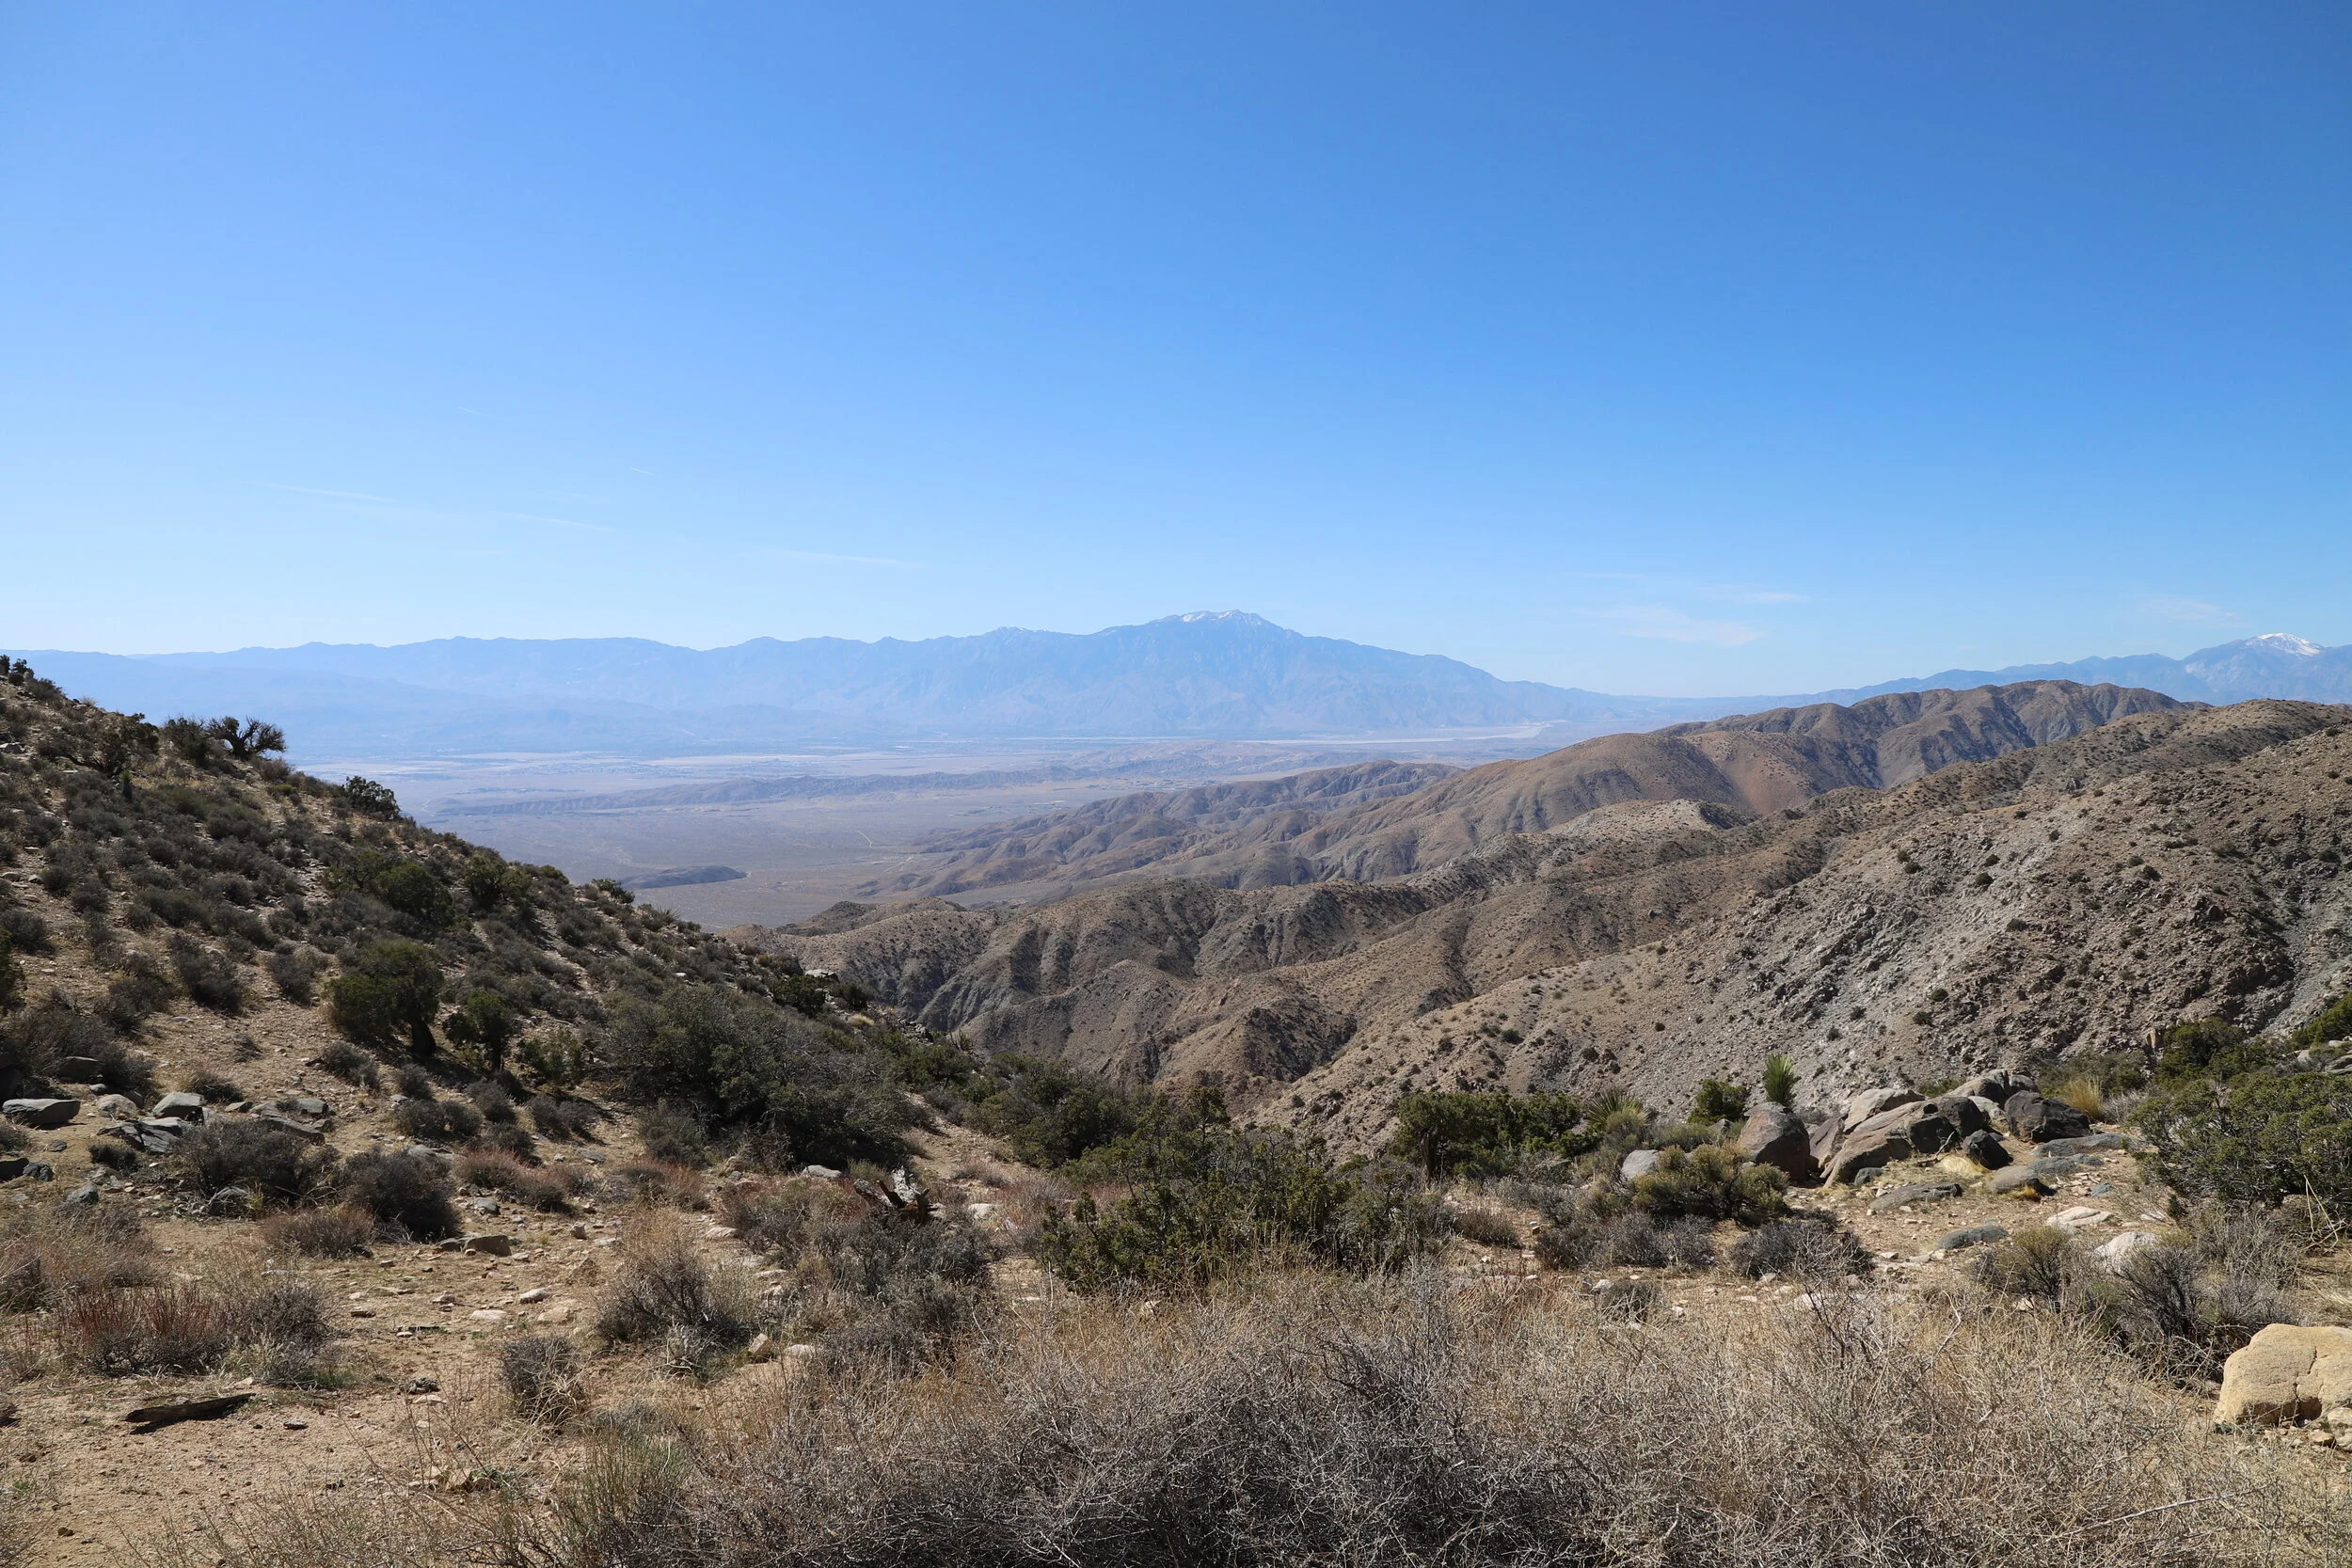
Keys View - San Andreas Fault is visible as the ridge in the valley below
It’s a quick drive down to Keys View and a short walk up to the top of the hill. The San Andreas Fault is visible at the bottom of the valley. I thought it was worth the few minutes of a drive to see the beautiful view.

Keys View
10 - Hidden Valley Trail
Distance - 1.0 miles
Elevation Gain - N/A
Trailhead Location - From Keys View, turn left to return to Park Blvd. The Hidden Valley Trailhead will be off on your left. Follow the signs, the road does not have a name.
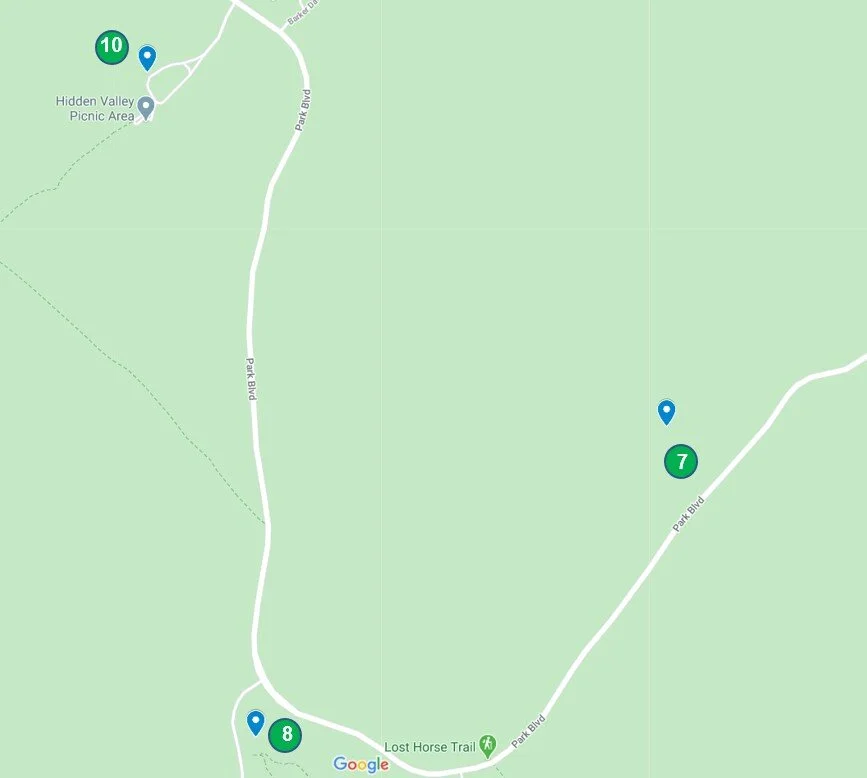
7 - Hall of Horrors, 8 - Cap Rock, 10 - Hidden Valley Trail
Hidden Valley was another great hike. Pretty, short, and really unique scenery. My only caution is that the end of the trail (we hiked it clockwise) was difficult to follow the trail. We were a little confused but figured it out with other hikers. Keep looking for the informative signs. That will help you continue on the trail when gets difficult to discern it with the washes.
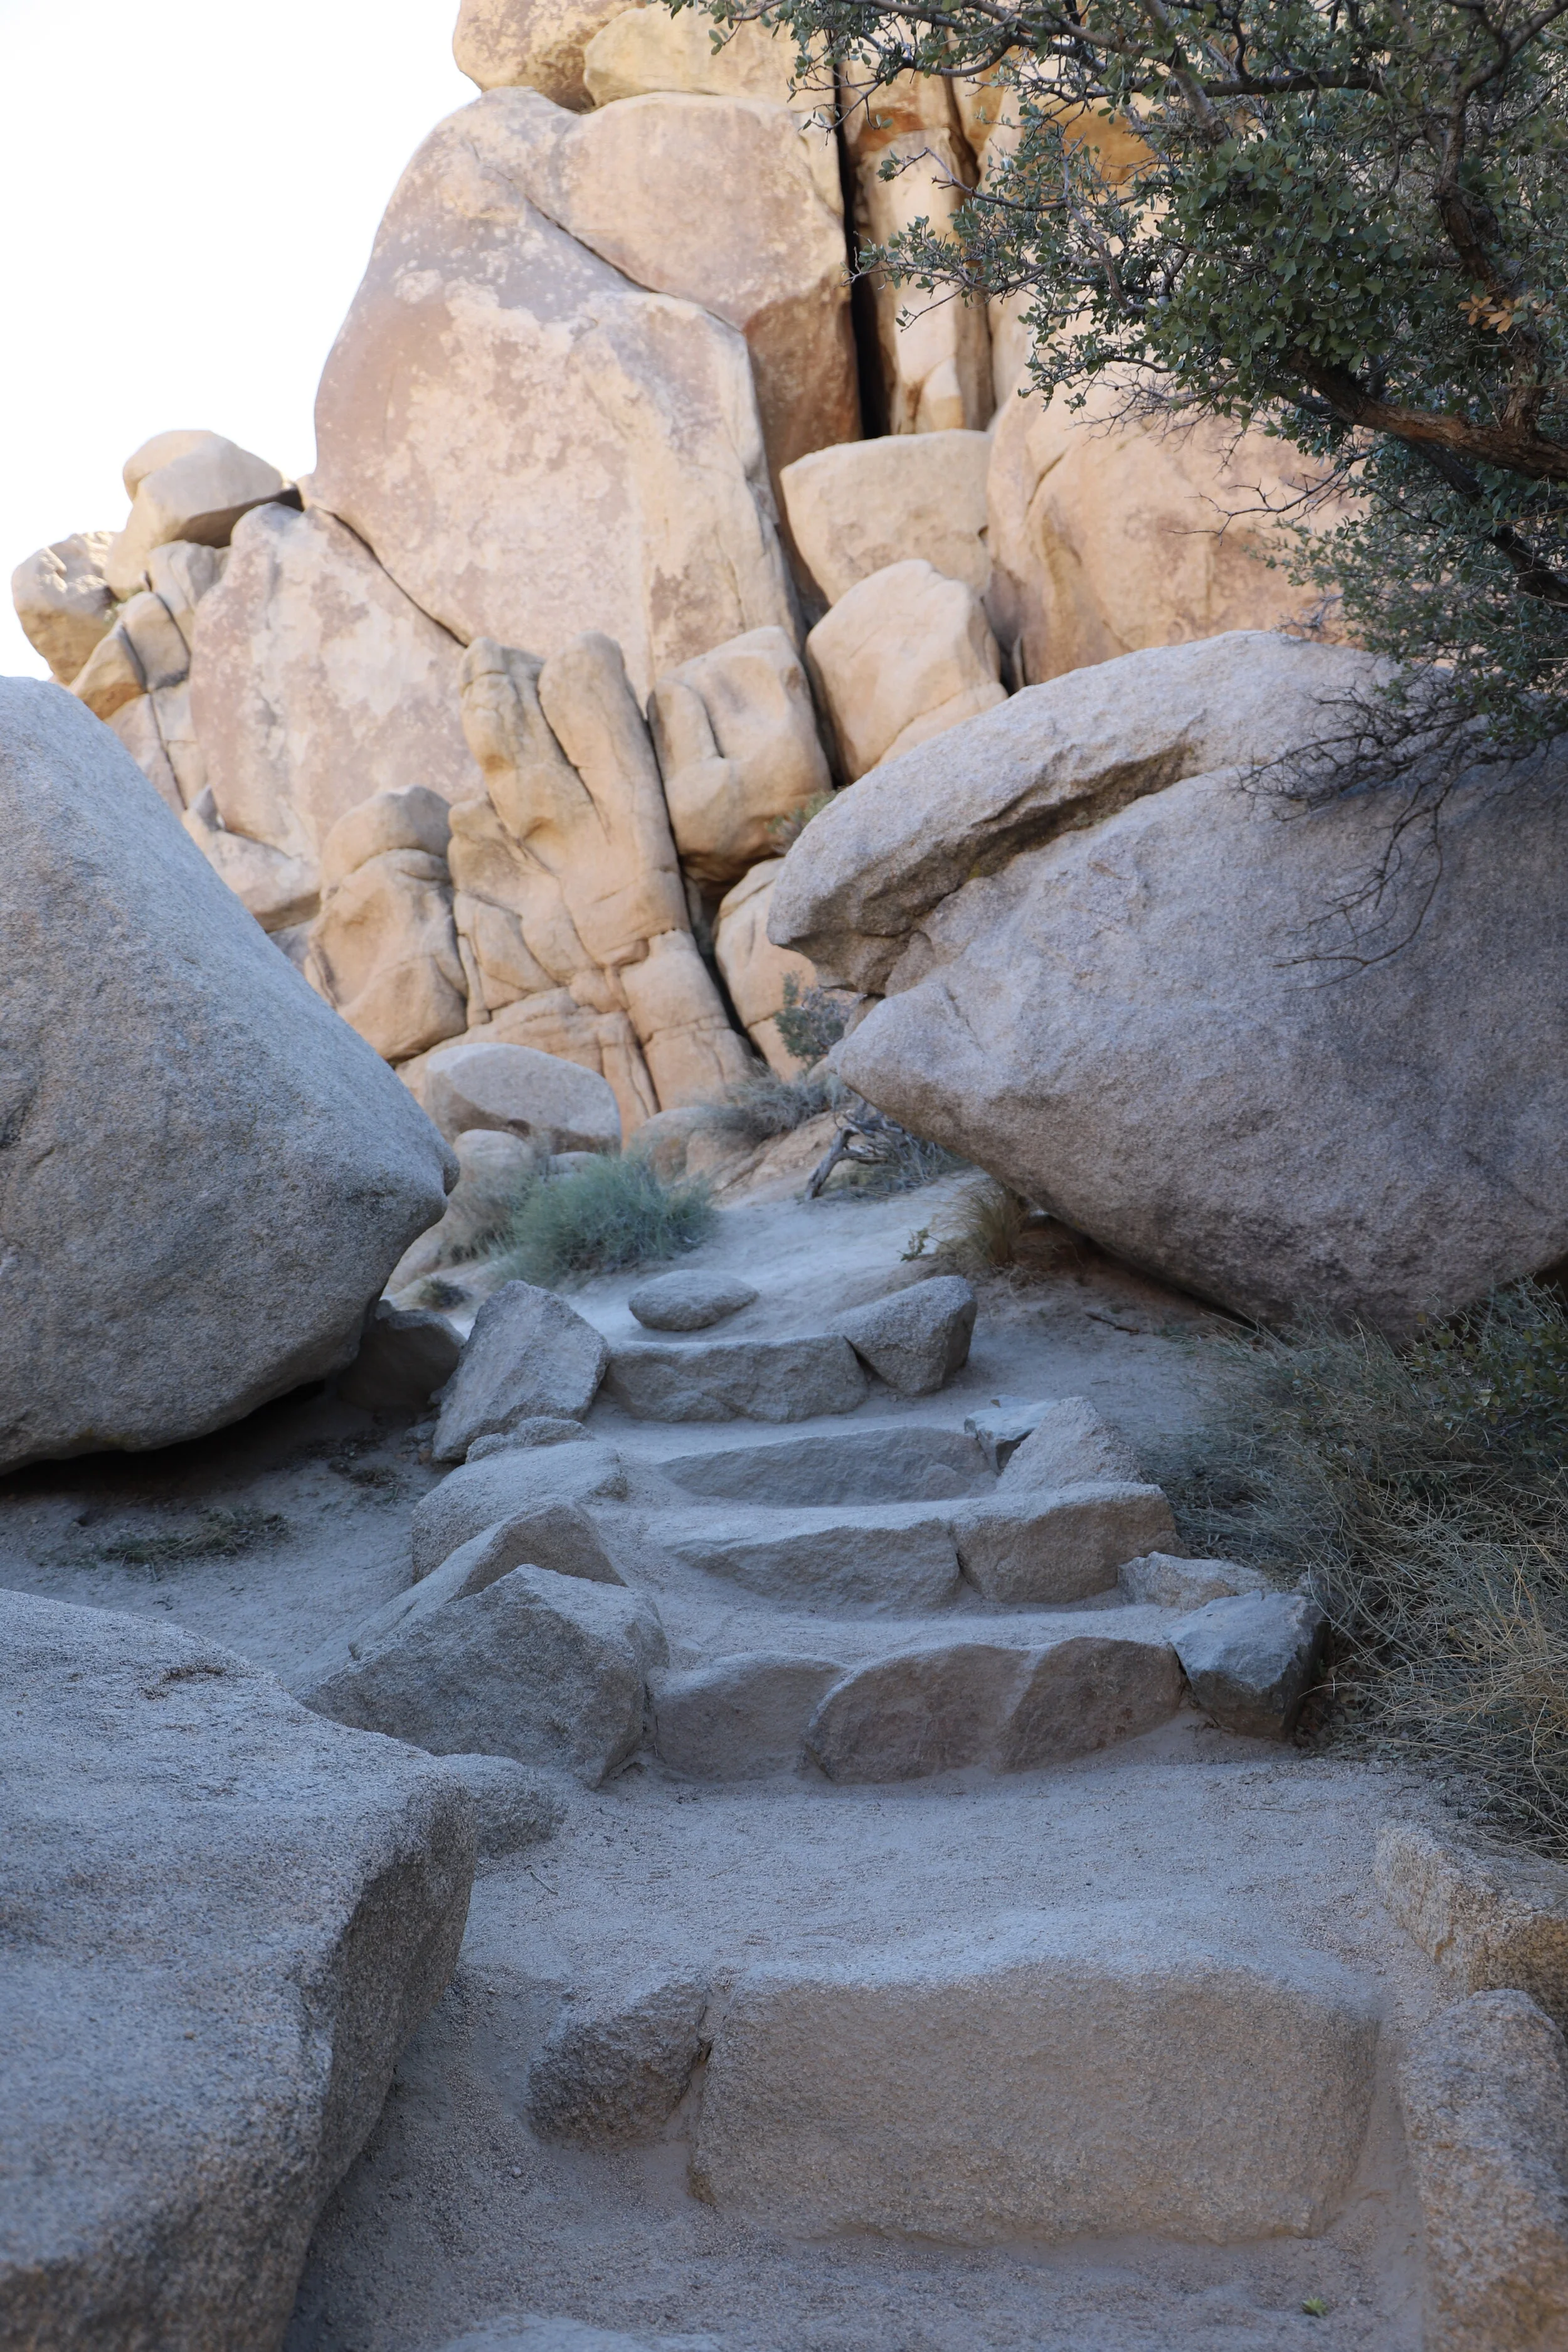
Hidden Valley is a short trail with little elevation, but there are lots of steps and boulders that need to be navigated
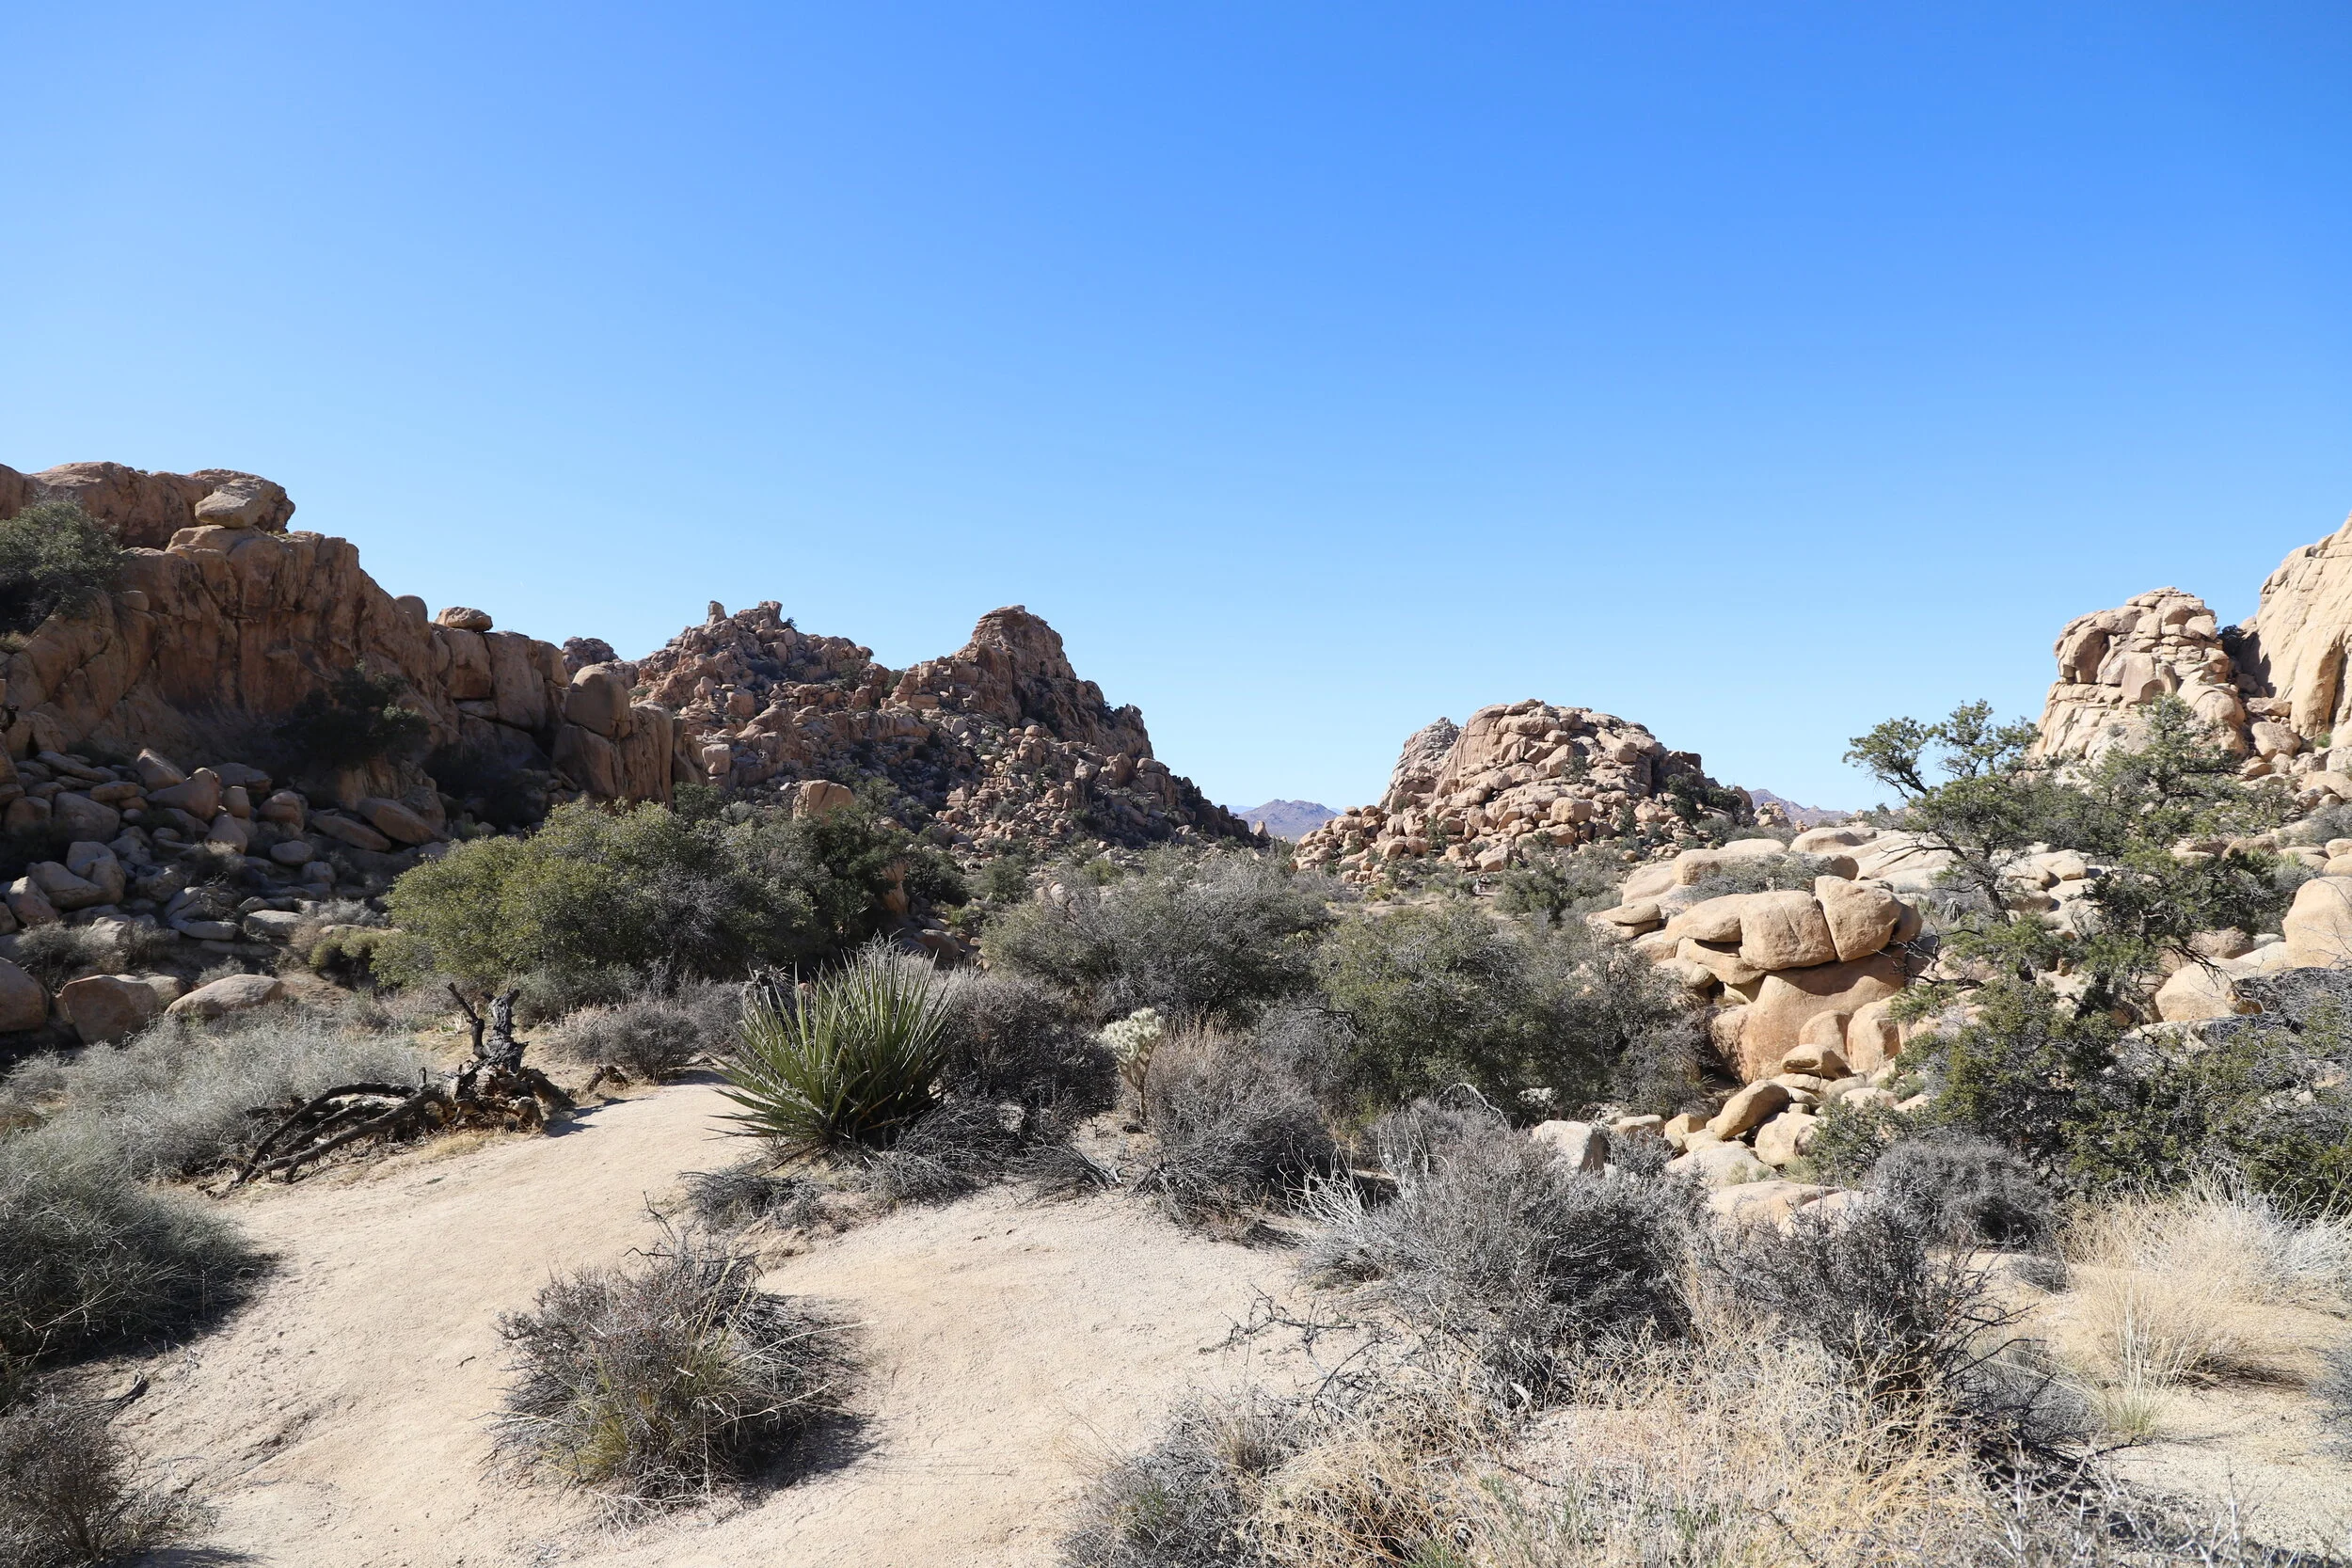
The trail is enclosed in a circular region surround by rocks. The trail follows the base of the rocks.
You can see the washes in the picture which look similar to the trail. Keep following those signs to find your way back out.
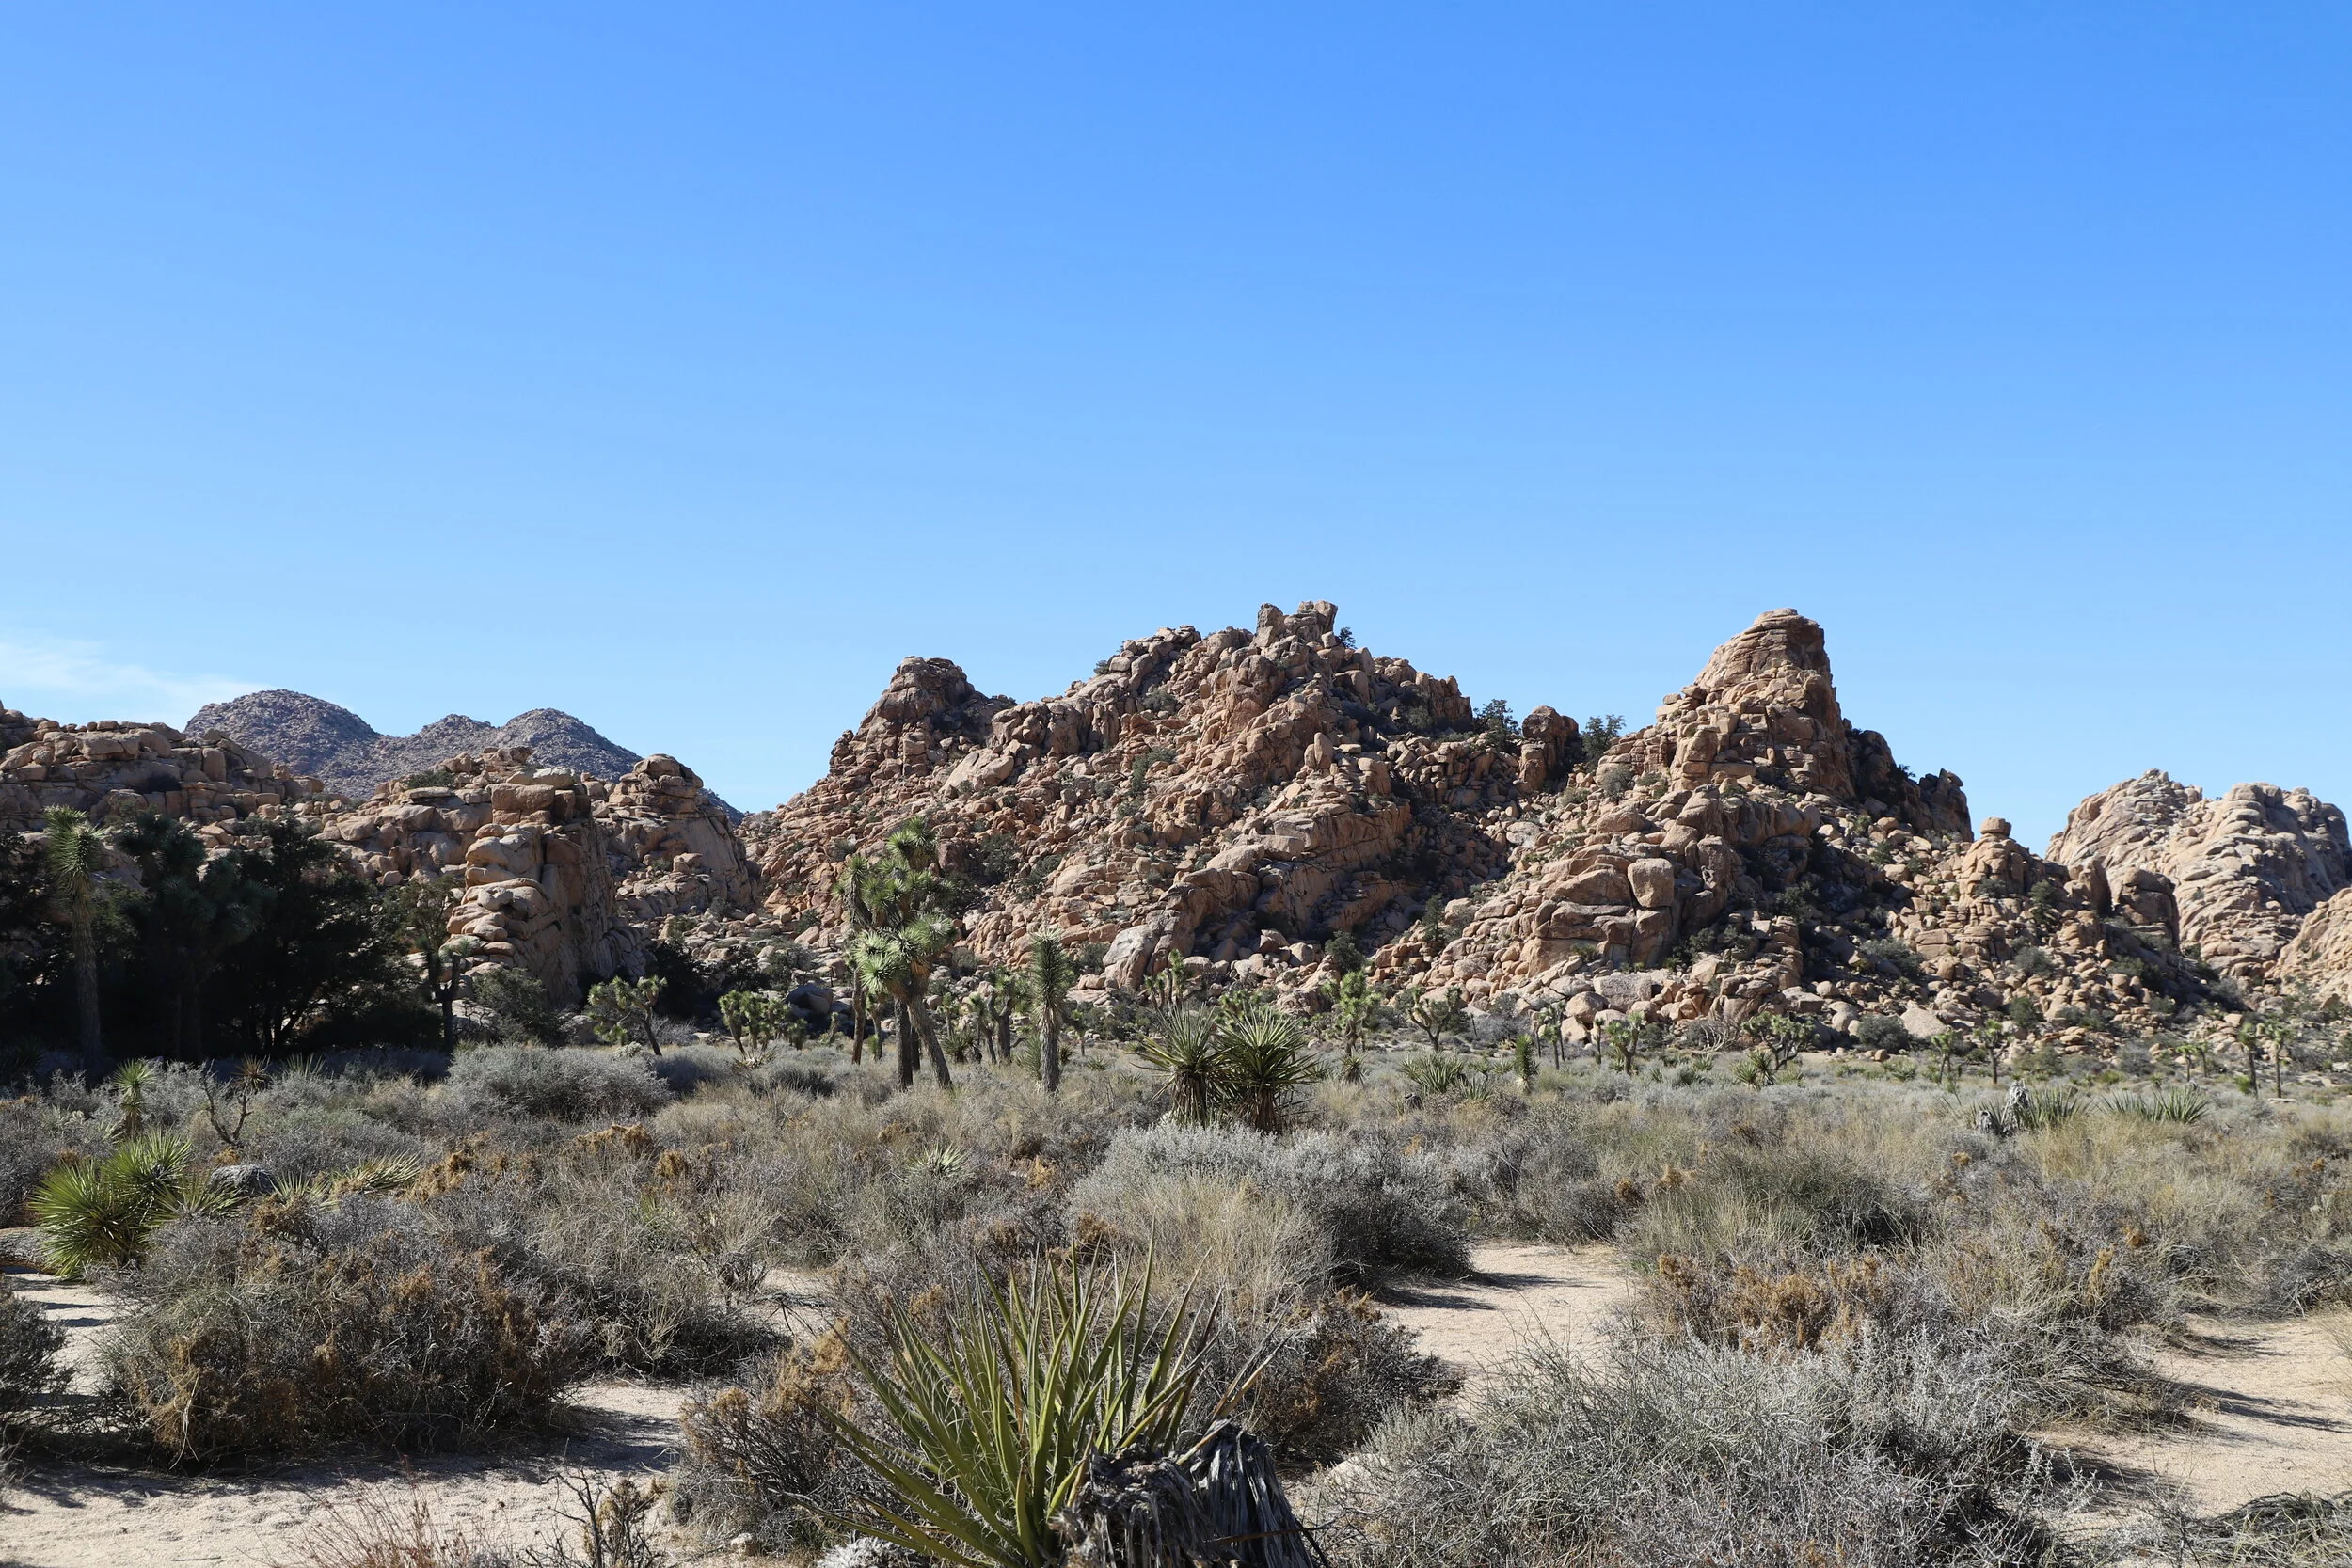
11 - Barker Dam
Distance - 1.1 mile loop
Elevation Gain - N/A
Trailhead Location - From Hidden Valley, go right on Park Road and take the next left onto Barker Dam Rd. Keep going until you see the parking lot for Barker Dam Nature Trail on your left.
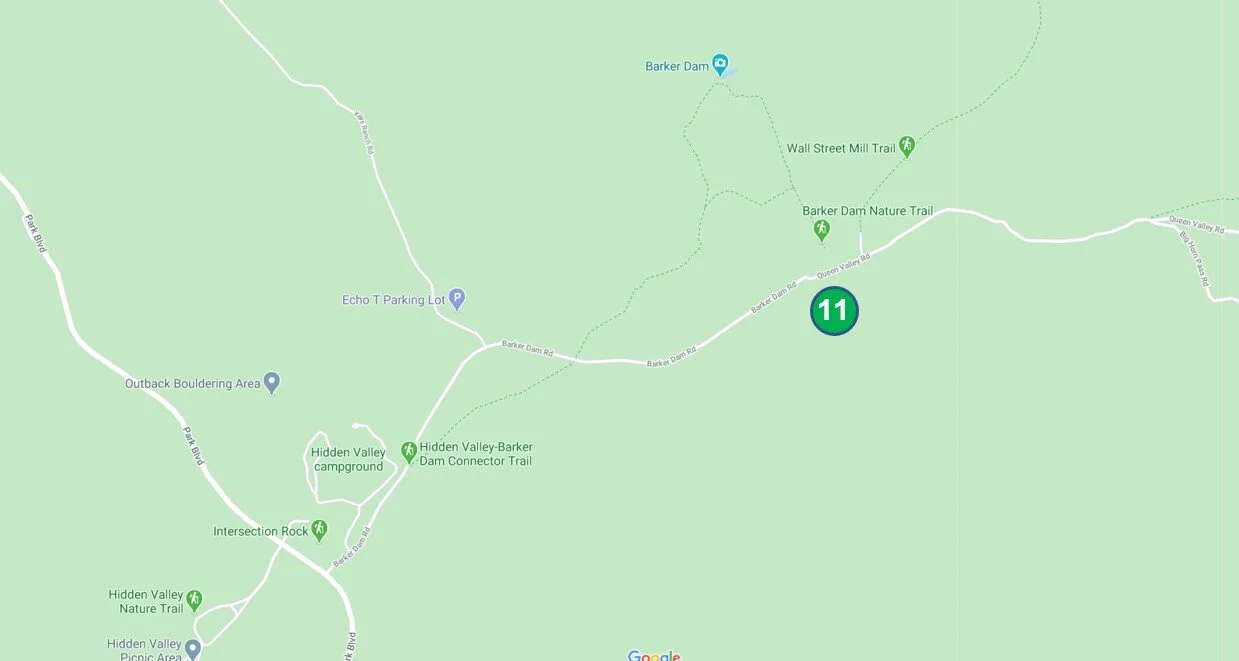
11 - Barker Dam
If you happen to be in Joshua Tree after it has rained, which we were not, Barker Dam will be filled with water and you can get one of those beautiful pictures with the desert plants reflecting off of the water. Stop at the visitor center and ask if there is any water in the dam area before heading out there.
At the trailhead, you will see a map, and on it, the location of the petroglyphs is marked. It’s at the trail intersection. You may want to note this for later in your hike.
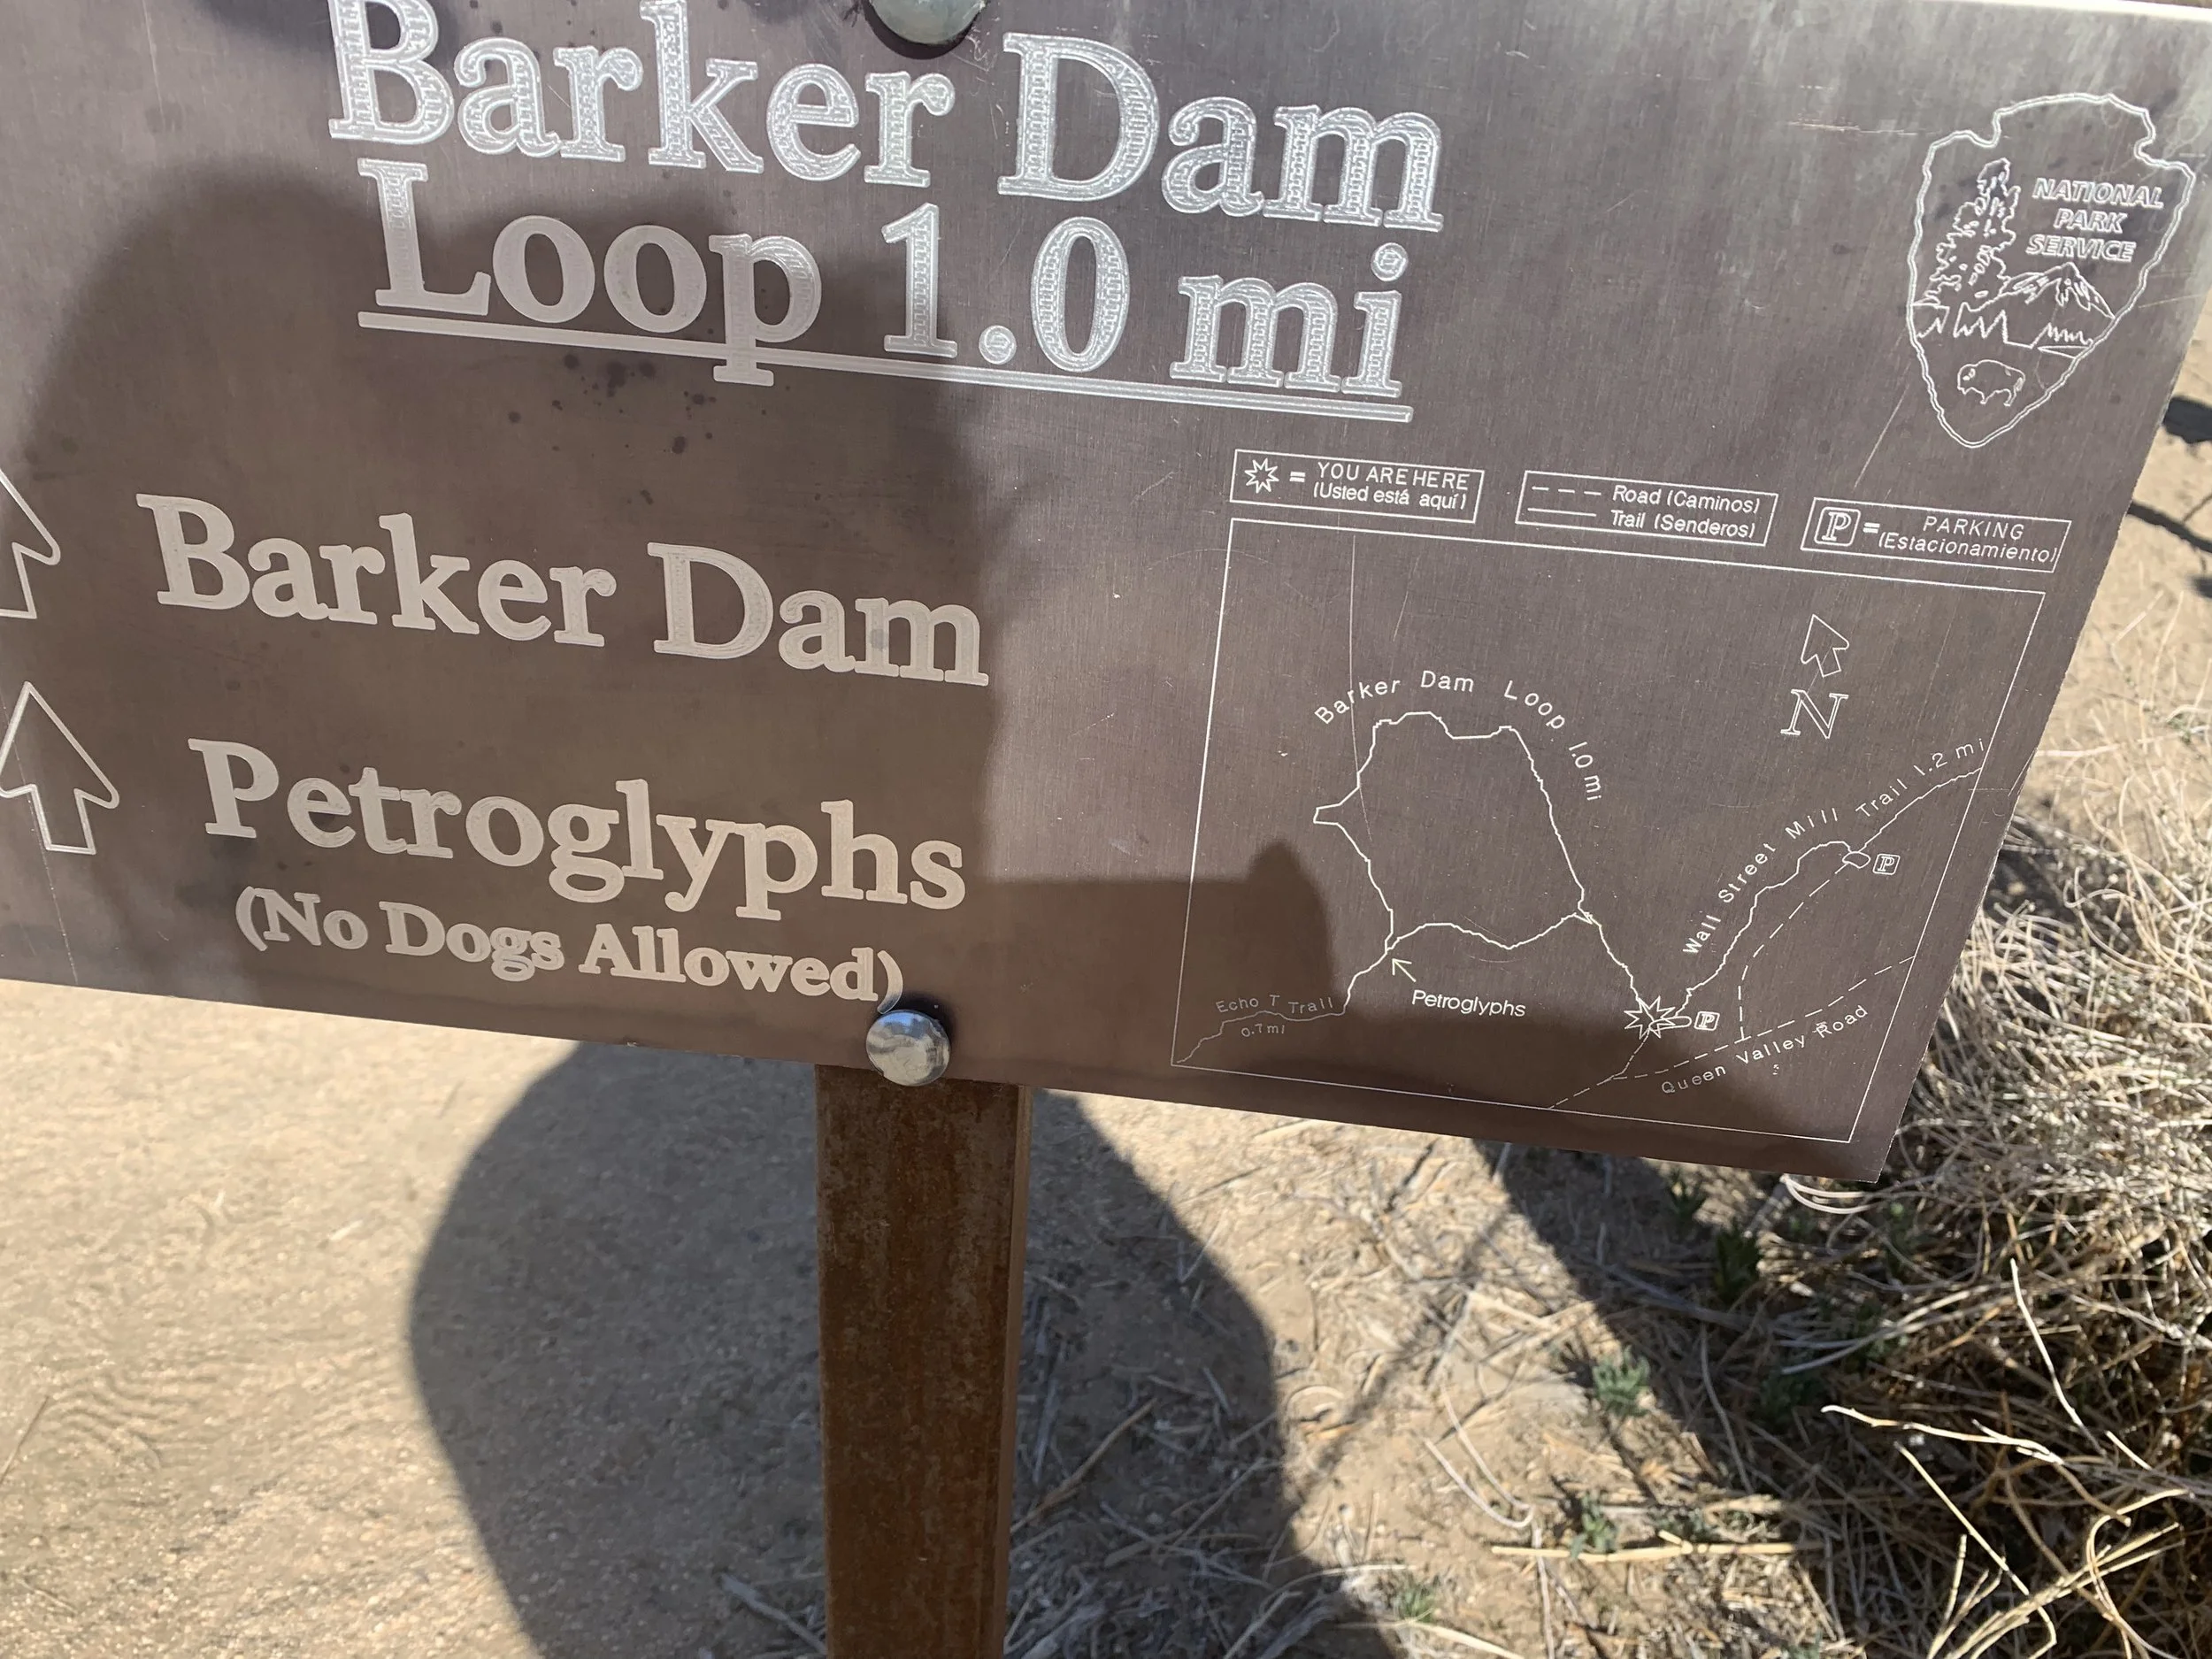
Location of Petroglyphs is marked on the map at the trailhead
Barker Dam is another interpretive hike with signs throughout the trail to learn about the plants and animals that have evolved in unique ways to survive the harsh weather extremes at Joshua Tree.
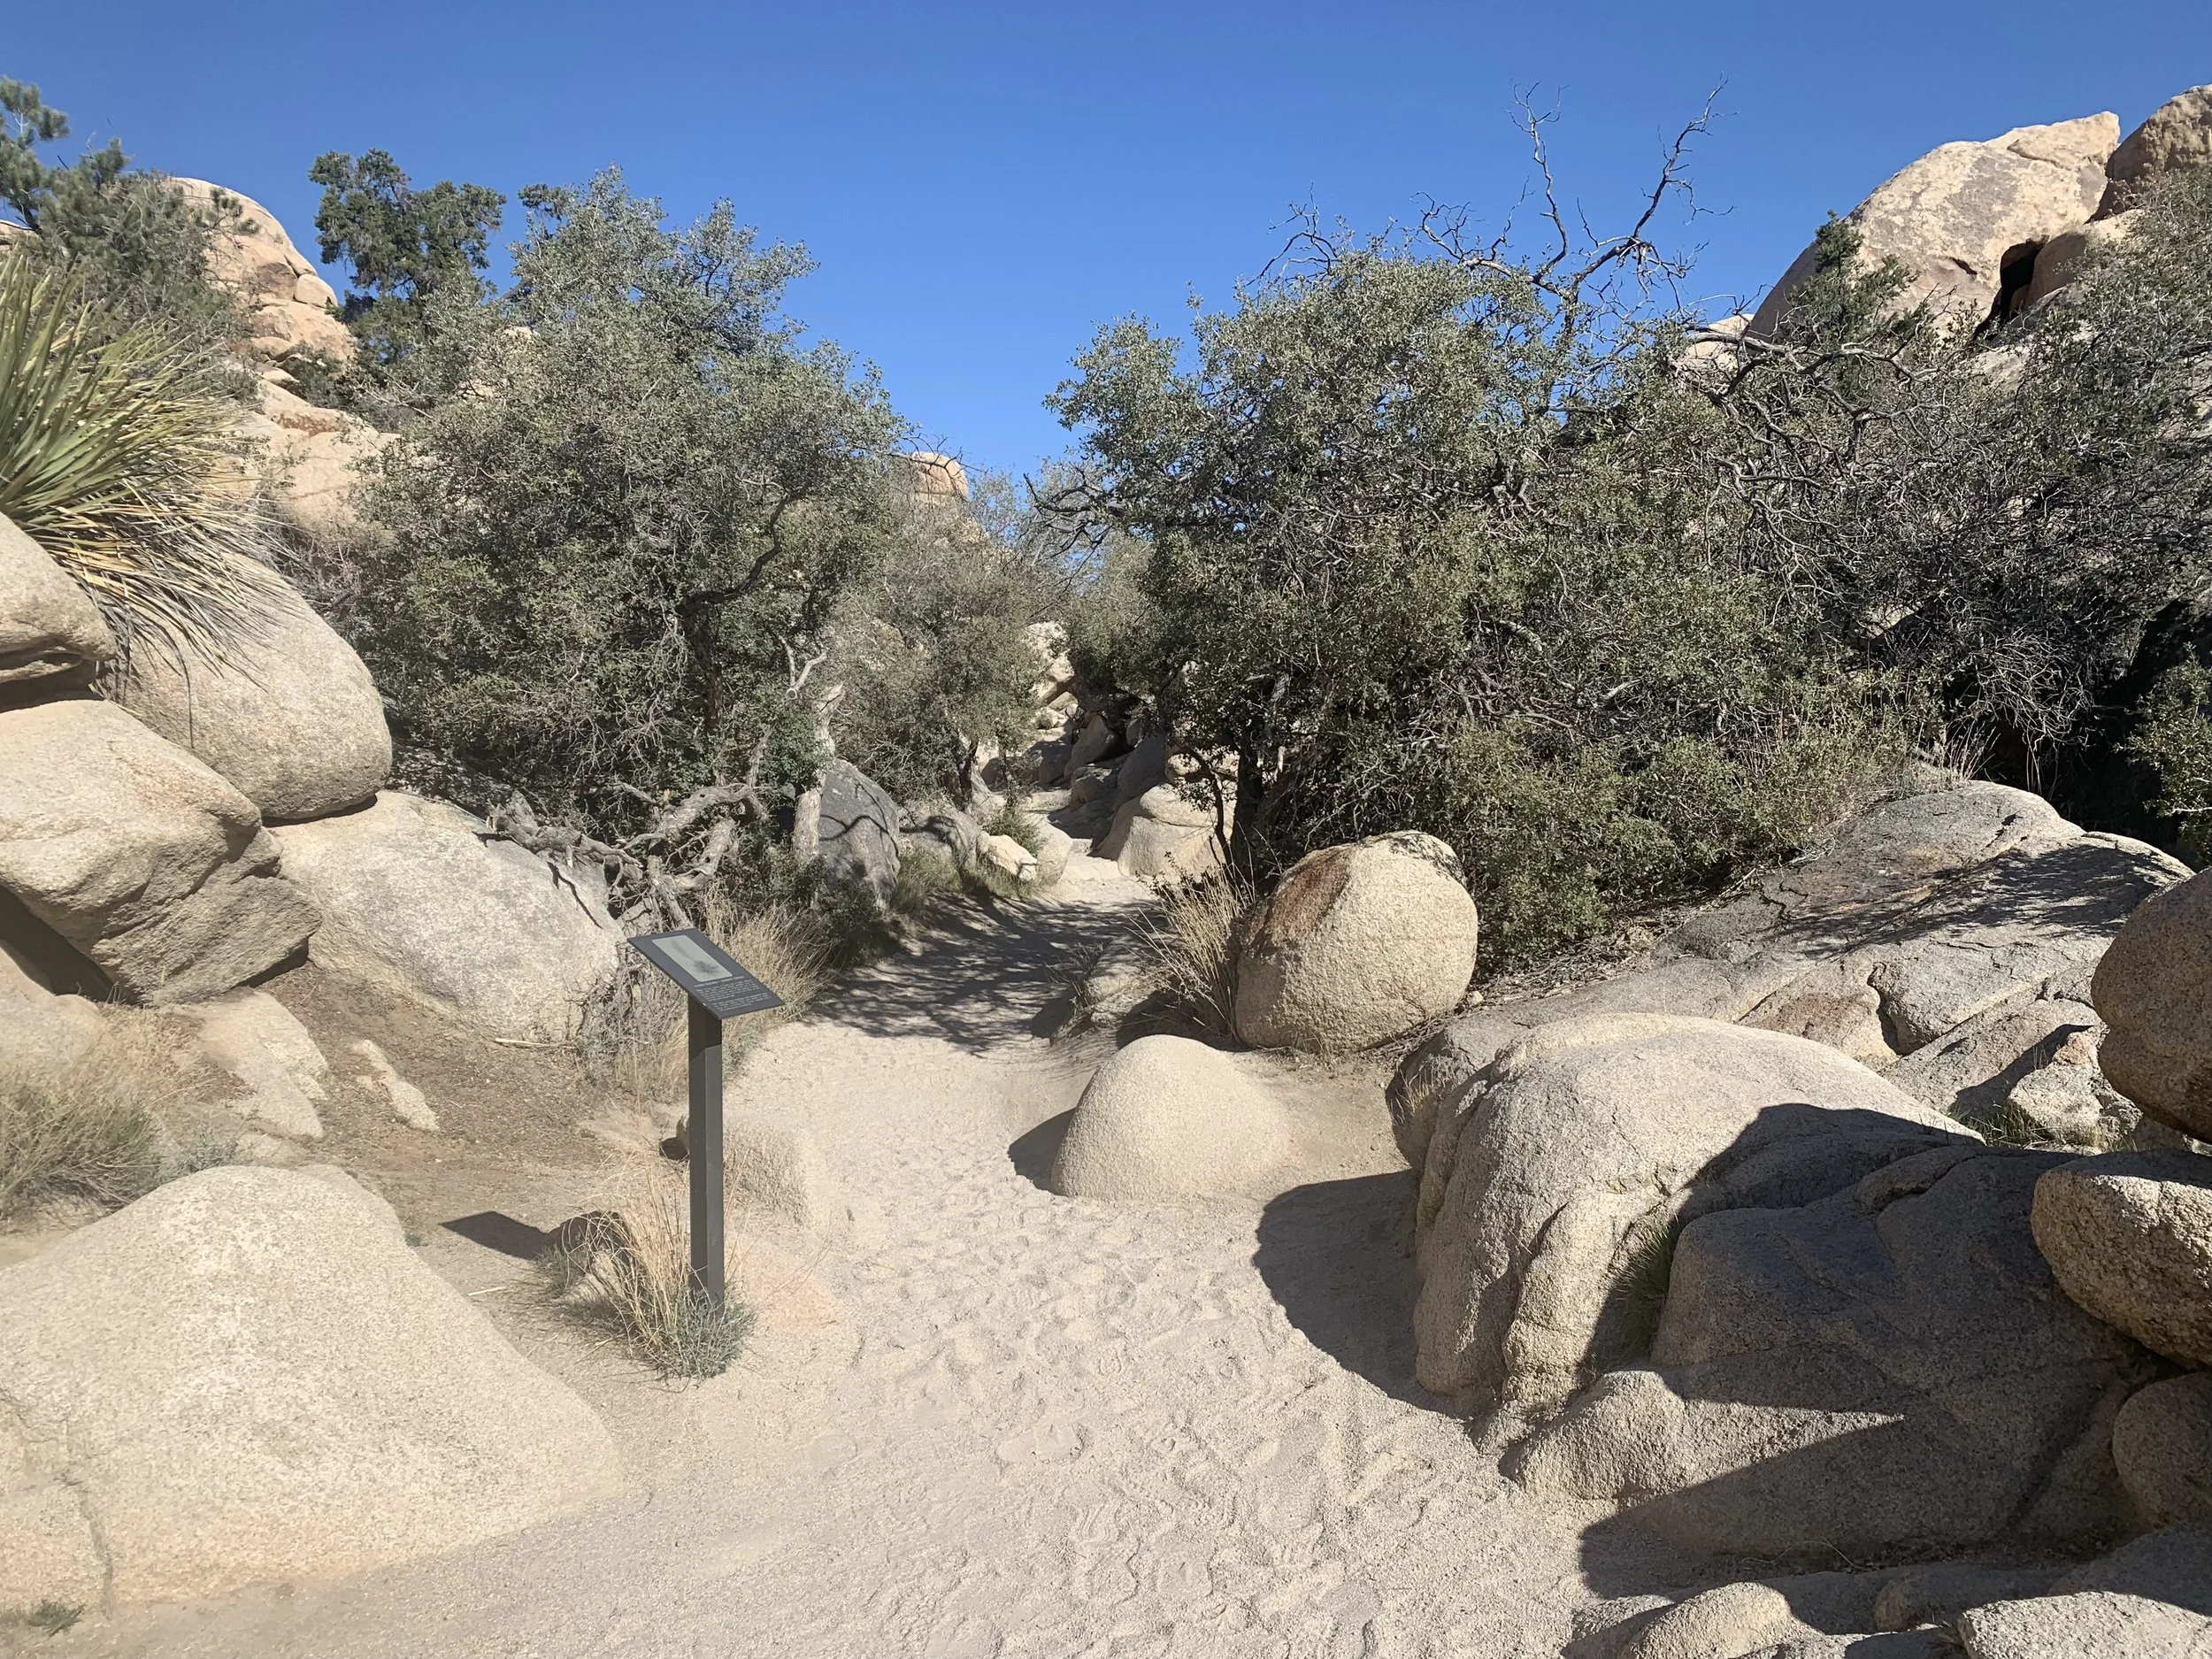
Barker Dam trail
As I mentioned earlier, the dam was dry when we visited, but it was still a nice and easy hike.

Barker Dam on a typical dry desert day
This would be the view of the pretty pictures of Barker Dam filled with water and pretty reflections of the desert landscape. It was still pretty without the water, but not quite as impressive.
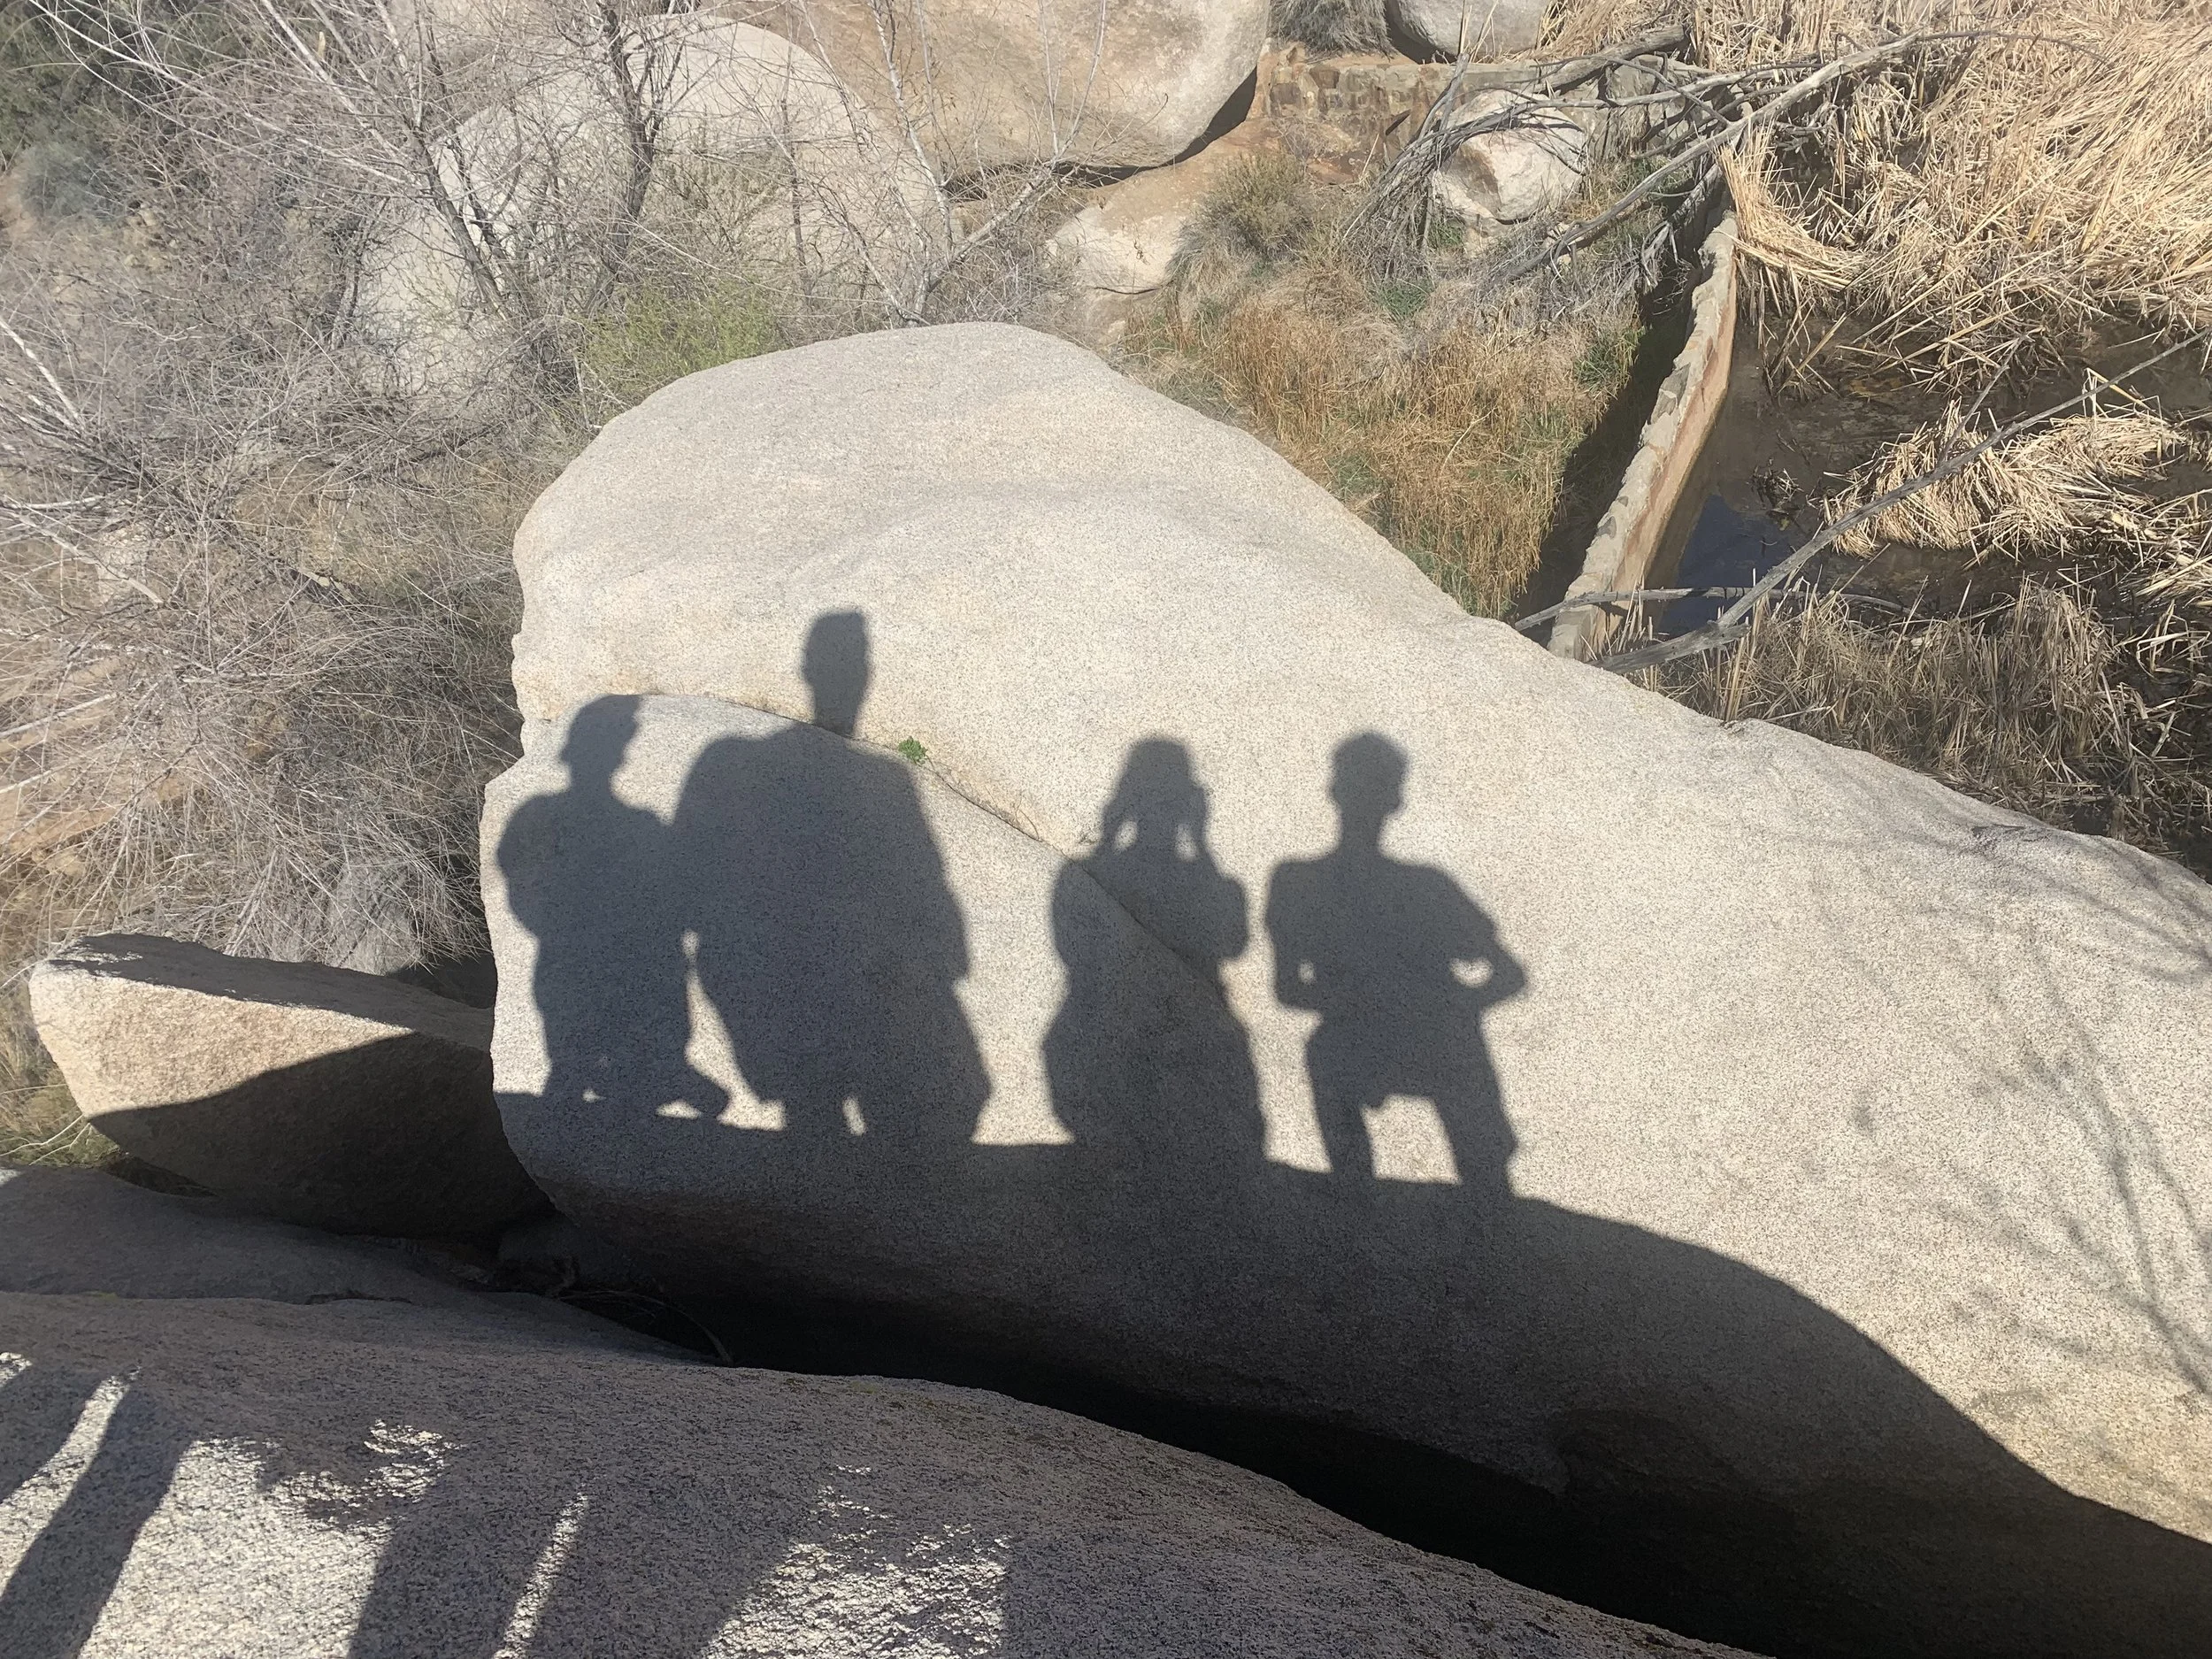
No water - no problem - we had fun taking shadow selfies instead
We walked the trail counterclockwise, so we came to the petroglyphs after the dam. They are well marked, but the marker looks like a trail intersection sign, so I could see how this could be missed if you aren’t reading the signs.
Every time we come across petroglyphs or pictographs, my boys get into an argument over which one is which. Petroglyphs are carved, pictographs are painted. This rock was confusing though as they are called petroglyphs but are clearly painted. According to the signs, someone painted the petroglyphs. So the images are truly carvings and the paint is graffiti.
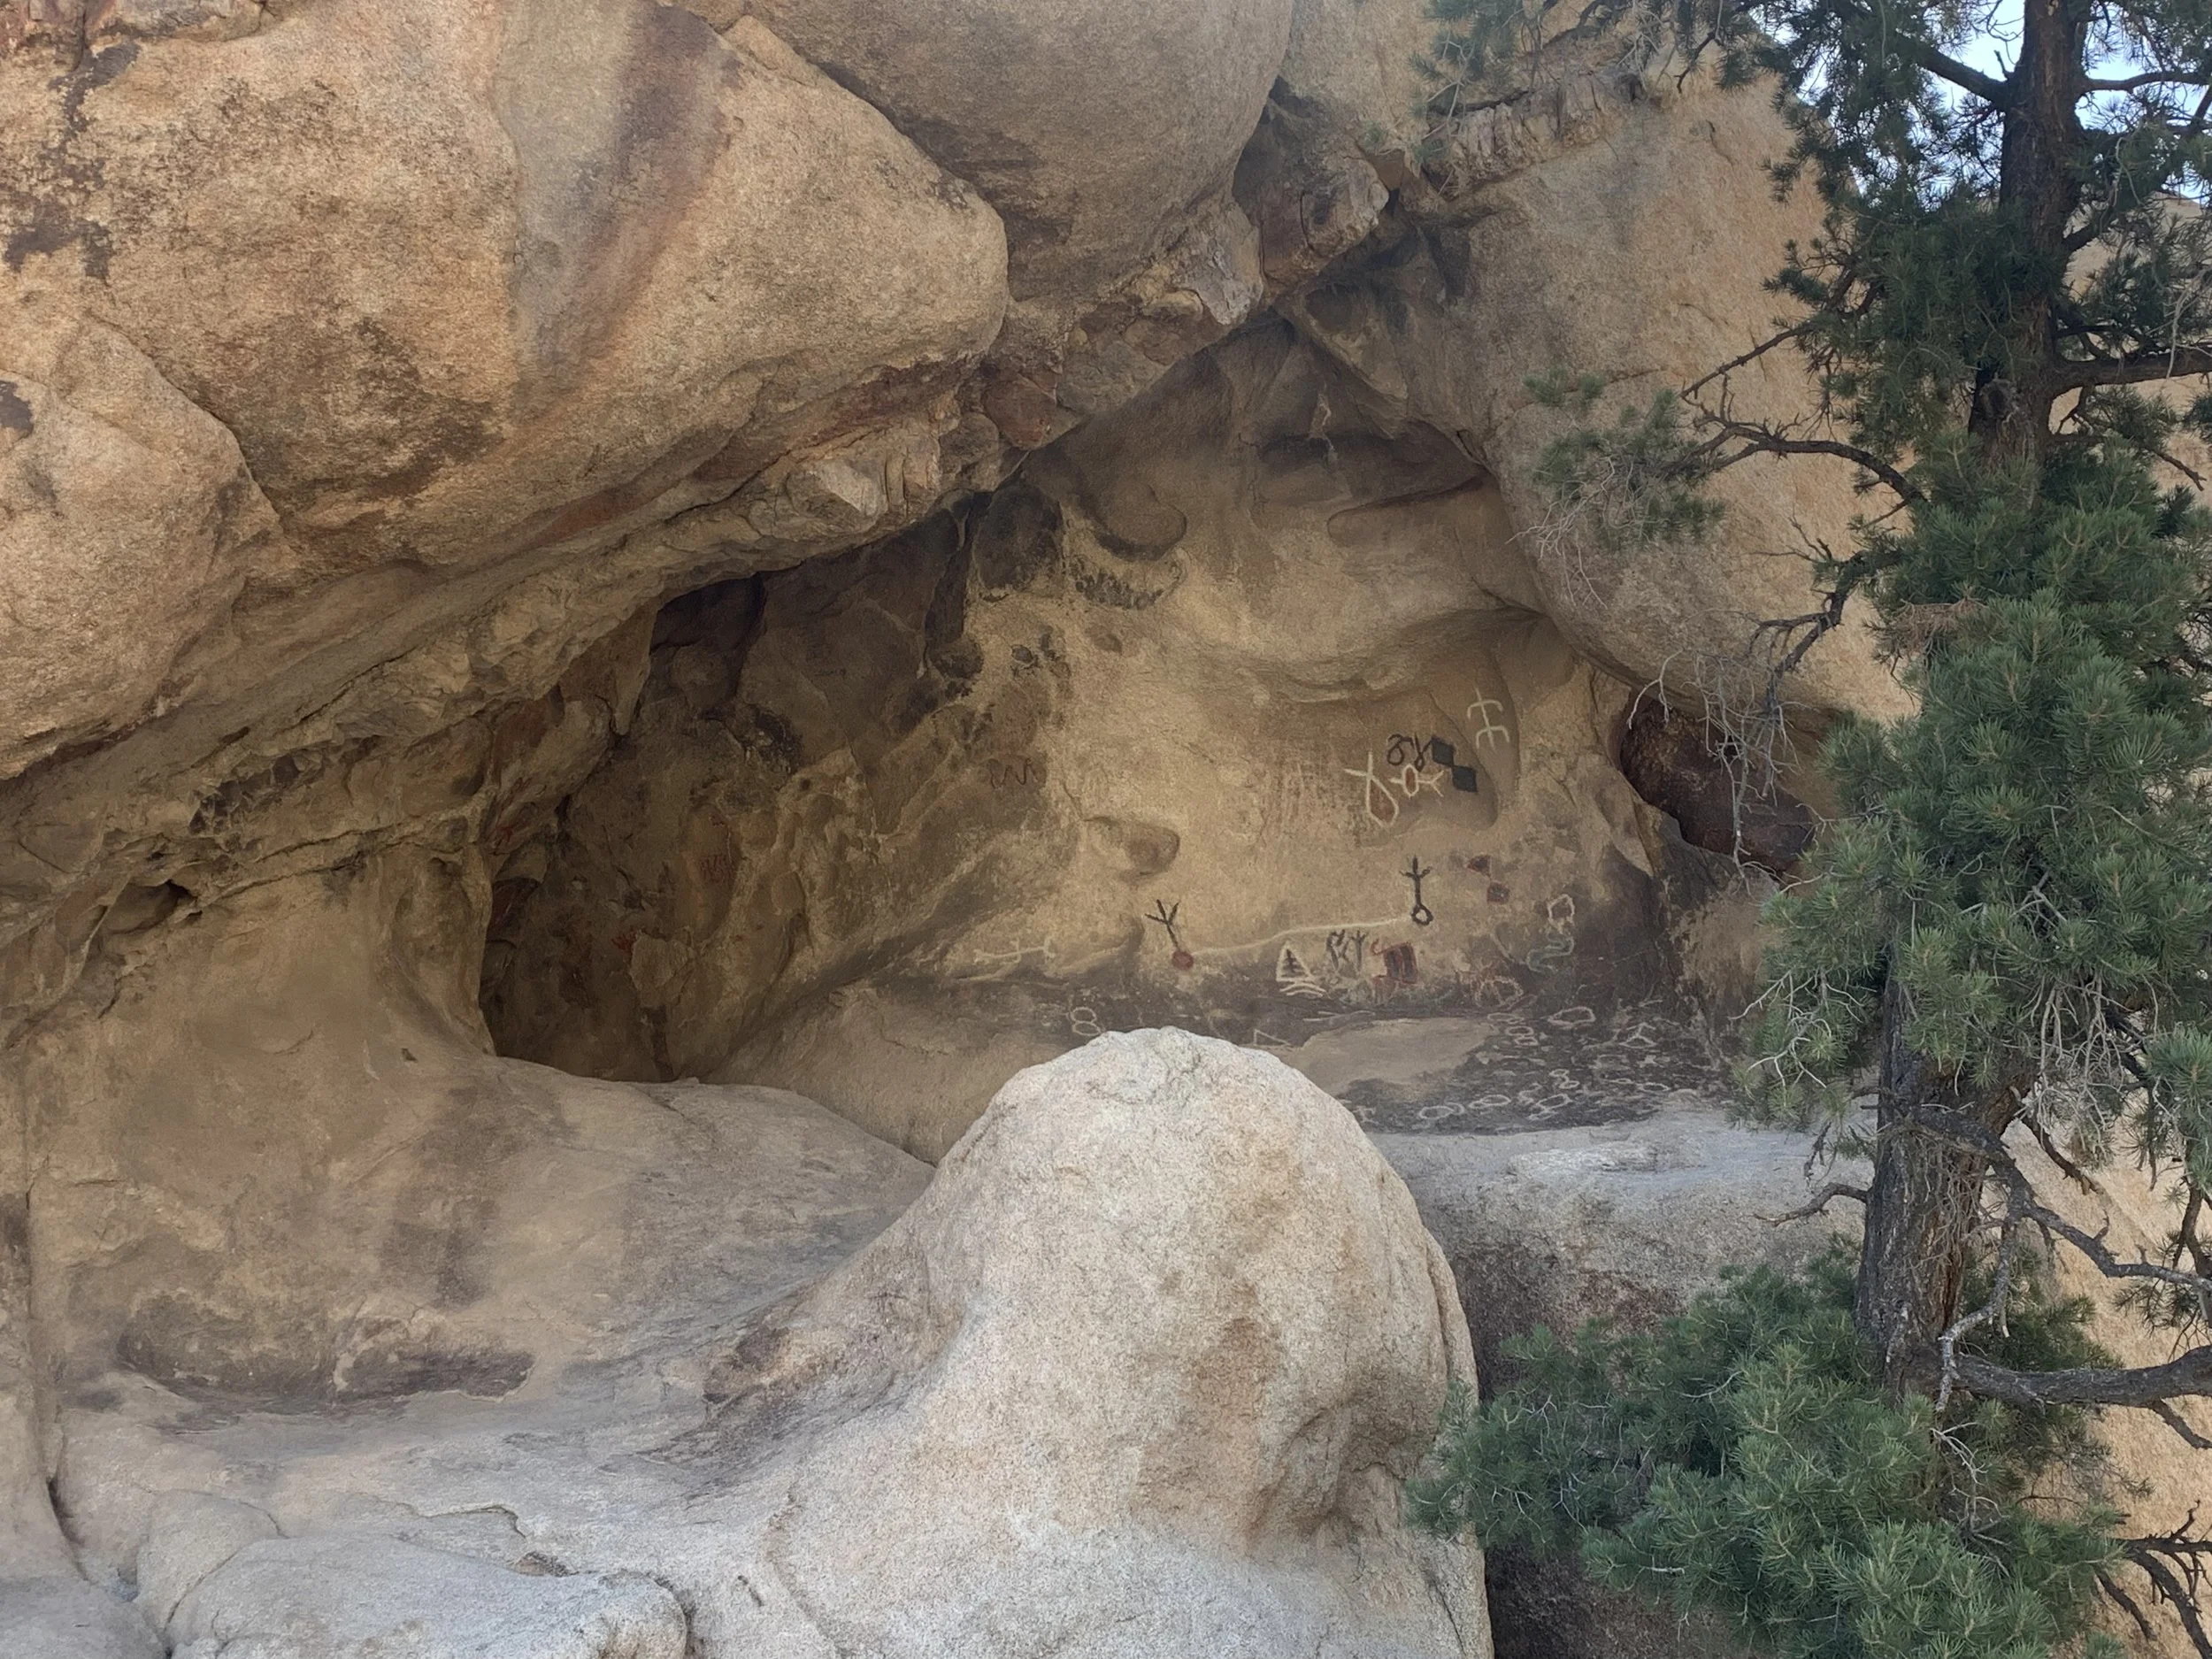
Barker Dam Petroglyphs
There were lots of beautiful Joshua Trees on the Barker Dam trail, and we were lucky enough to be here in March when they were blooming.
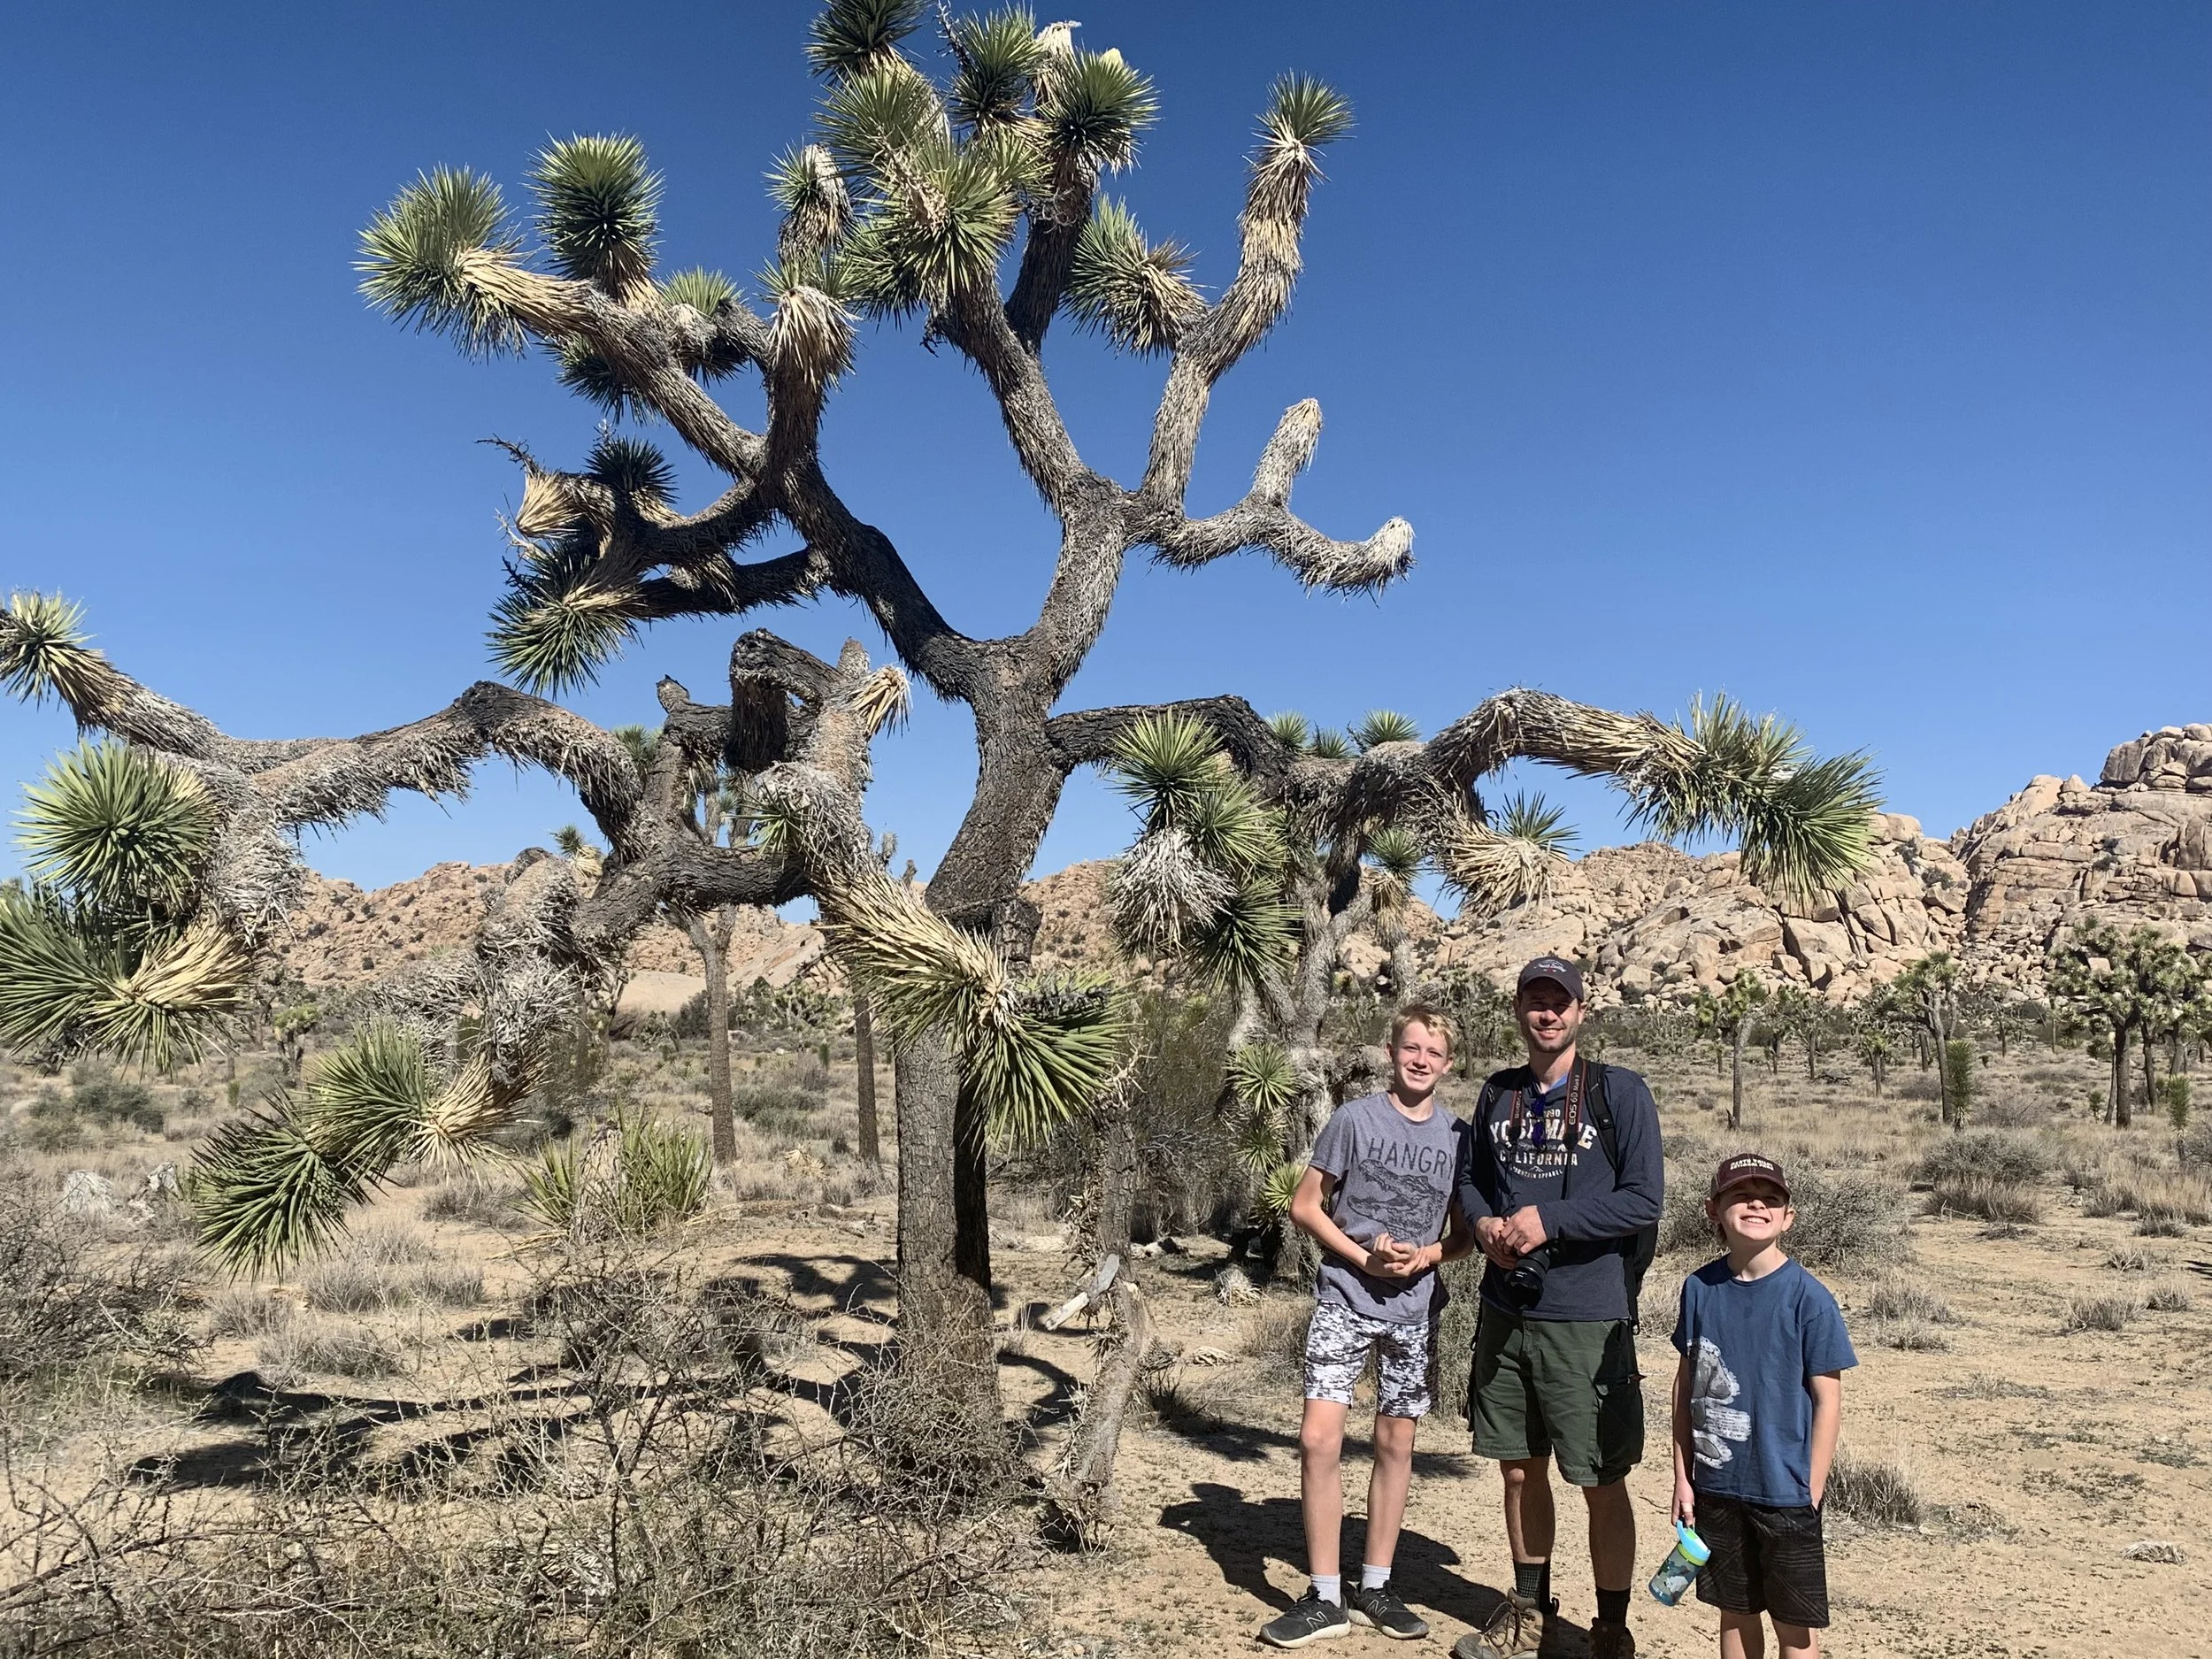
More Joshua Trees
12 - Rattlesnake Canyon
Distance - 2.3 miles (out and back)
Elevation Gain - 350ft
Trailhead Location - To find Rattlesnake Canyon, you will need to exit the park. The closest exit to Rattlesnake Canyon is the North Entrance. If you haven’t stopped yet at the main Oasis Visitor Center, this would be a good time to do so.
You will need to re-enter the park at the Indian Cove Campground. Take Twentynine Palms Highway (Hwy 62) to Indian Cove Road. Follow the road into the park. Do not stop at the campground. Continue to the day use area (east-most part of the road). Park at the end.
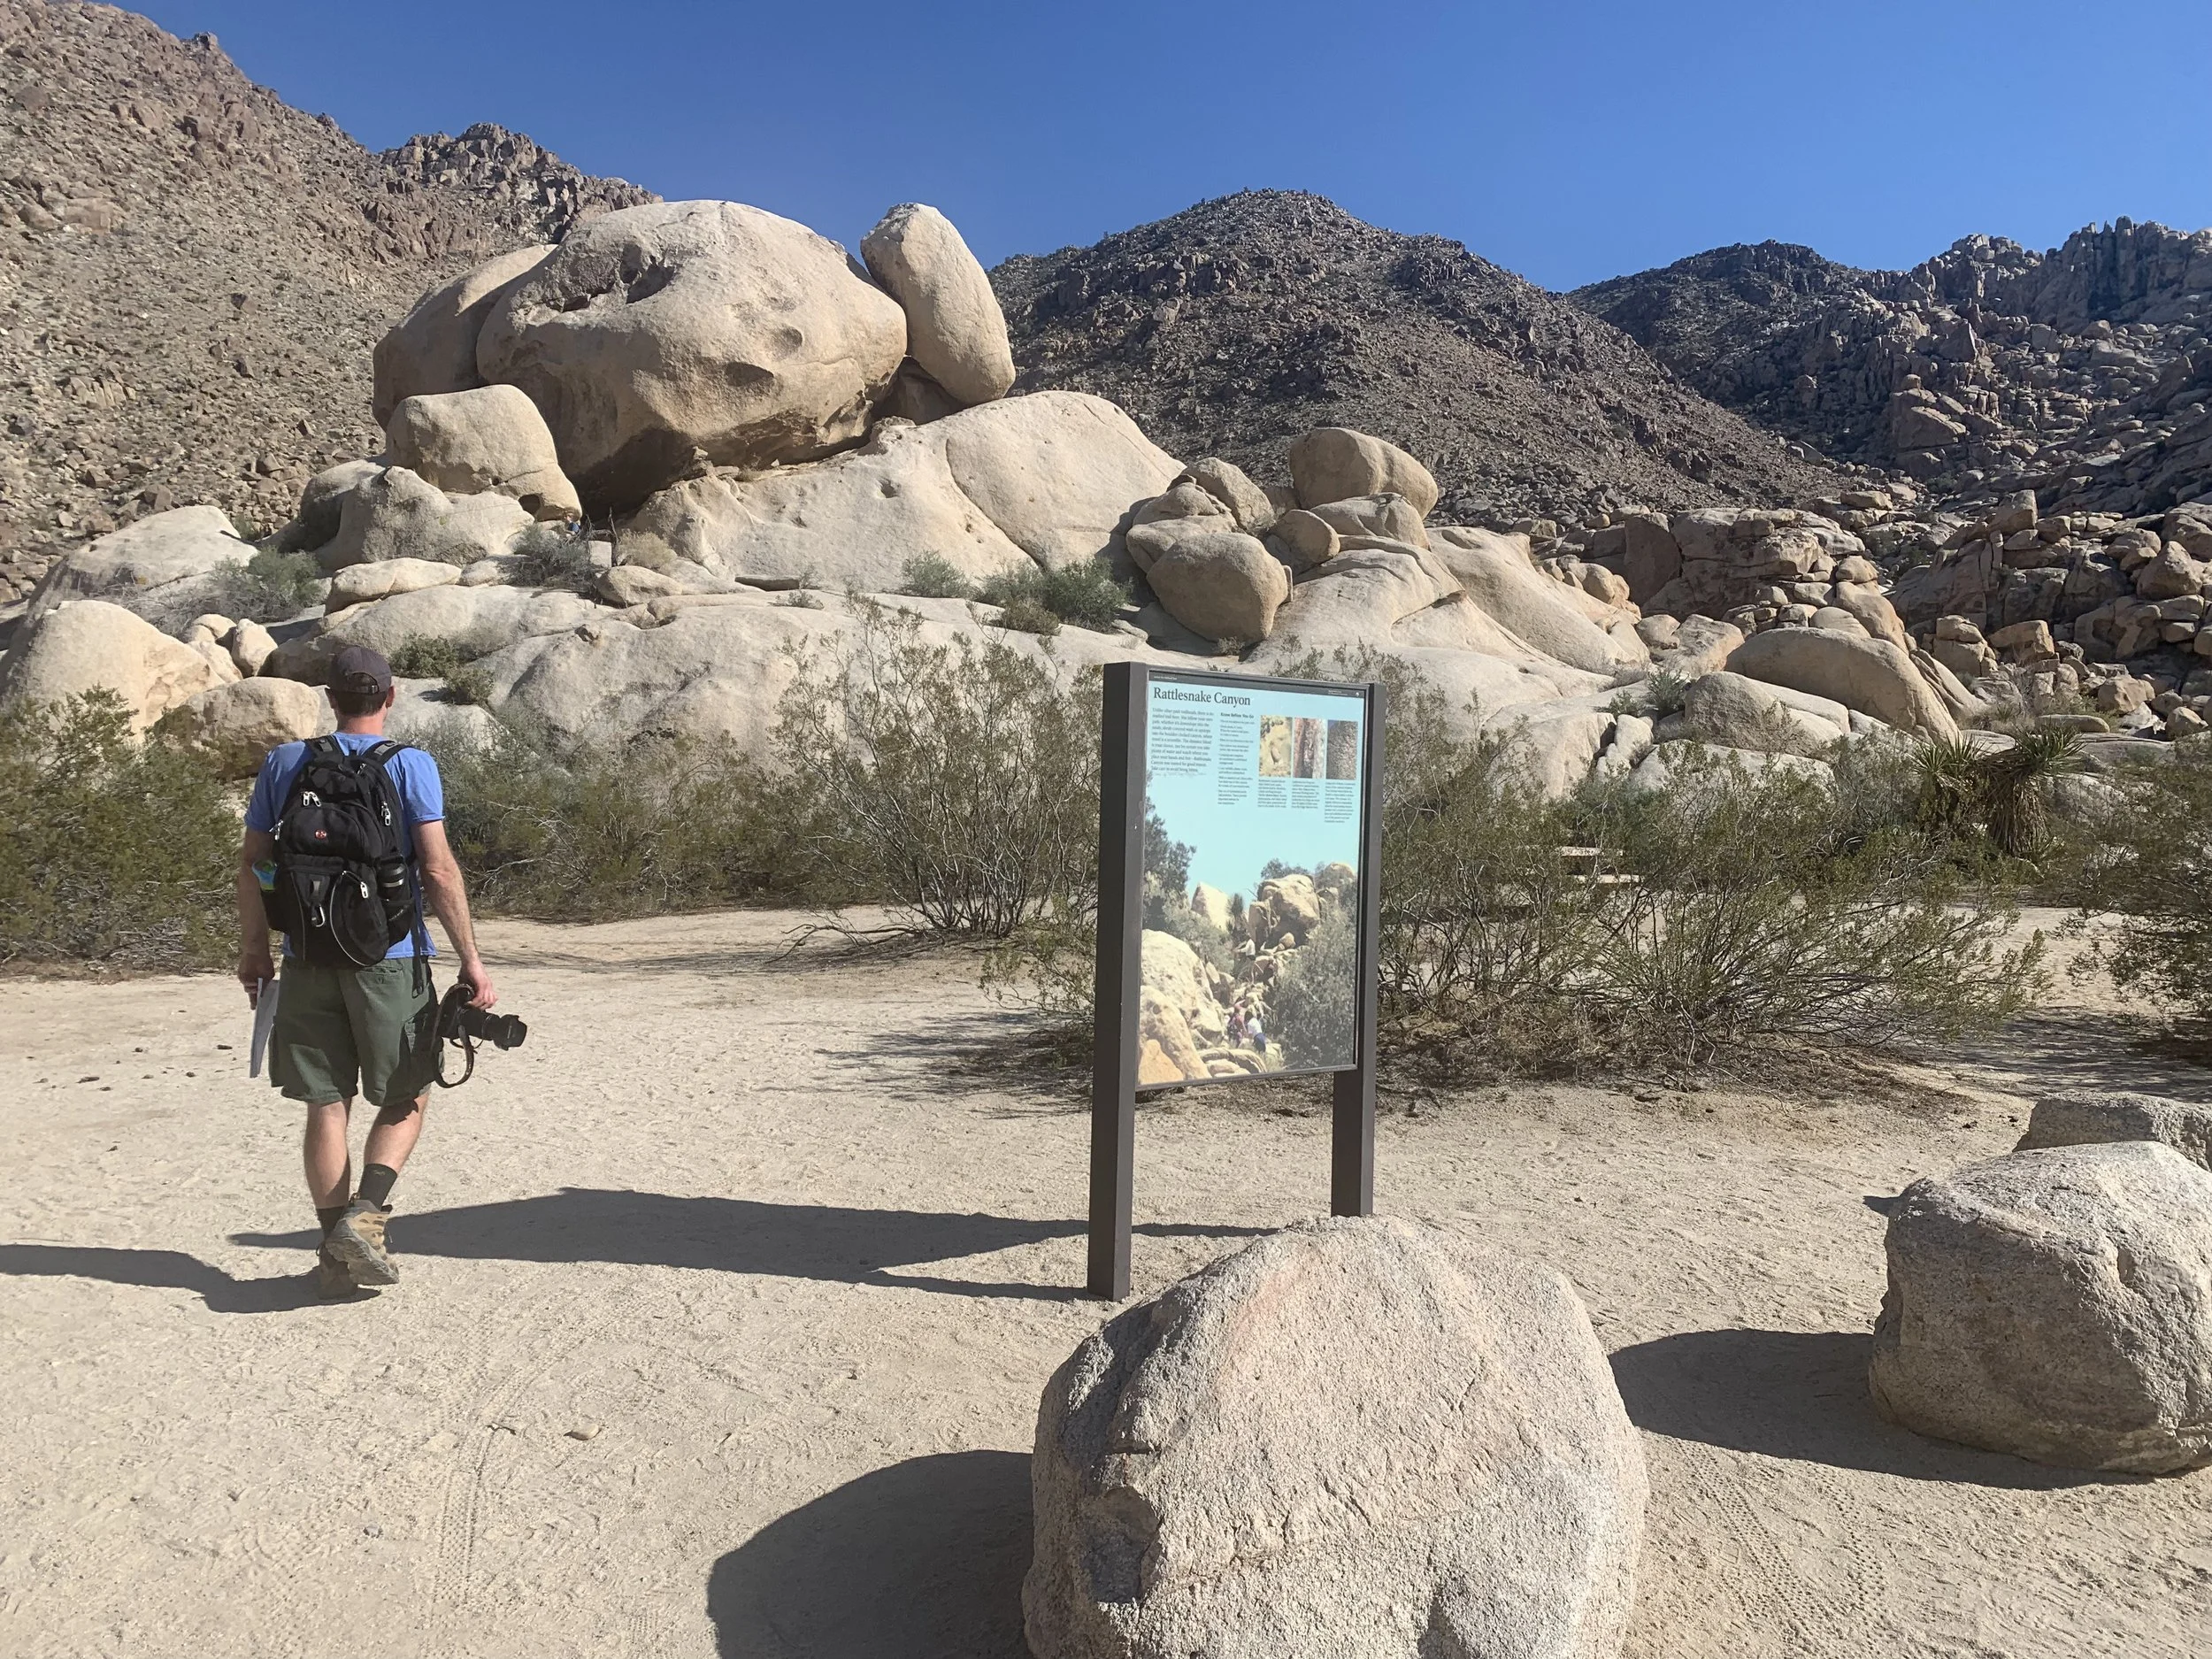
View from the parking lot. If you can find this Rattlesnake Canyon sign, you are in the right spot.
There is not a formal trail for Rattlesnake canyon. In fact, this is more of a scramble up and over boulders than it is actually a traditional hike. I think trails that you need to use your hands on though are the more fun types of hikes to be on.
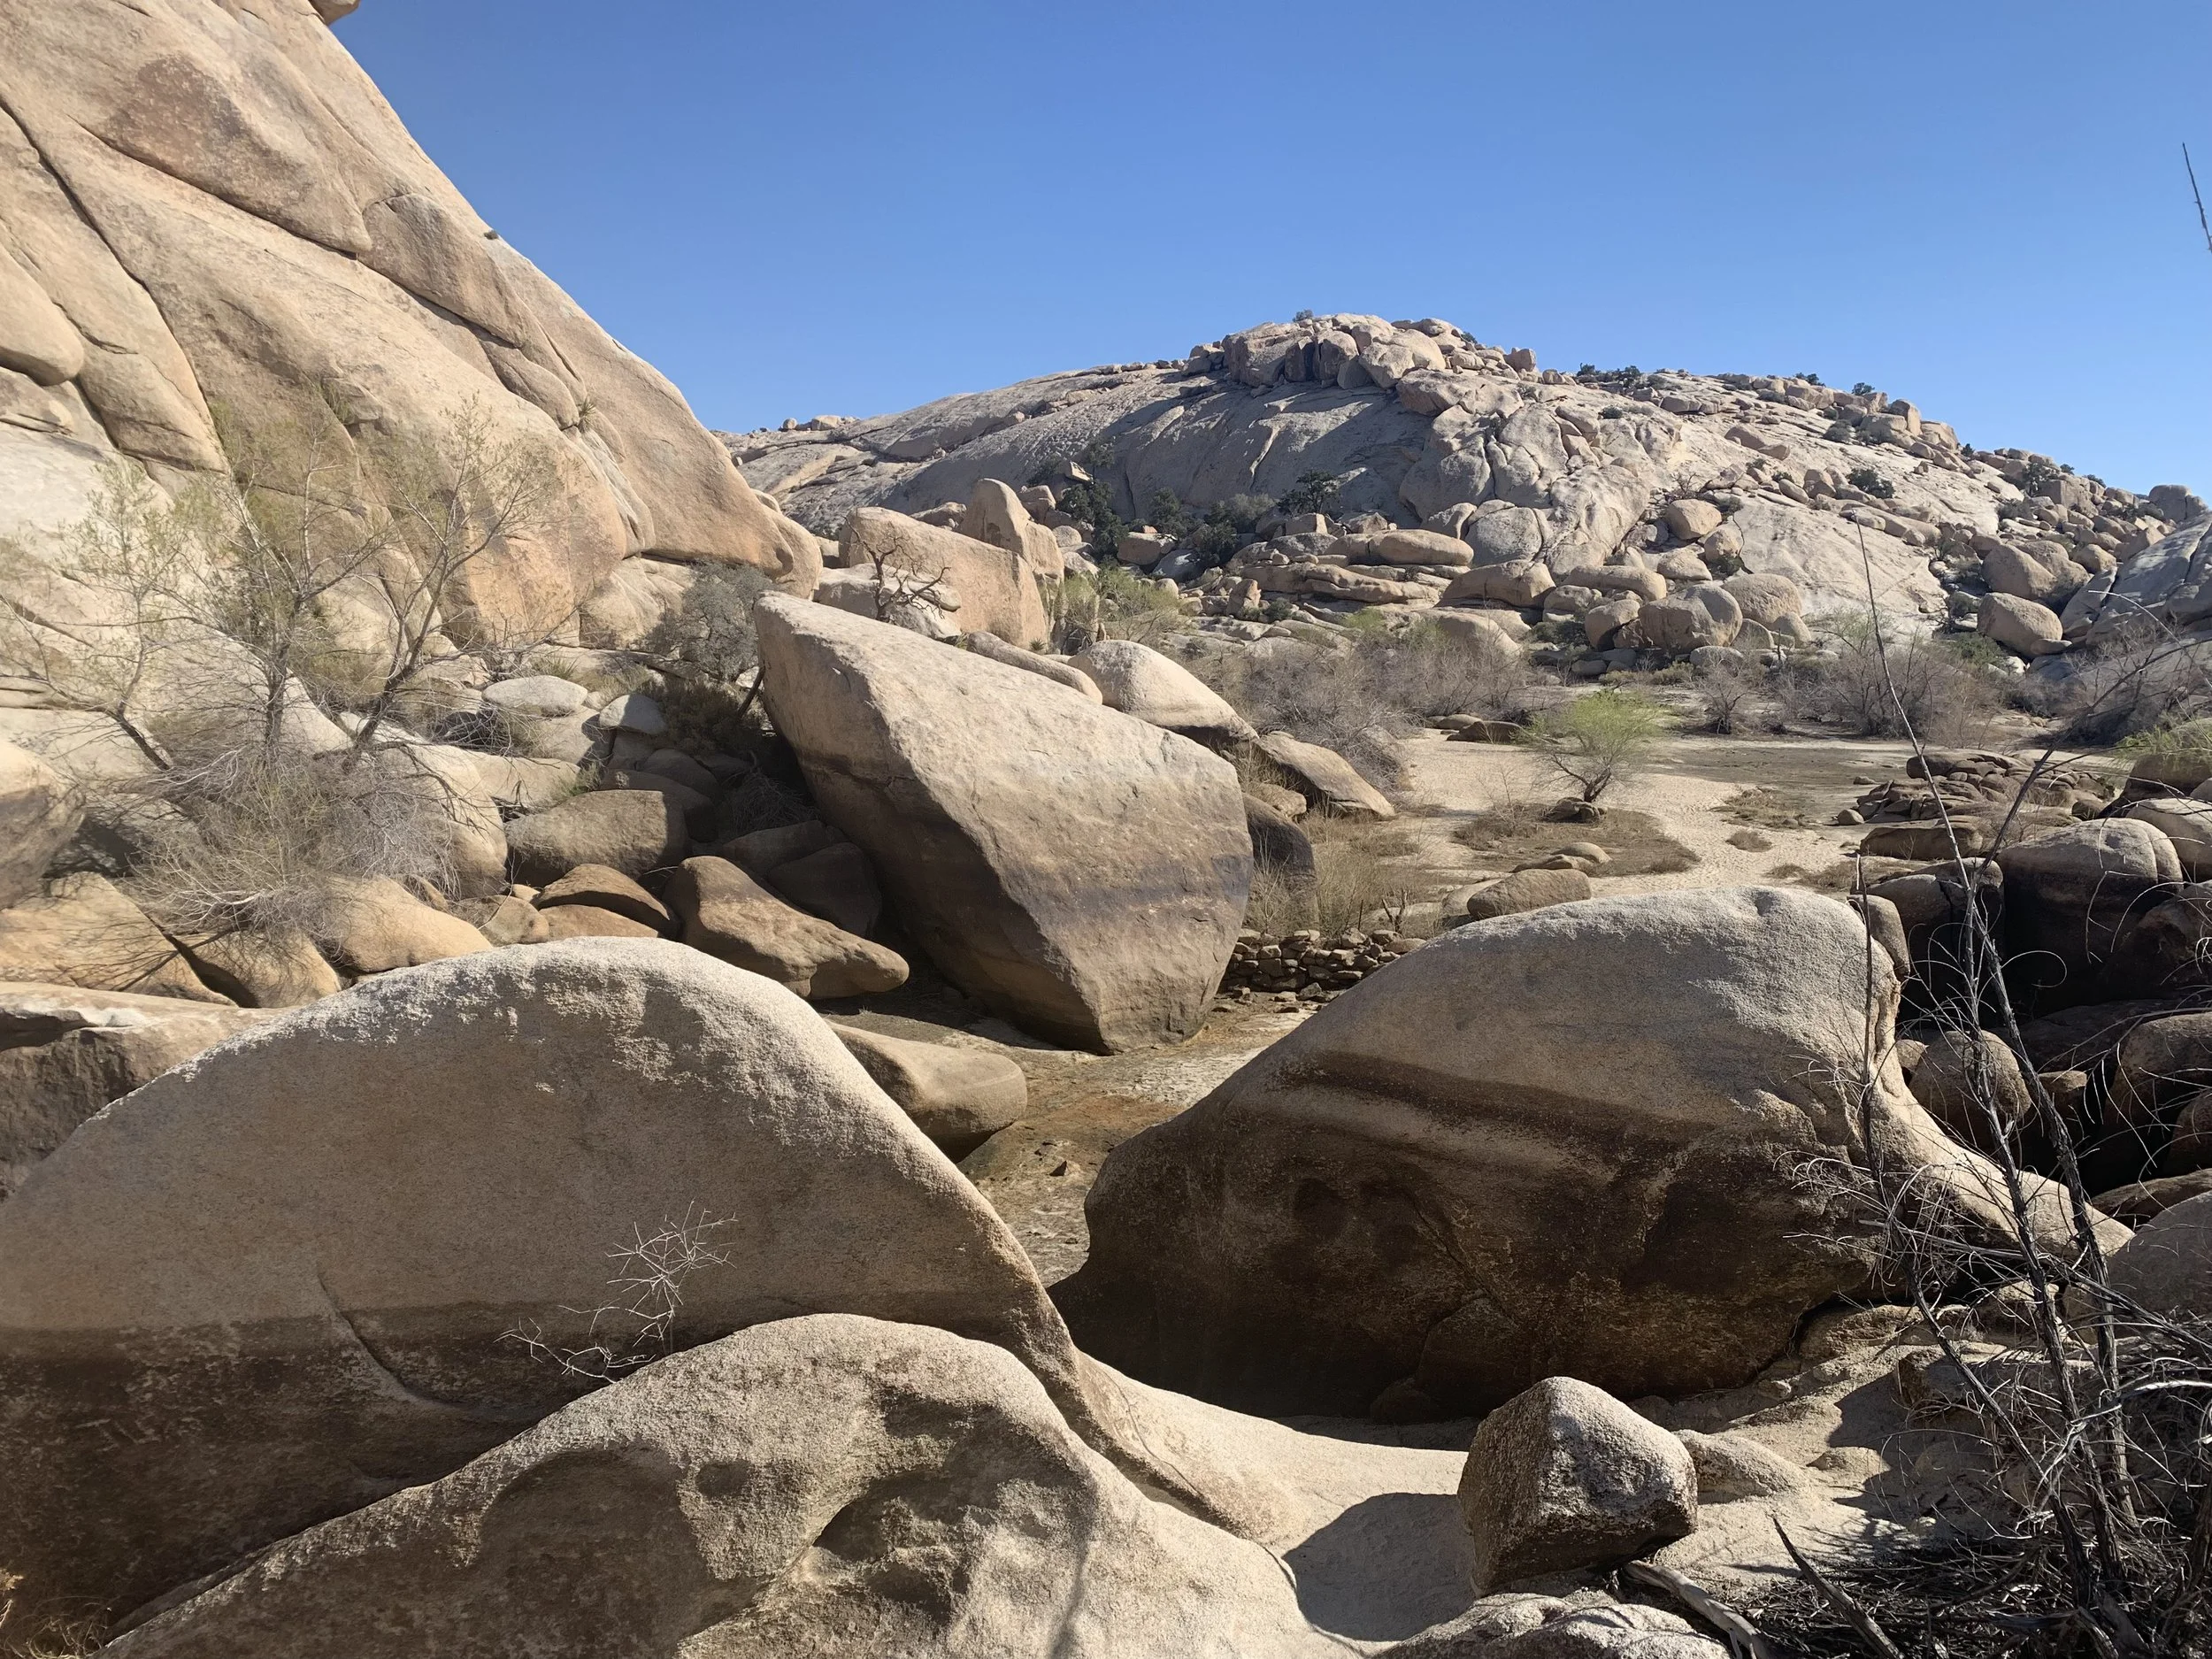
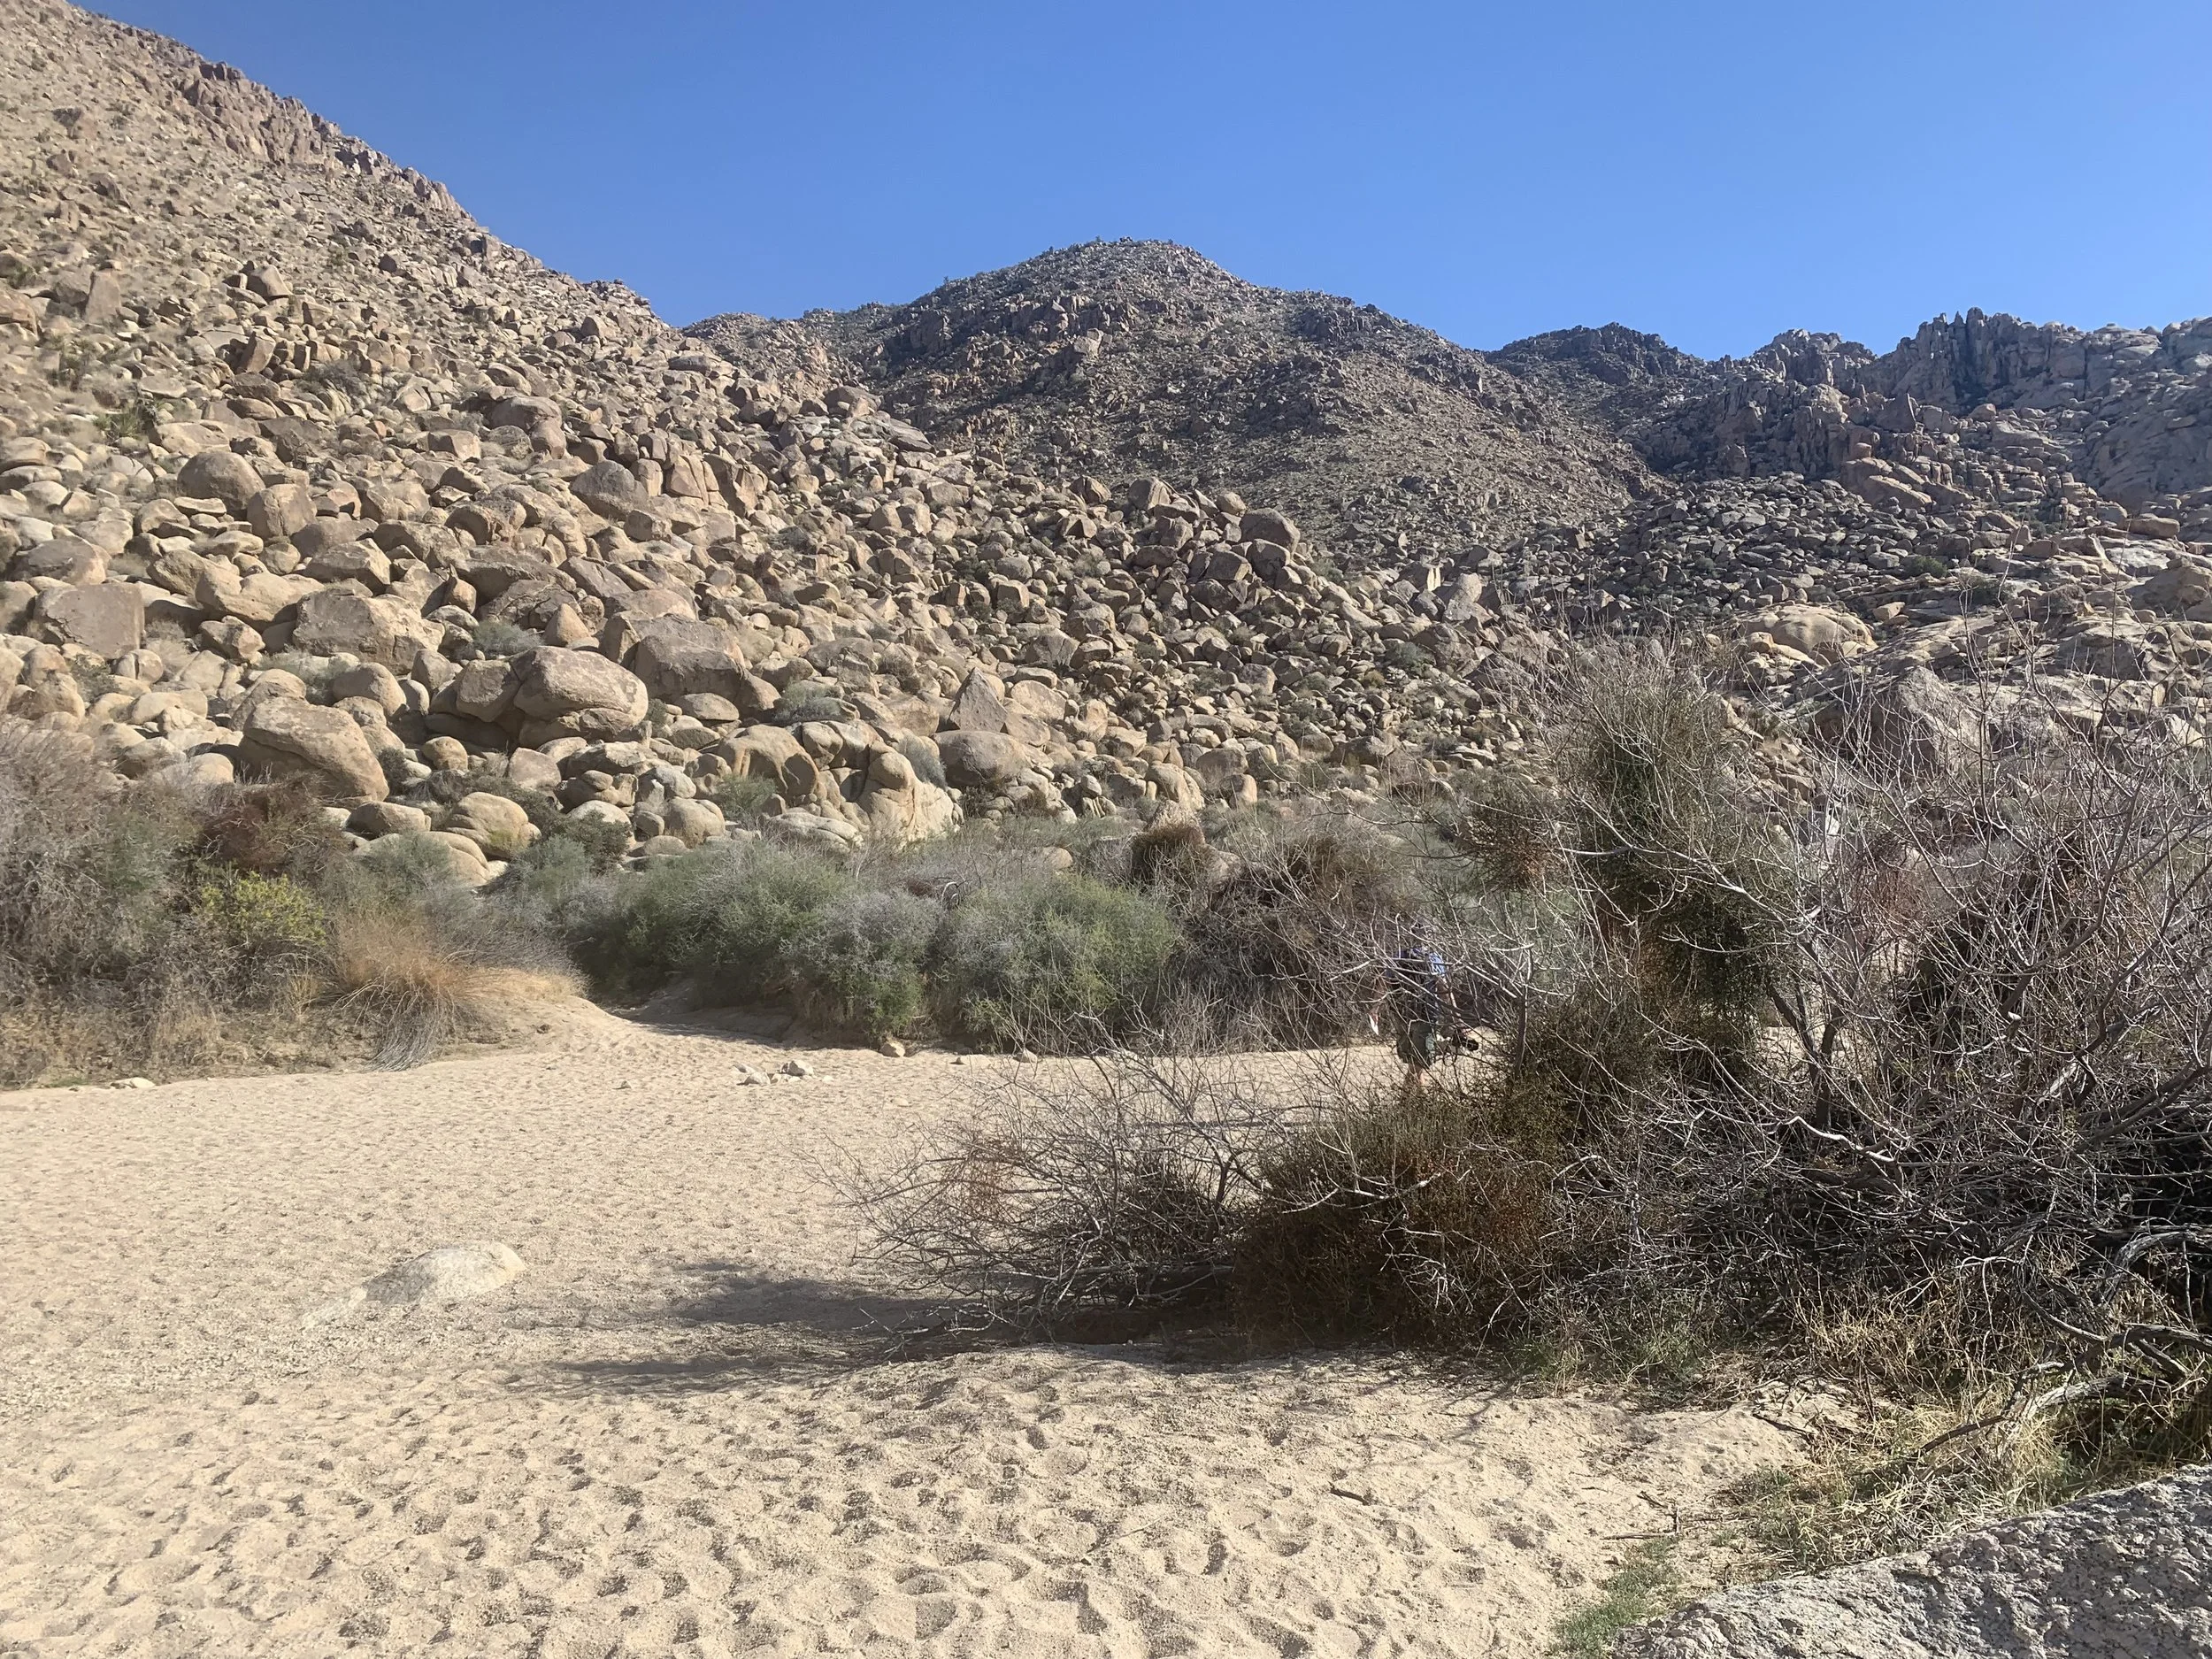
Follow the wash around the bend and head up the boulders. There are footsteps to follow, but in general just head upwards however you feel most comfortable to do so. And turn around when you feel like you are ready to be done. There isn’t any one particular thing that you are hiking towards in Rattlesnake Canyon. This is simply just a really fun place to explore. And in a very busy park, you just might luck out and have the entire canyon to yourself as we did.
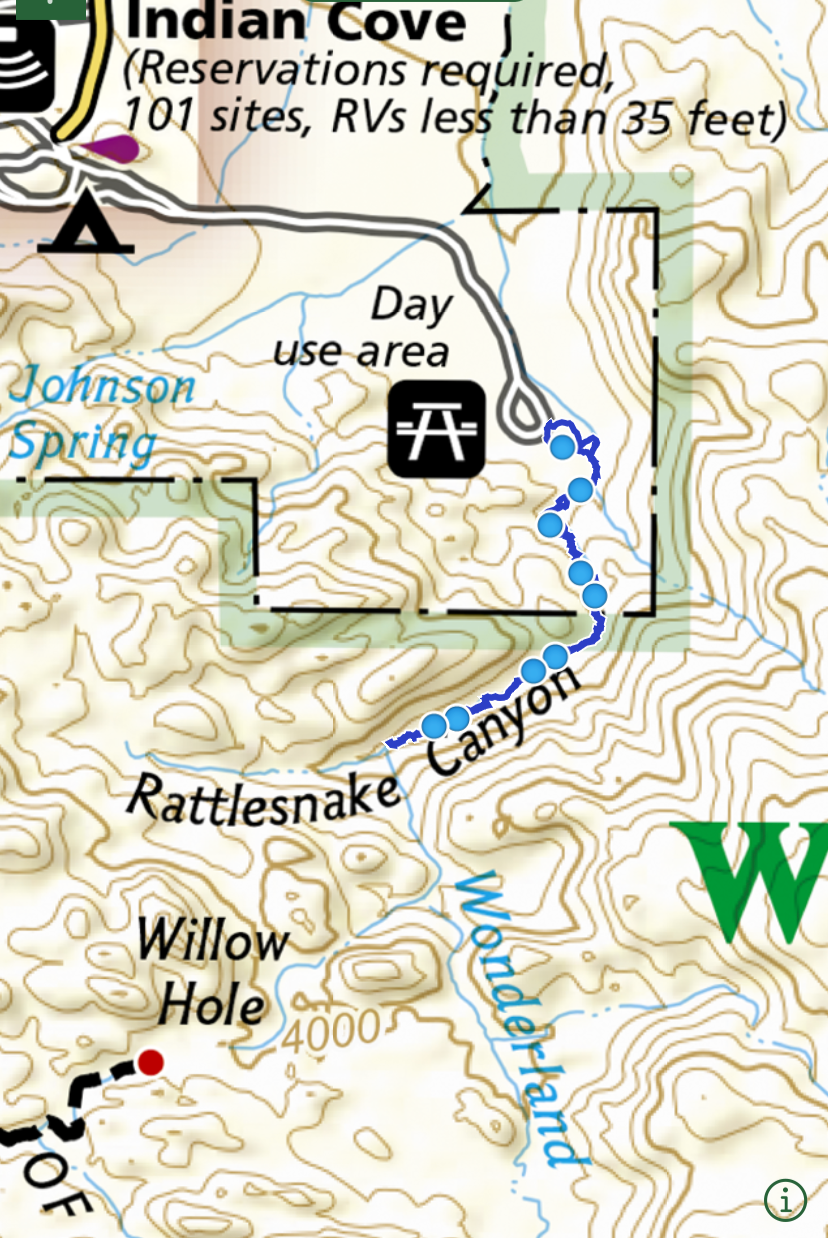
This is another map of our steps that we made using the GAIA app. We followed the wash up to where it joined a second wash thinking there might be a waterfall based on other people’s blogs that I had read prior to our trip. We did not find a waterfall, though it might simply be that it had been a while since it had rained.
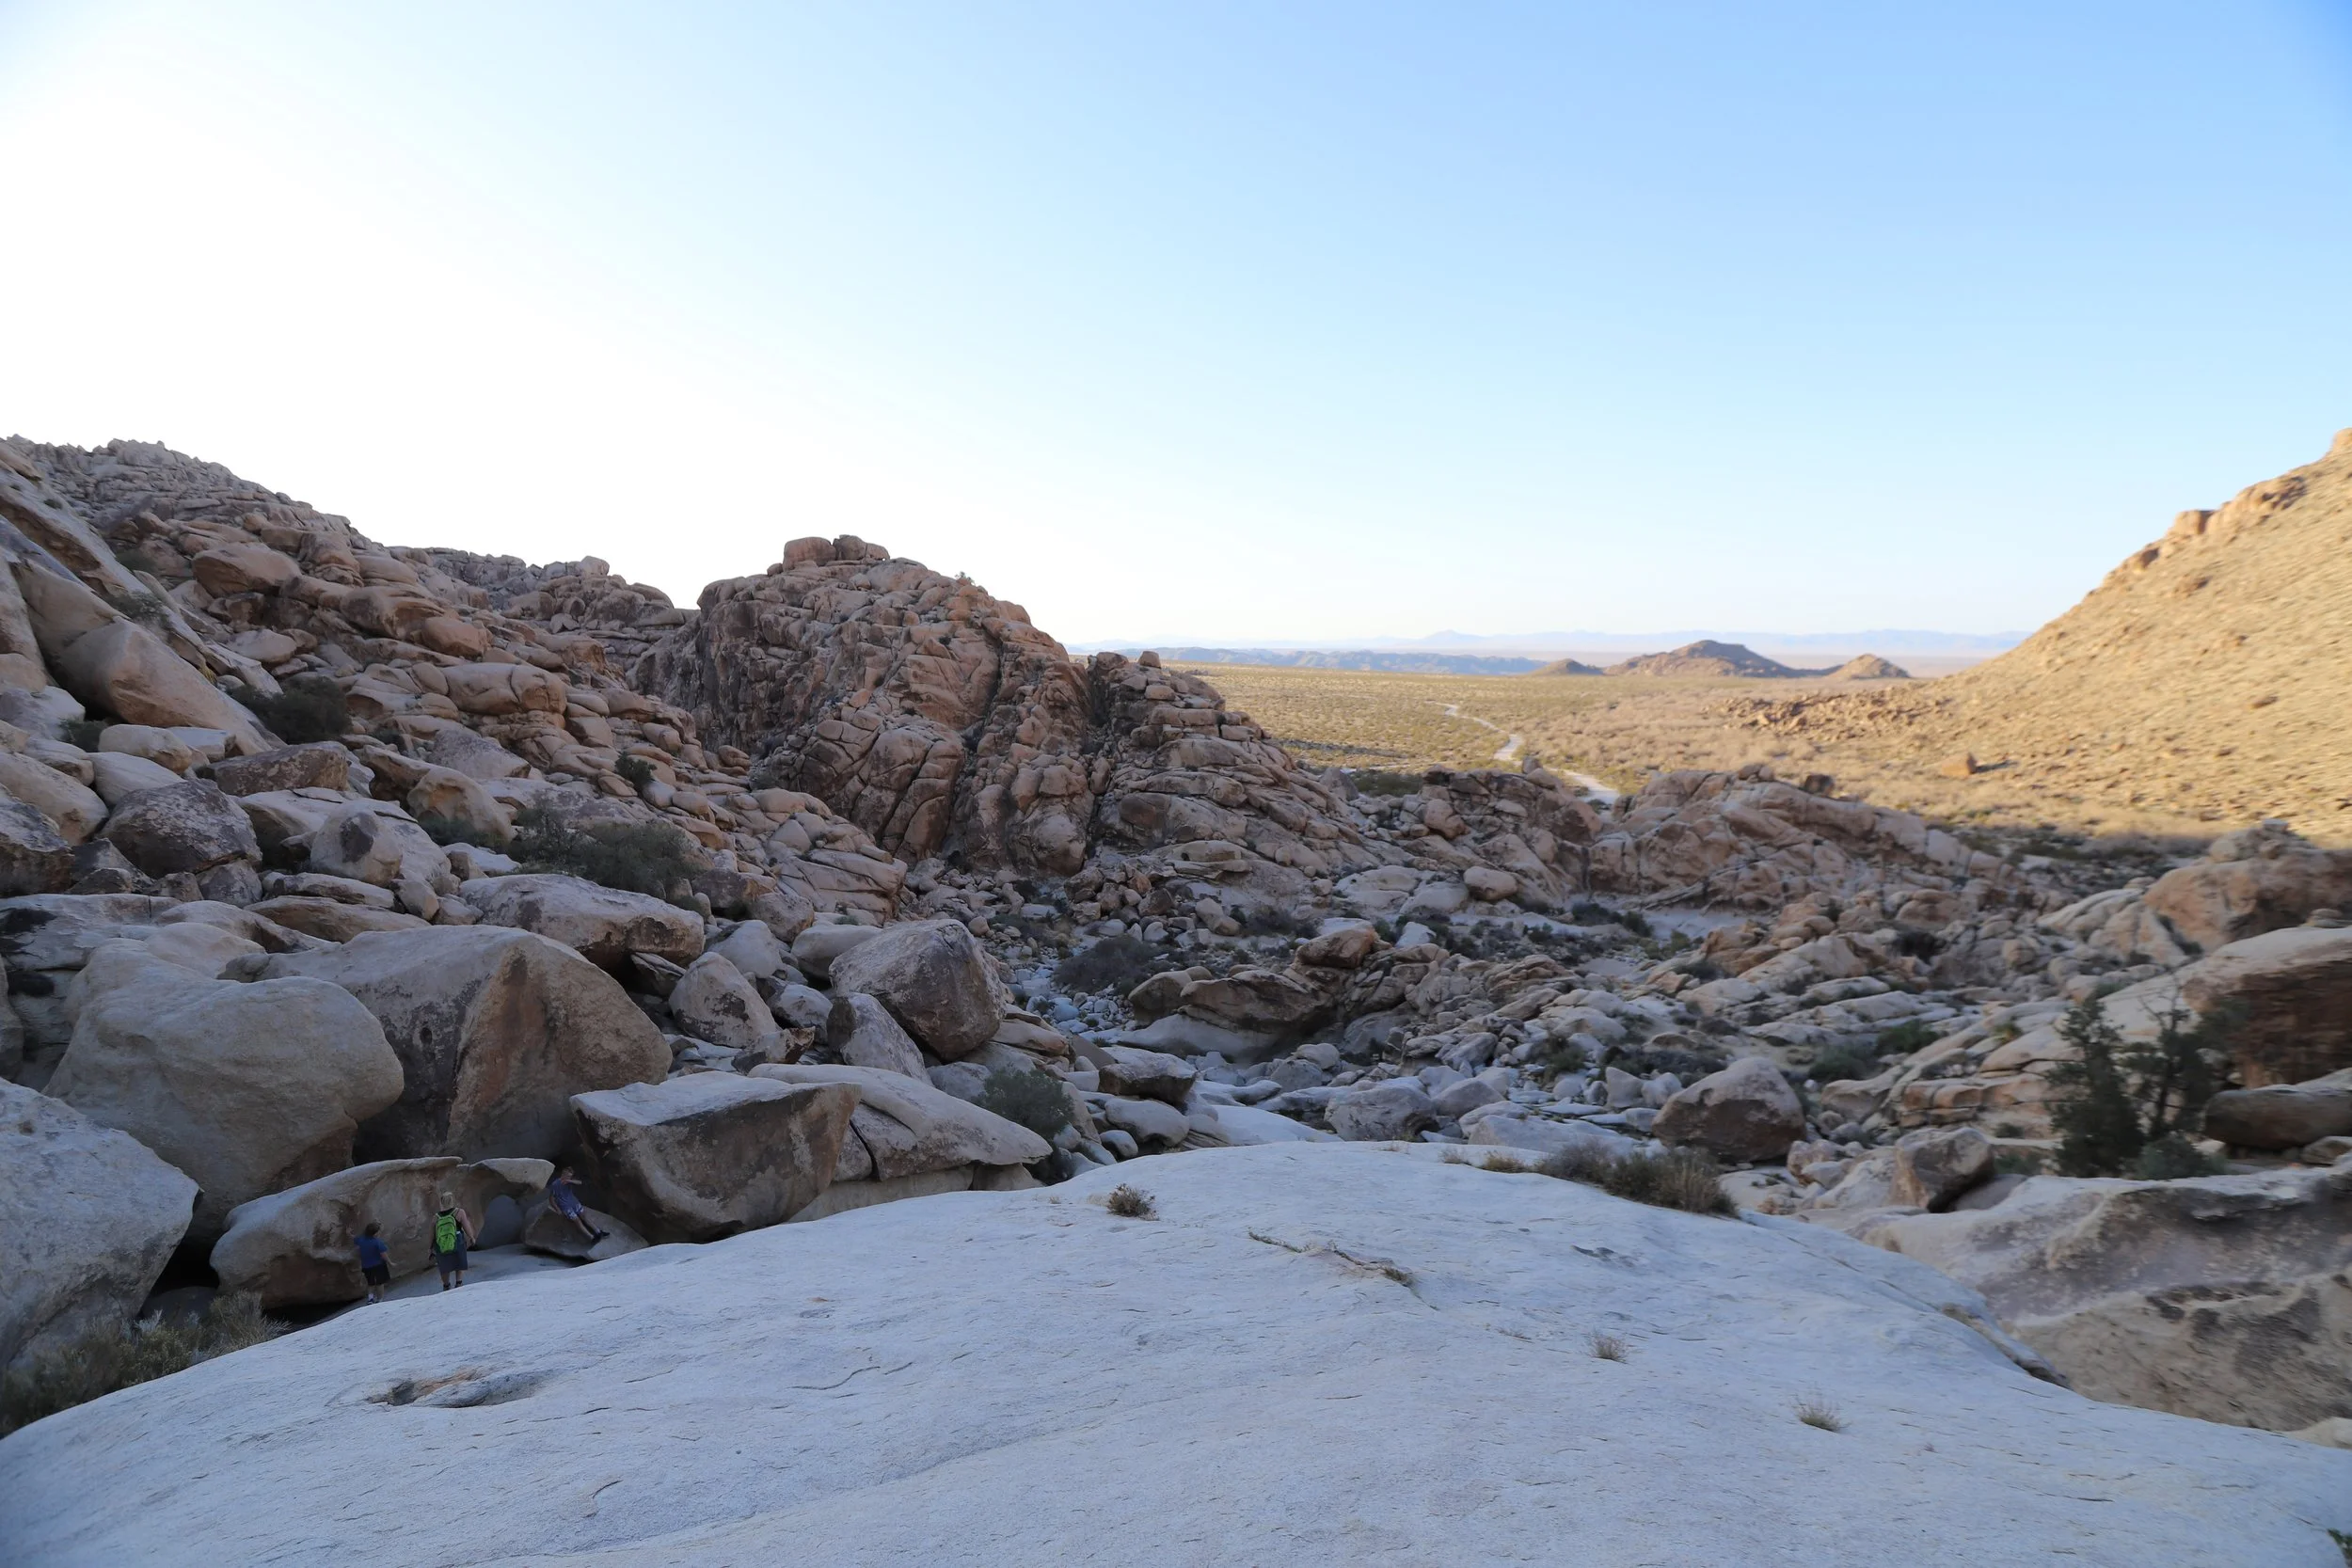
You’ll start in this sandy wash and eventually this curves towards that boulder field. We chose to stay as close to the wash as we could on the way both up and down. Often it was marked with wetter sand. You’ll see in our pictures that we did find a bit of free standing water along the way.

This is a view of the boulder field. We stayed in the valley between the peaks.
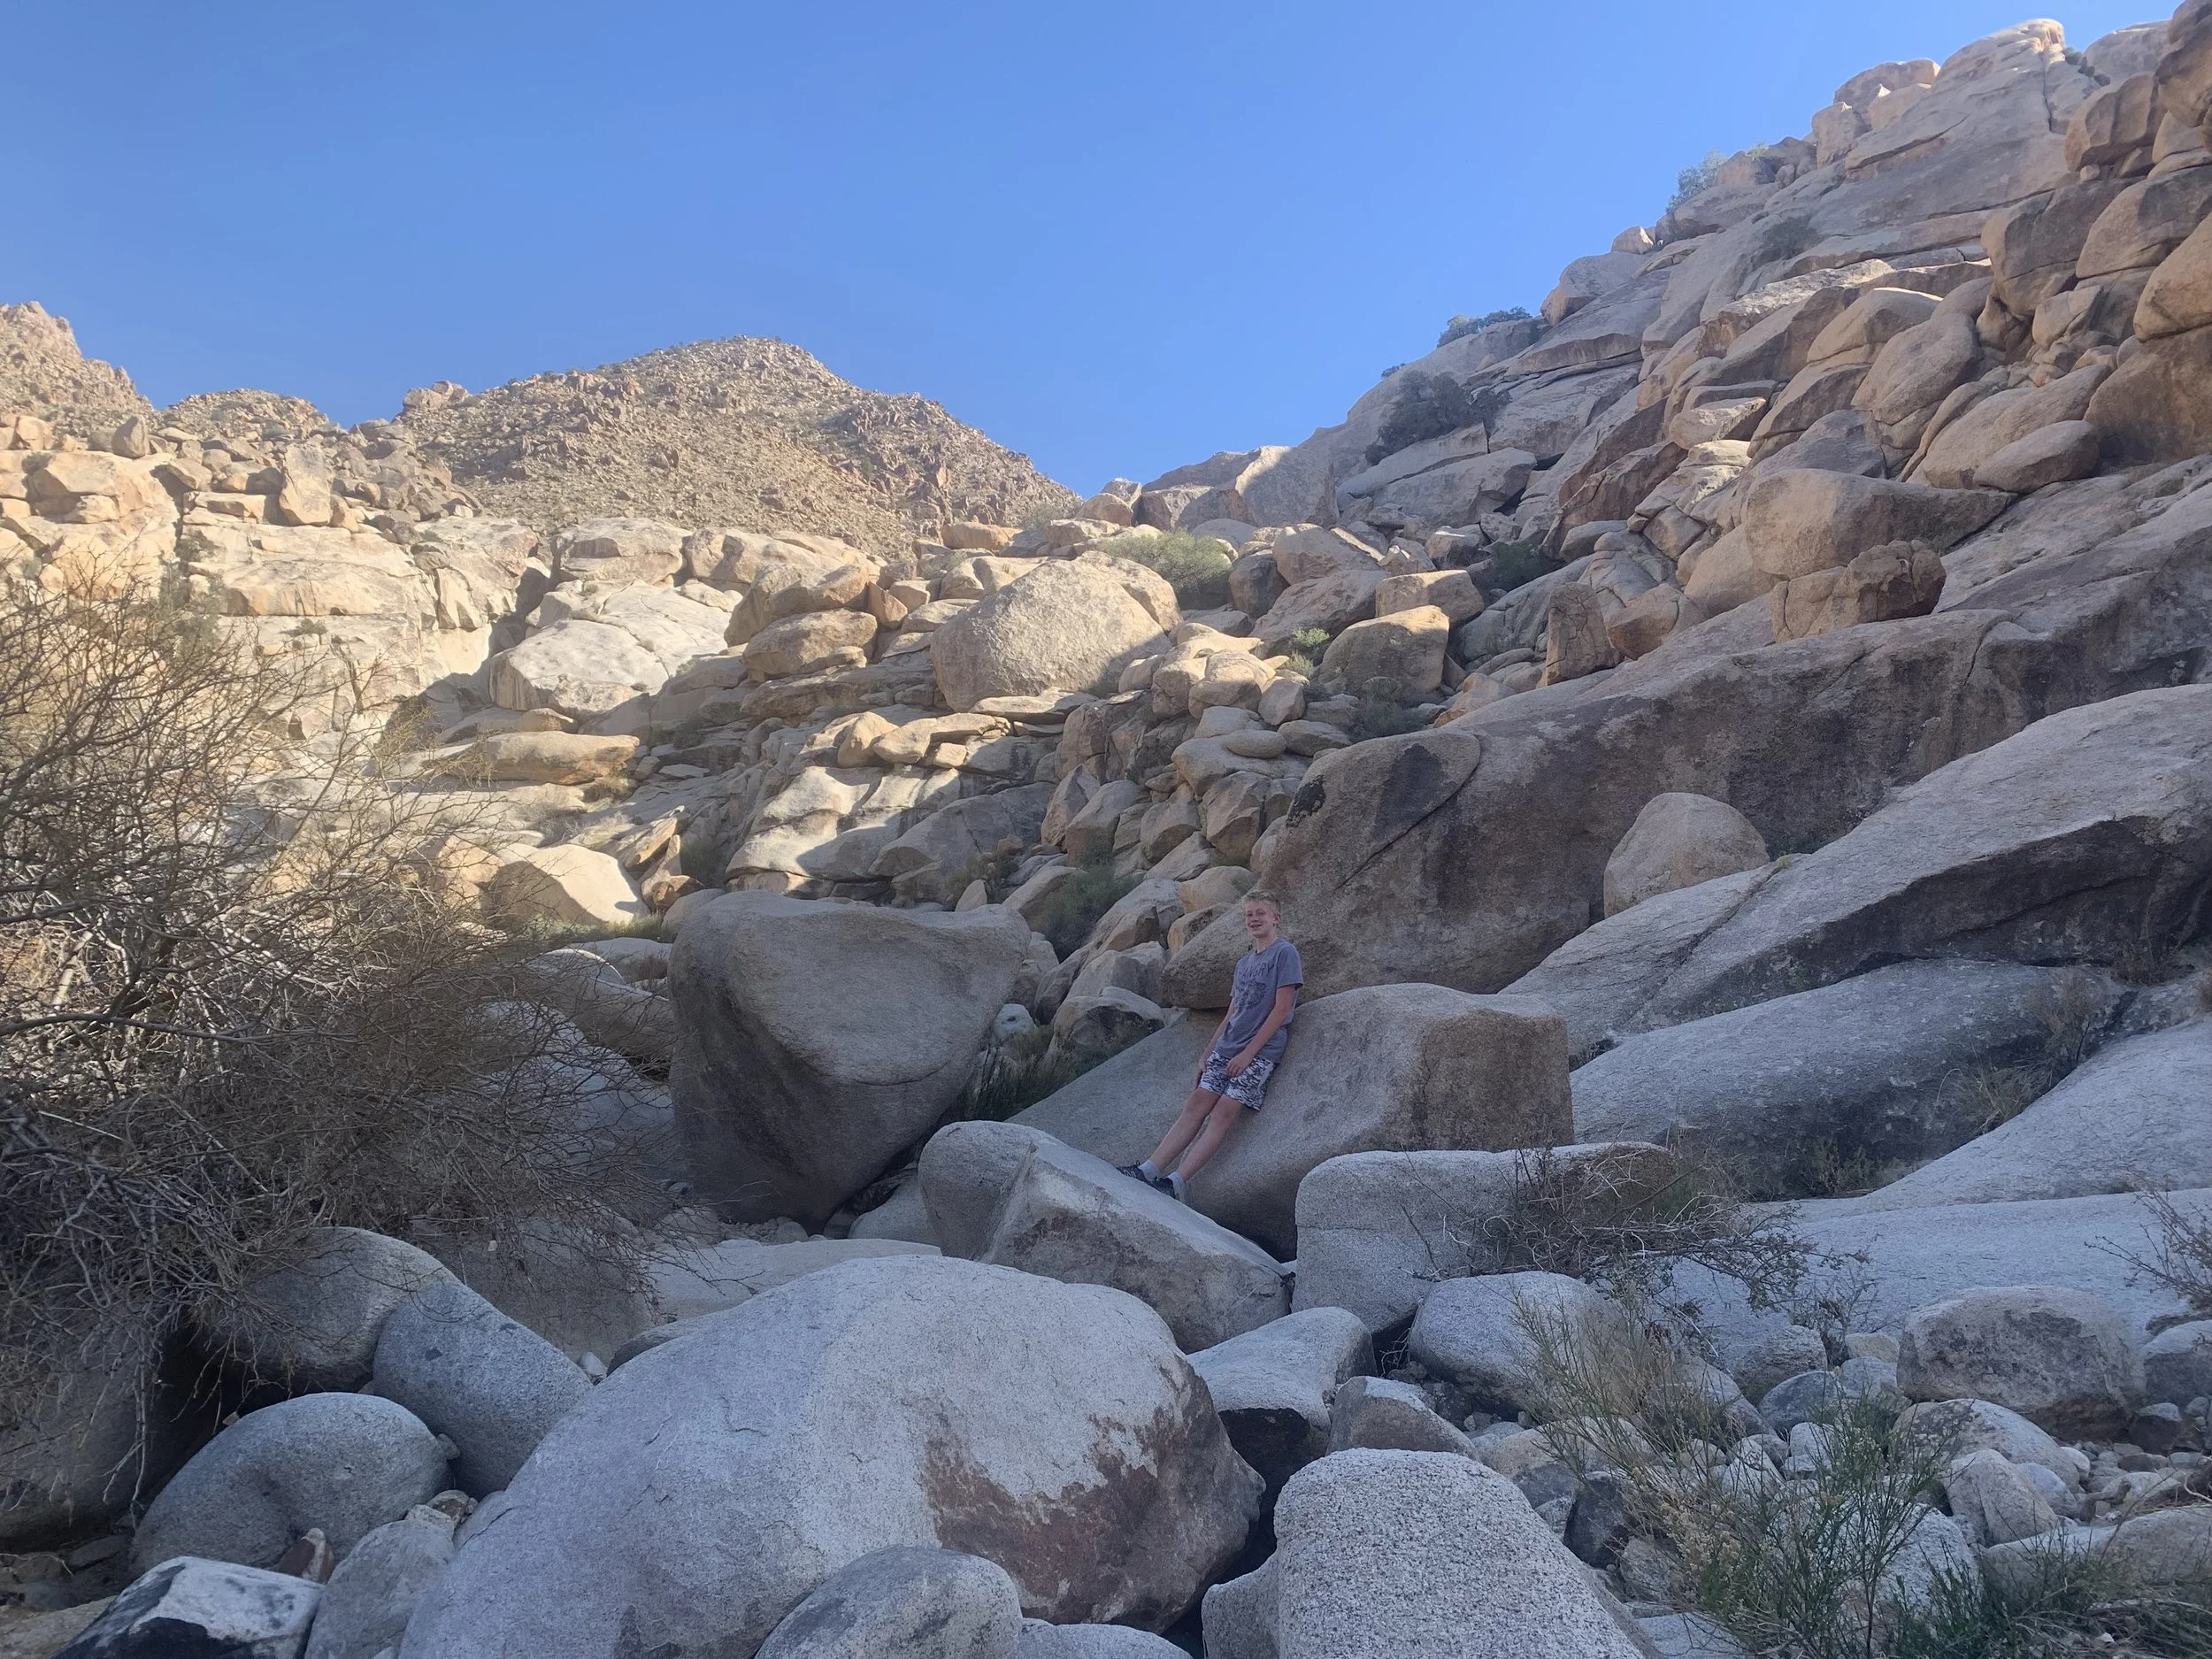
Some perspective on how big the rocks are.
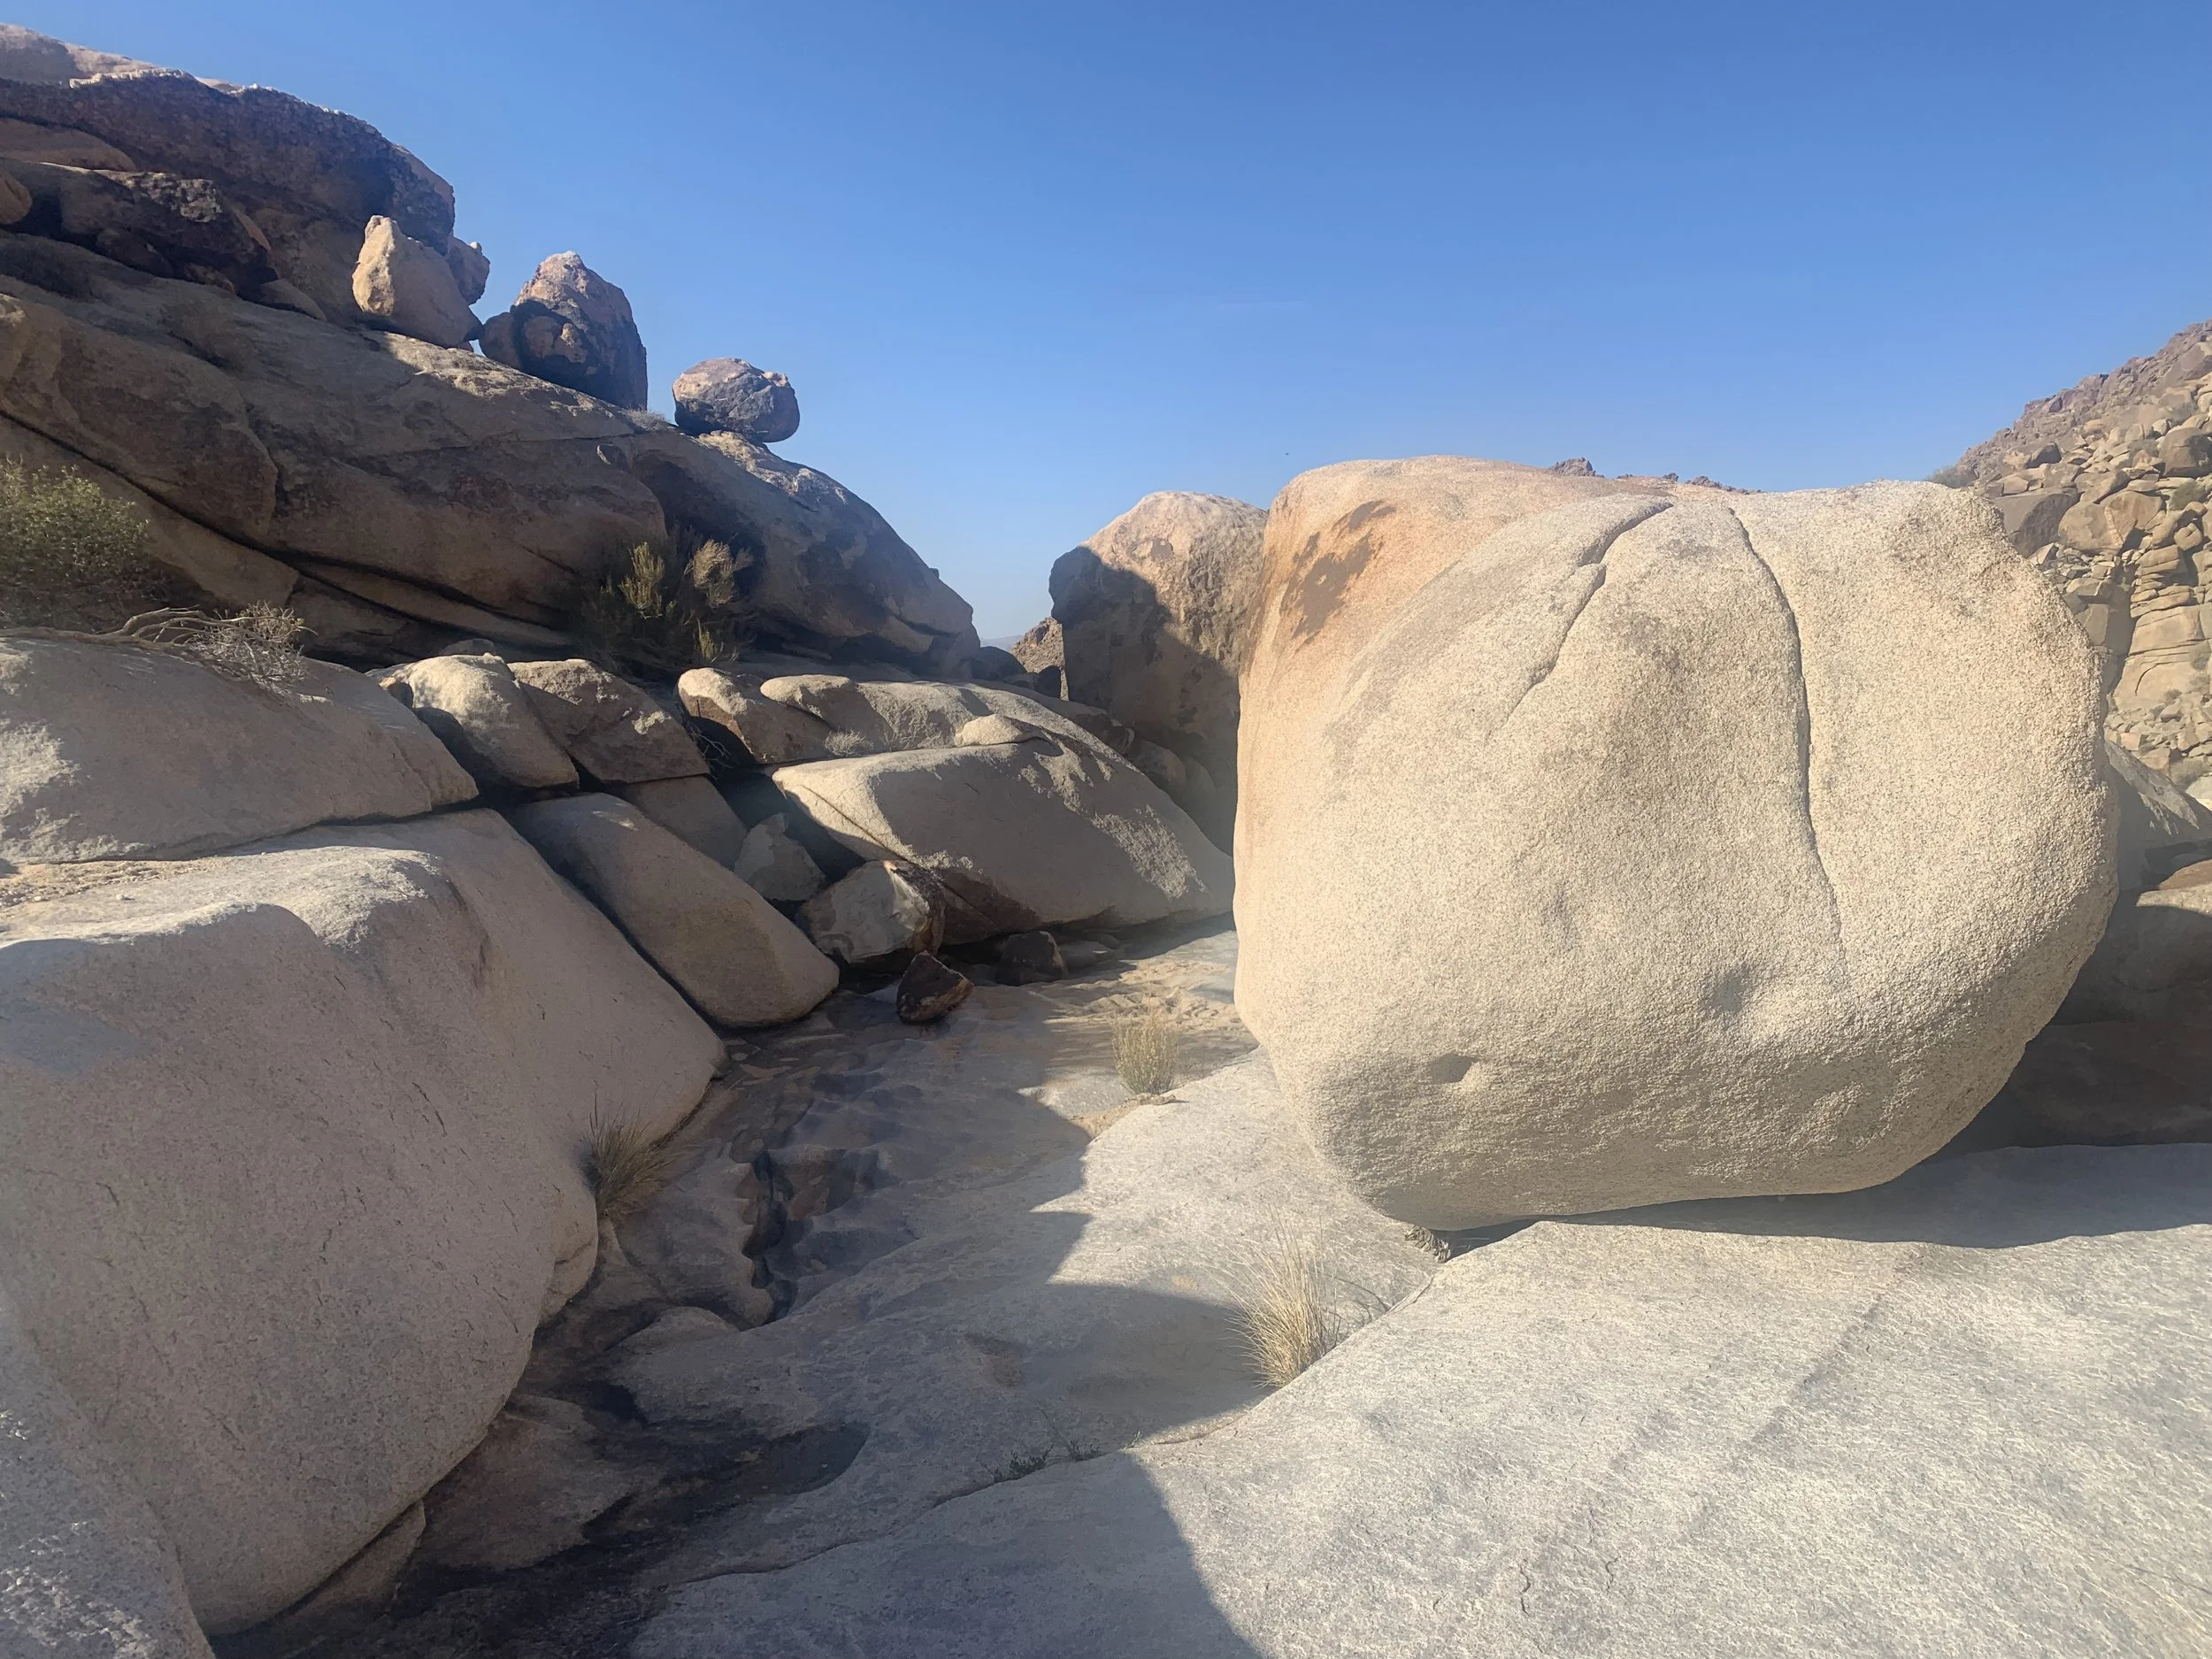
Rattlesnake Canyon
This was another hike where sometimes we chose over the rocks, and other times it seemed easier to crawl under or squeeze between the rocks.

Rattlesnake Canyon

Seems funny with how tight of a squeeze this was between boulders, but there was a small drop-off on the other side, so this was the route we picked.
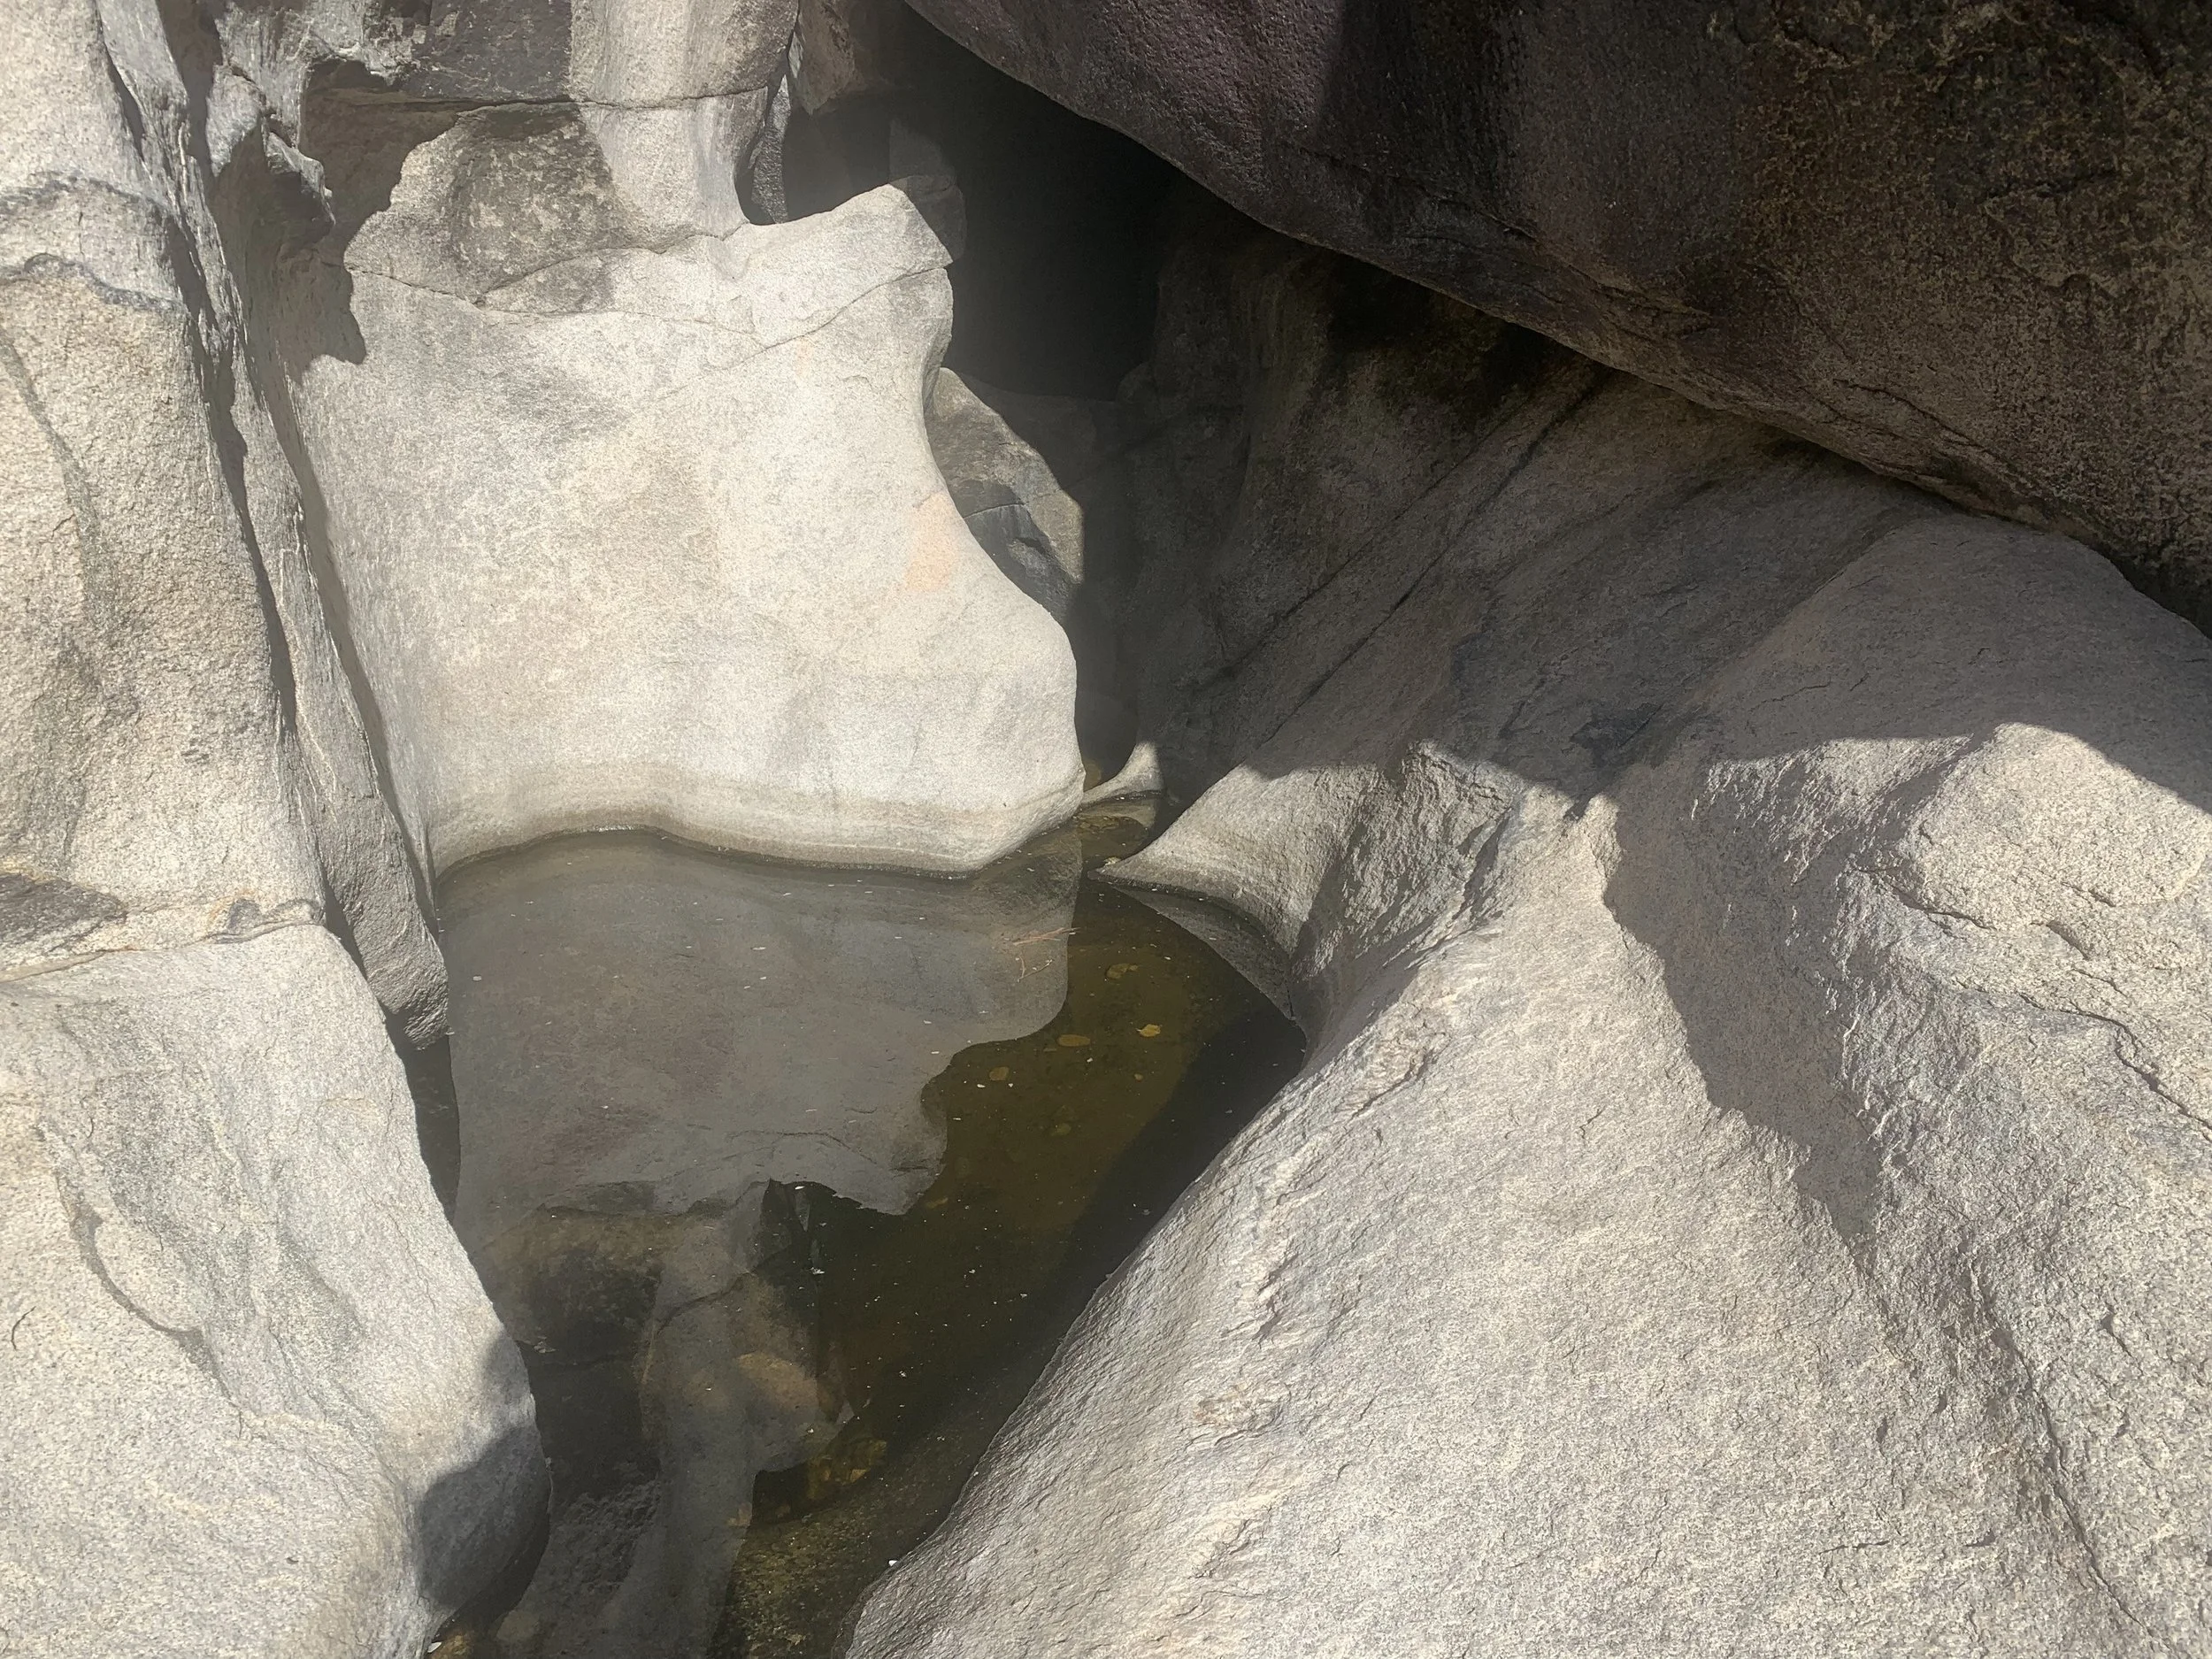
We did find a bunch of pooled water along the route we picked. Our favorite part was the unexpected beautiful songs of frogs - in Joshua Tree!
The most surprising thing we found in Joshua Tree Park was this California Tree Frog.

California Tree Frog
There was a small section of the hike that held several pools of water. As we continued upward, even though we stayed in the wash, we did not find any more free standing water.
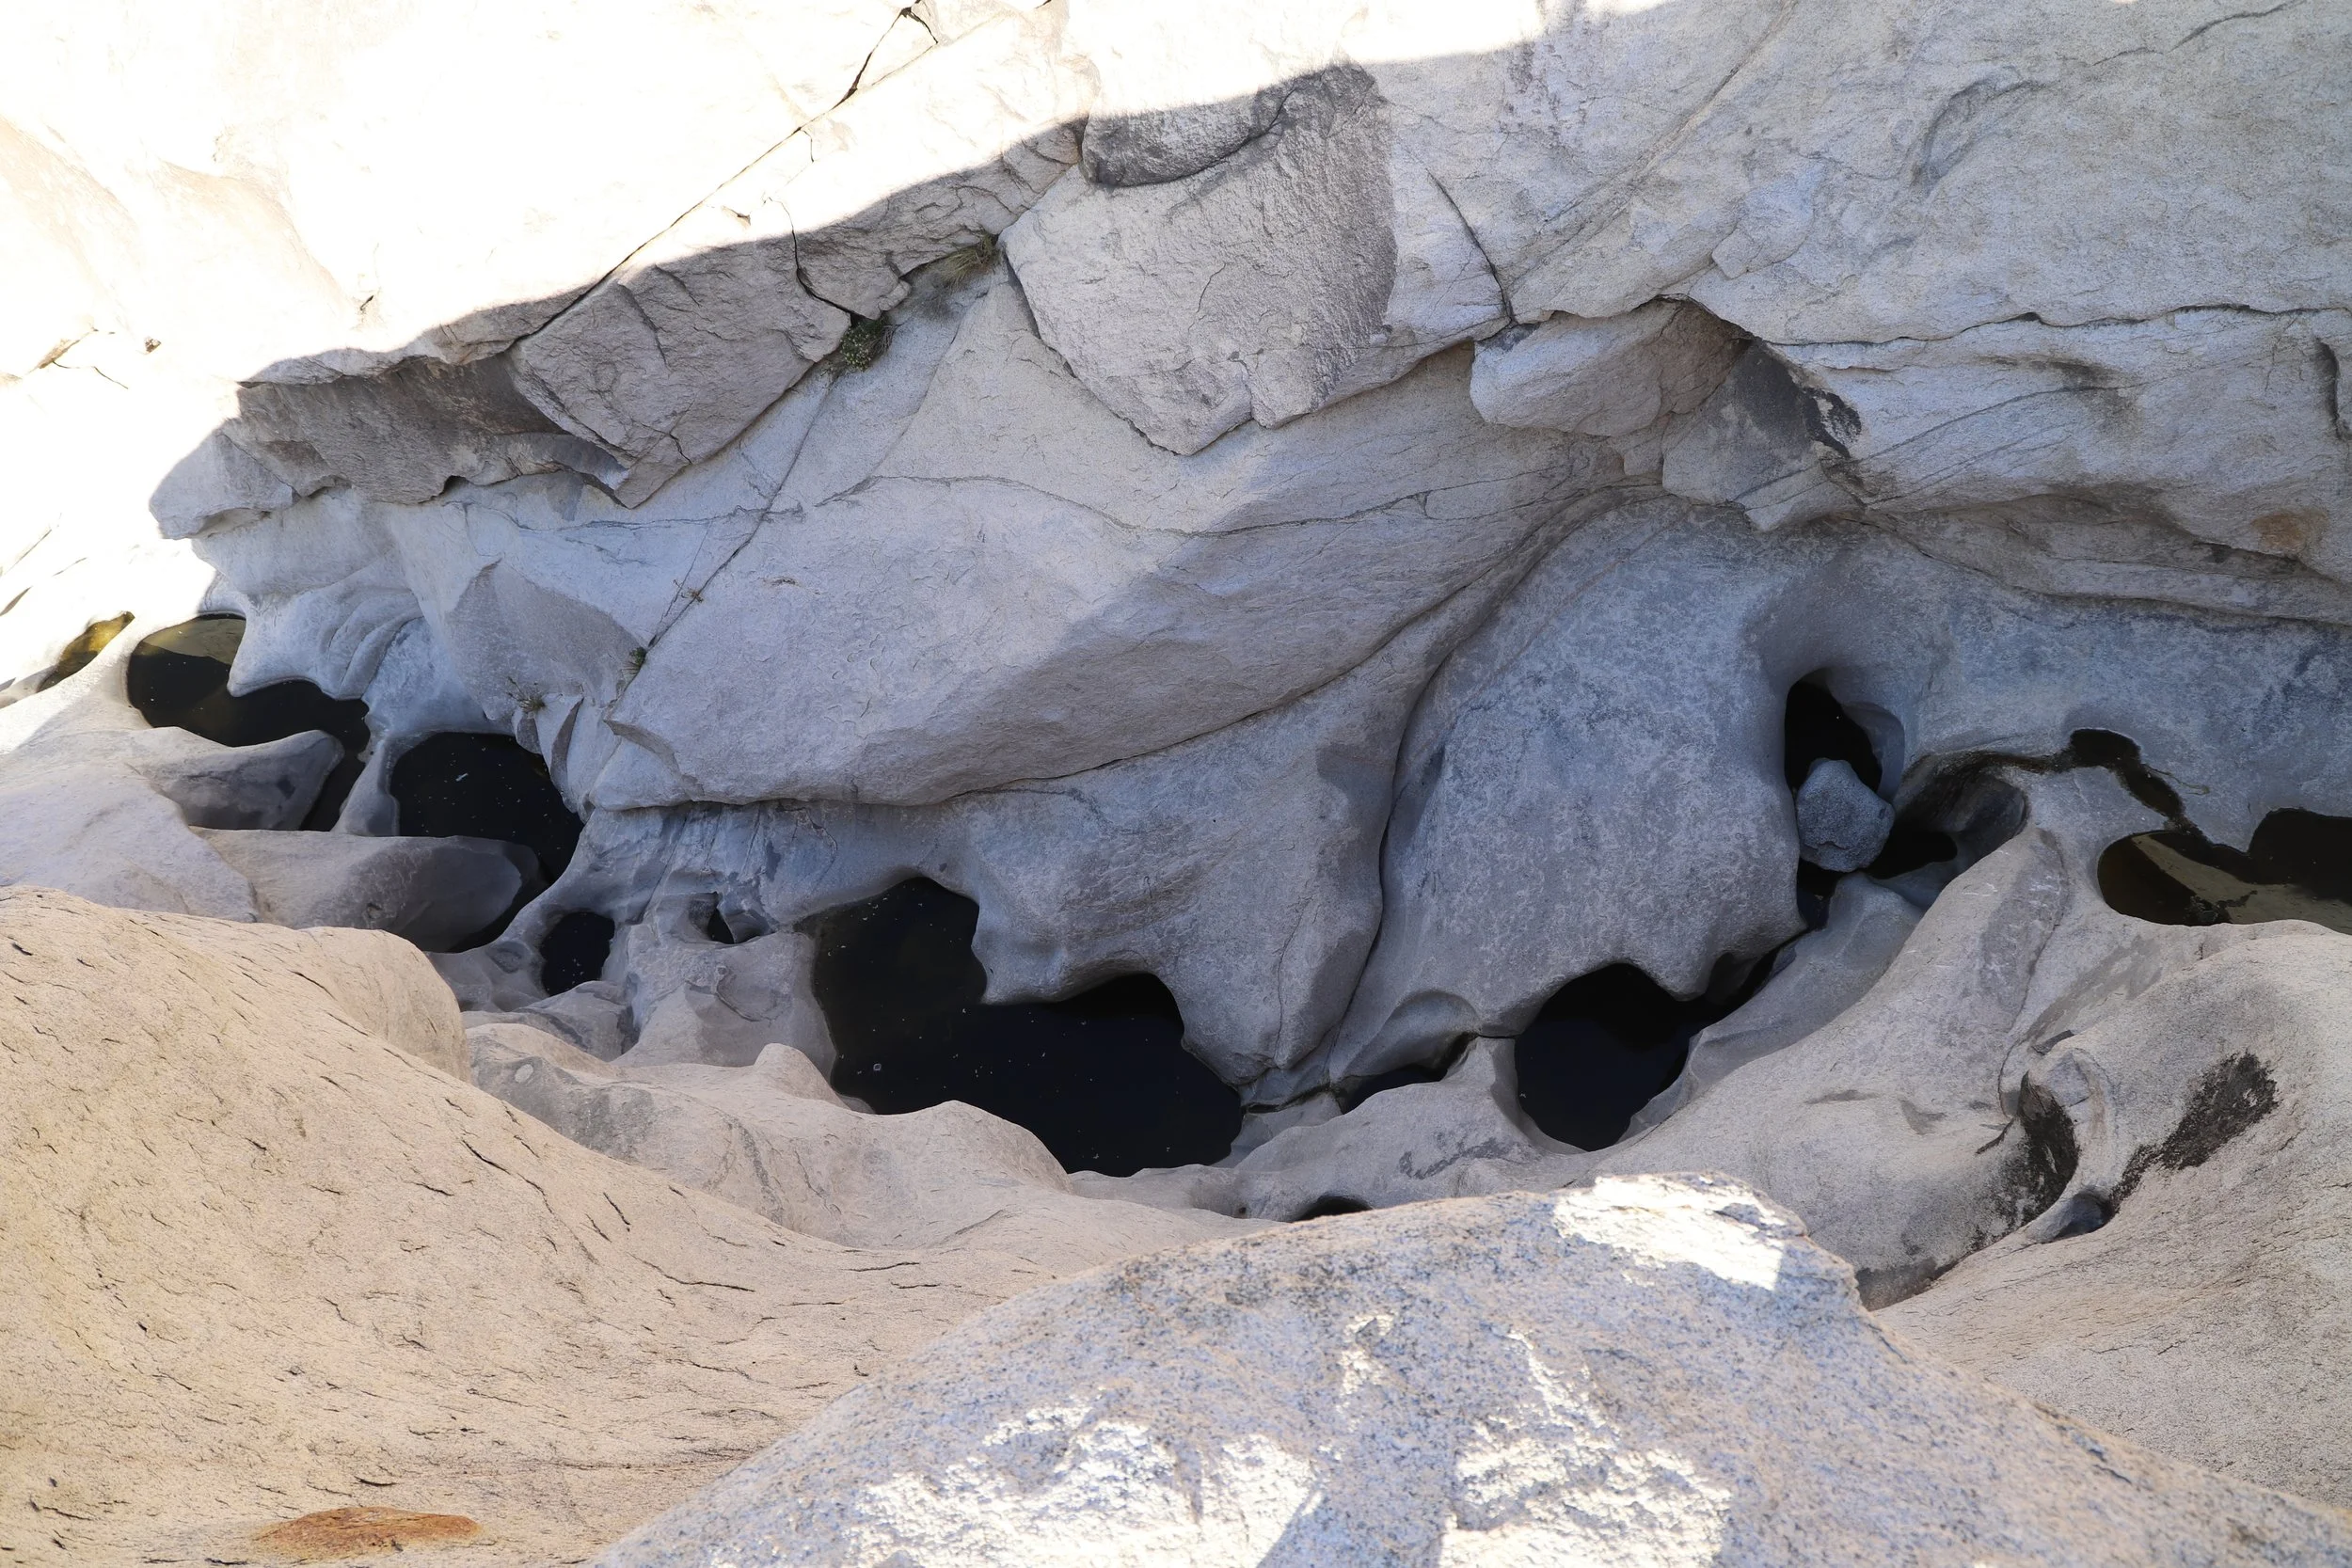
Water pools along Rattlesnake Canyon
The sun was heading down, so we also had to turn around and head back down to the car before dark.
View of Indian Cove Road from Rattlesnake Canyon
More From www.NatureImpactsUs.com
There are posts linked to each pin below.